

|
|
XT8 Update |

|

|
(#1)
|
|
RC-Monster Aluminum
Offline
Posts: 957
Join Date: Sep 2006
|
XT8 Update -
04.14.2008, 02:19 PM
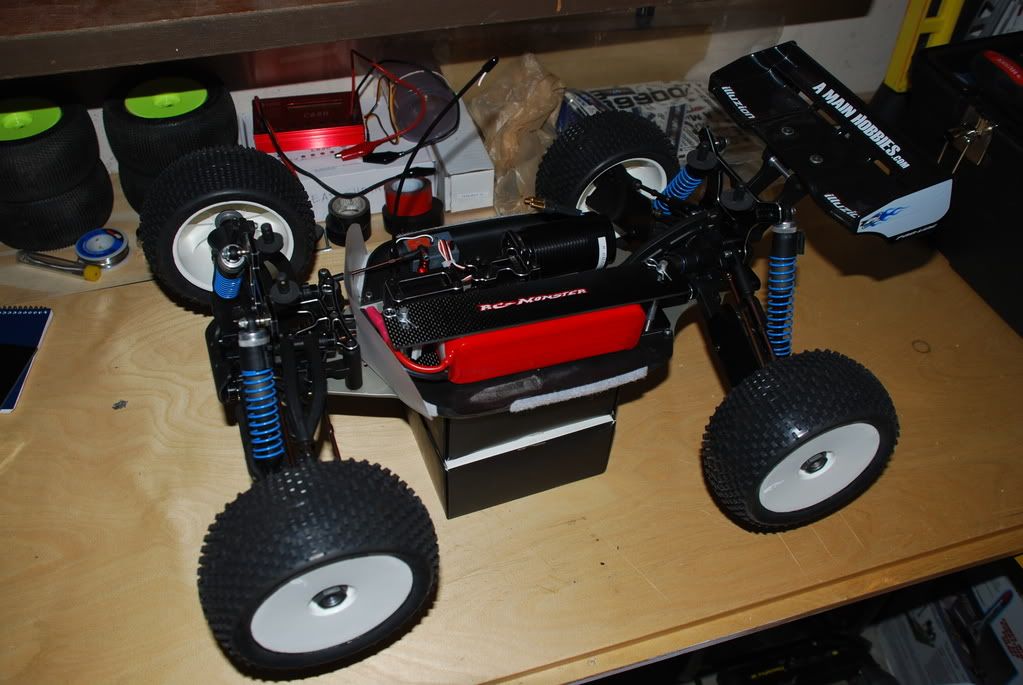
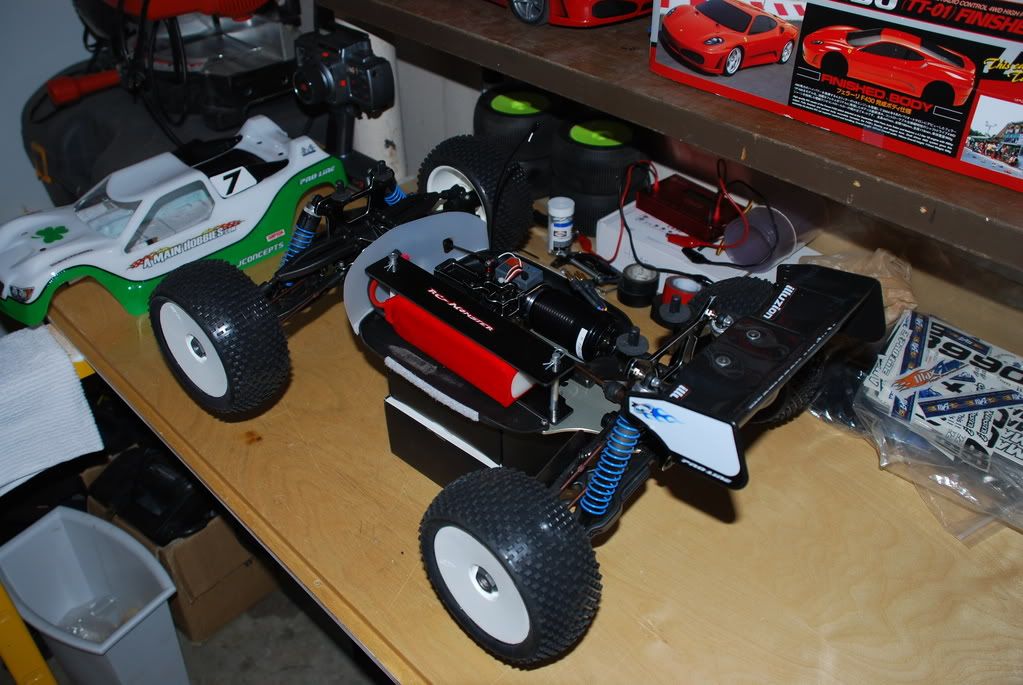
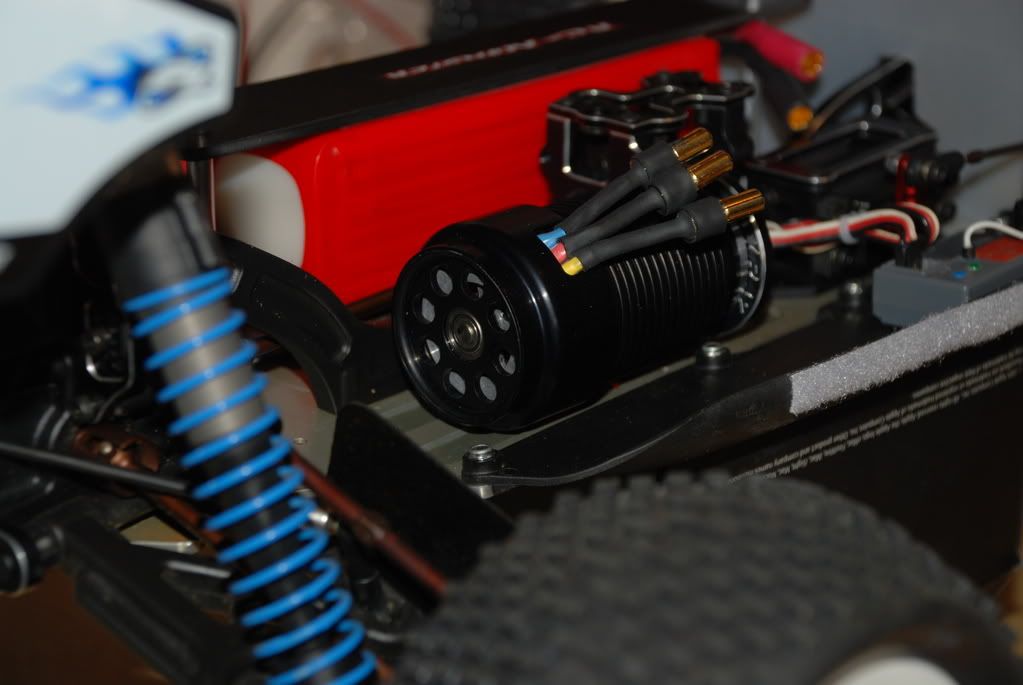
Ok, so I've been slowly working on my XT8 conversion and thought I would post some of the latest pics. Now that I've got my battery "tray" installed I'm just waiting for the Monster Max esc and I'm done. Check out the pics and let me know what you guys think!
|
|
|

|
|
|
|
|
(#2)
|
|
Old Skool
Offline
Posts: 7,494
Join Date: Feb 2007
Location: Devon, England
|
04.14.2008, 03:20 PM
The word 'tidy' comes to mind. Great job dude.
|
|
|
|
|
|
|
|
(#3)
|
|
That's All Folks!
Offline
Posts: 2,359
Join Date: Dec 2006
Location: in a VAN down by the RIVER
|
04.14.2008, 03:30 PM
Looks good, gotta love the X-rays.
Couple q's: Is that deflector in front of everything something you came up with (I like it)? And, what keeps the lipo from sliding out the side of you batt holder? |
|
|
|
|
|
|
|
(#4)
|
|
Certified Spaceball
Offline
Posts: 675
Join Date: Jun 2007
Location: CA
|
04.14.2008, 03:35 PM
I definitely like it. I'd like to learn more about the dirt guard as well. Looks useful.
rcm xt8 rcm xb8 rcm crt.5 |
|
|
|
|
|
|
|
(#6)
|
|
RC-Monster Aluminum
Offline
Posts: 957
Join Date: Sep 2006
|
04.14.2008, 05:37 PM
Thanks for the kind words guys!
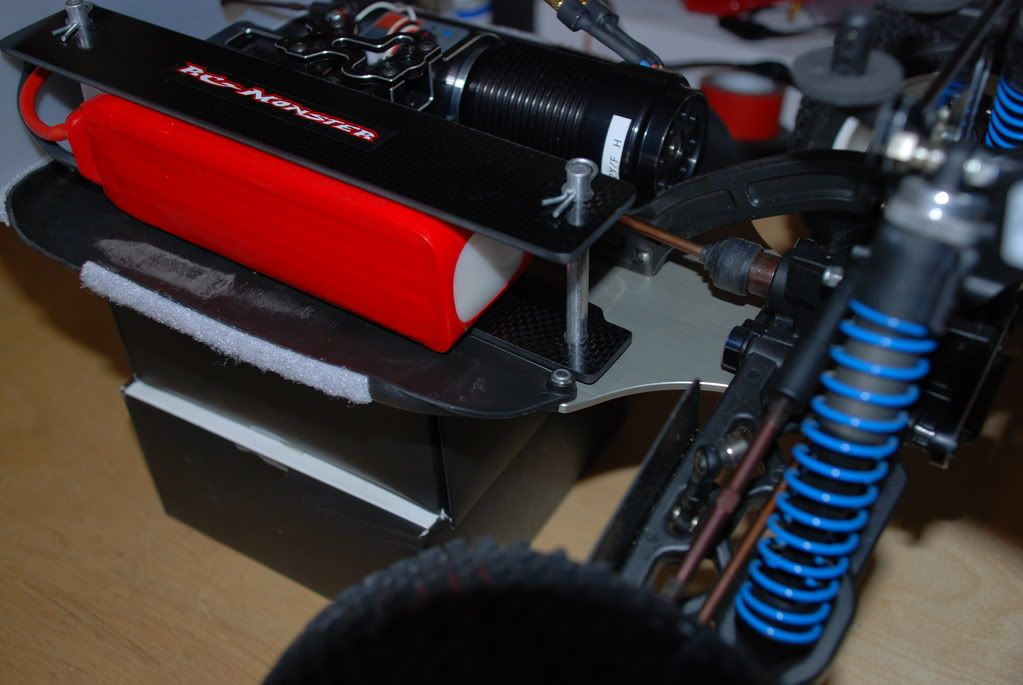
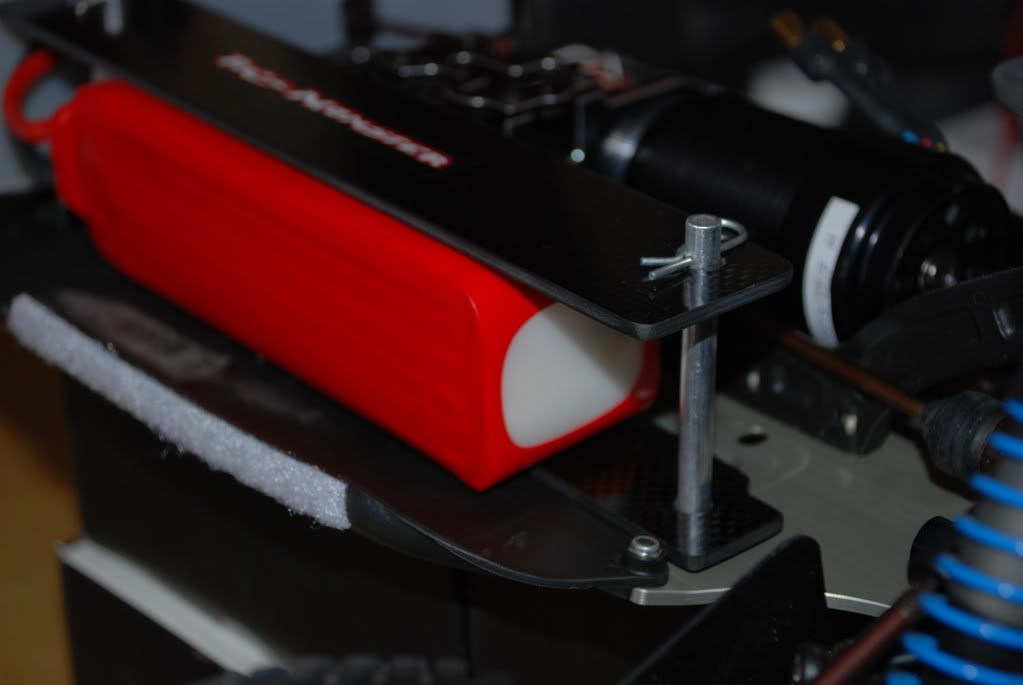
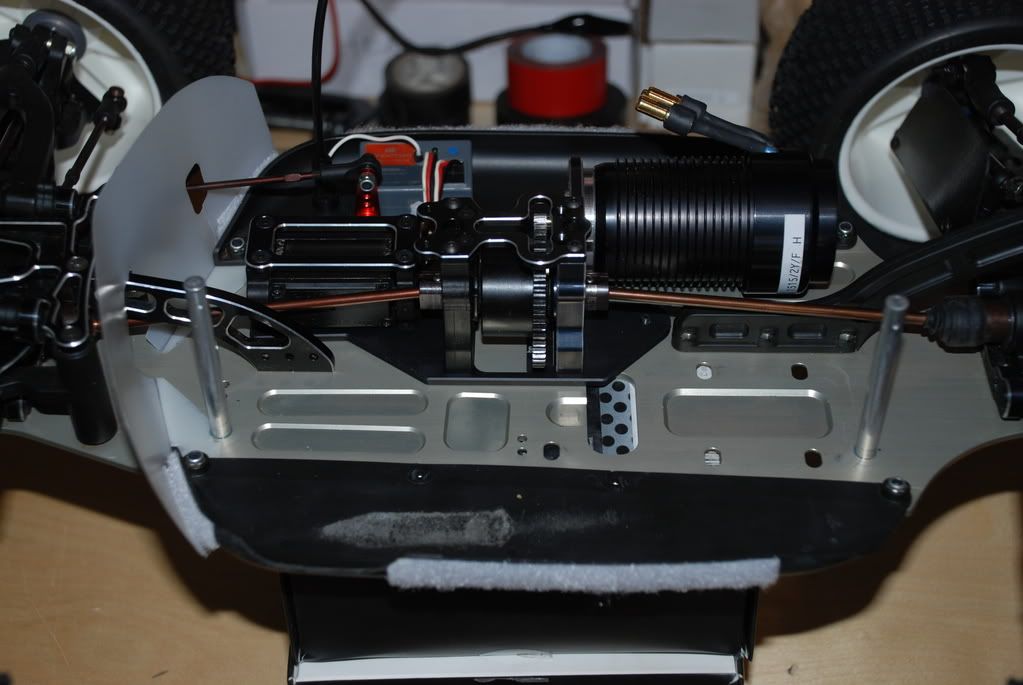
About the mud guard, yes it is something I came up with. Basically it's a solid piece of plastic that is held on by the two front bolts on the side mud guards. It sandwiches between them. Then there are velcro strips to form it to the side mud guards. The plastic has a small slit going up to the servo arm so it can slide down as one large piece. On the battery tray, I attached the battery to the CF with some very heavy duty double sided tape. The battery is then held down by a couple 1/4" aluminum posts that I threaded to accept a 8/32 counter sunk screw from the bottom of the chassis. It seems extremely stout. As you'll notice, the bottom CF strip is not covering the whole battery in order to drop the COG as much as possible. With 1/8" CF, the battery rests almost perfectly flush to the mud guard. Then I have a piece of the fuzzy part of velcro on the bottom of the CF for cushioning. |
|
|
|
|
|
|
|
(#7)
|
|
RC-Monster Aluminum
Offline
Posts: 957
Join Date: Sep 2006
|
04.14.2008, 05:41 PM
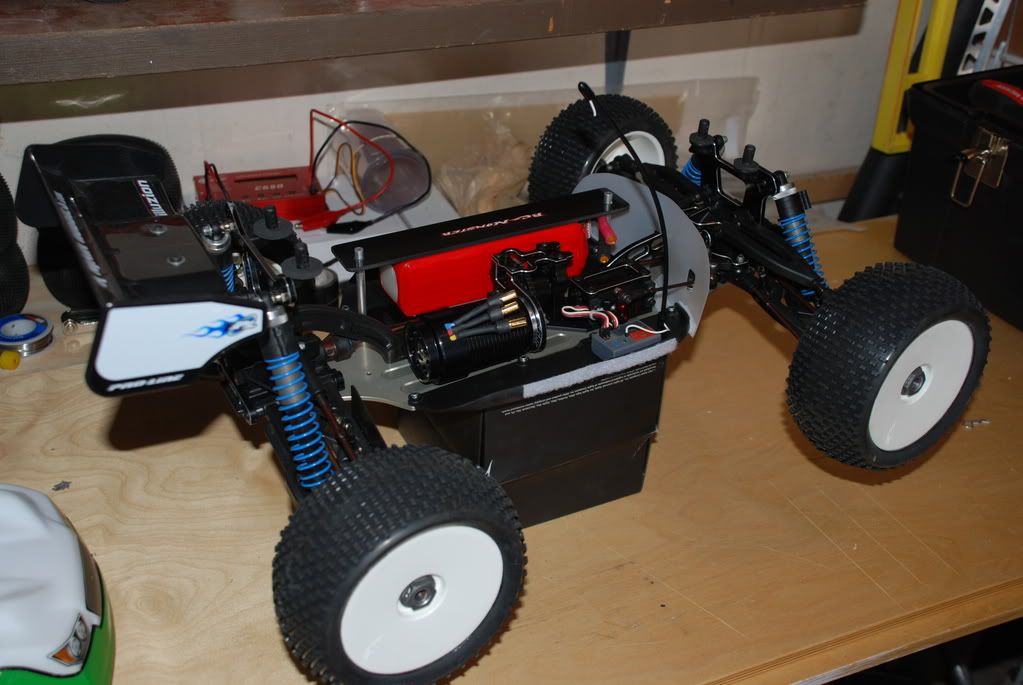
Here are a few more "detailed" shots that might help my explanations:
|
|
|
|
|
|
|
|
(#8)
|
|
HV basher
Offline
Posts: 392
Join Date: Jun 2007
Location: Austria (Europe)
|
04.15.2008, 05:50 AM
Interesting motor choice (1515/2Y/F/H -> 1100kv) especially considering you are waiting for a 6s capable ESC (MMM). I run my 1515/2y (smooth can) with 10s1p A123 (comparable to 8s lipo) and it reaches around 30000rpm under load (eagletree) with Badlands on gras with a 1:13 gearing. With lighter racing tires i see around 32000rpm. Now if you run it with 6s max you will shoot for 25000rpm. No doubt this also can be geared to 35-40mph. Should make it very driveable as you have to gear it very low to reach speed.
Battery pack seems to be a 6s pack, right? judging by it's dimension you will have some good runtimes. All in all a perfect racing setup (low RPM turning motor, thus not as agressive as high rpm revving motors. With its attached fan and relative low voltage the motor should run ultra cool. I wouldn't expect high Amp peaks too, so the ESC will have no hard time and will run cool too. All this will result in low mAh consumption, giving you long runtimes.) With your front protection, sideguards in combination with your body chances are low that stones are sucked into the fan of the motor. Thumbs up. I like it. Jazz 55-10-32, Neu 1515/2Y (1100kv), 9s2p A123 (27v), up to 3.1KW Latest video with eagletree Data inserts: Run on asphalt |
|
|
|
|
|
|
|
(#9)
|
|
RC-Monster Carbon Fiber
Offline
Posts: 171
Join Date: Mar 2008
Location: Virginia
|
04.18.2008, 08:12 AM
That’s absolutely beautiful!
Stupid question here; how you do tell which Neu motors include the end-bell fan? Is it obvious via the part-number or is this an accessory item for all 15 size motors? |
|
|
|
|
|
|
|
(#10)
|
|
one.five.two.seven
Offline
Posts: 427
Join Date: Oct 2007
|
04.18.2008, 09:14 AM
The Neu's with fans have an 'H' on the end. They are actually supposed to be used as heli motors. If you go to CC and build a 15xx Neu, you'll see a heli version option, that includes the fan.
Check this out: http://www.neumotors.com/20061222/HeliMotors.html |
|
|
|
|
|
|
|
(#11)
|
|
RC-Monster Aluminum
Offline
Posts: 957
Join Date: Sep 2006
|
04.21.2008, 05:21 PM
Ok guys, here's the latest. I agonized over it, but after 3 hours of wrenching, I finally pulled the two motor screws out so I could get a better pic of the endbell.
I also have a shot of the new "air filter". Basically a cut out piece of felt. Hope you enjoy! 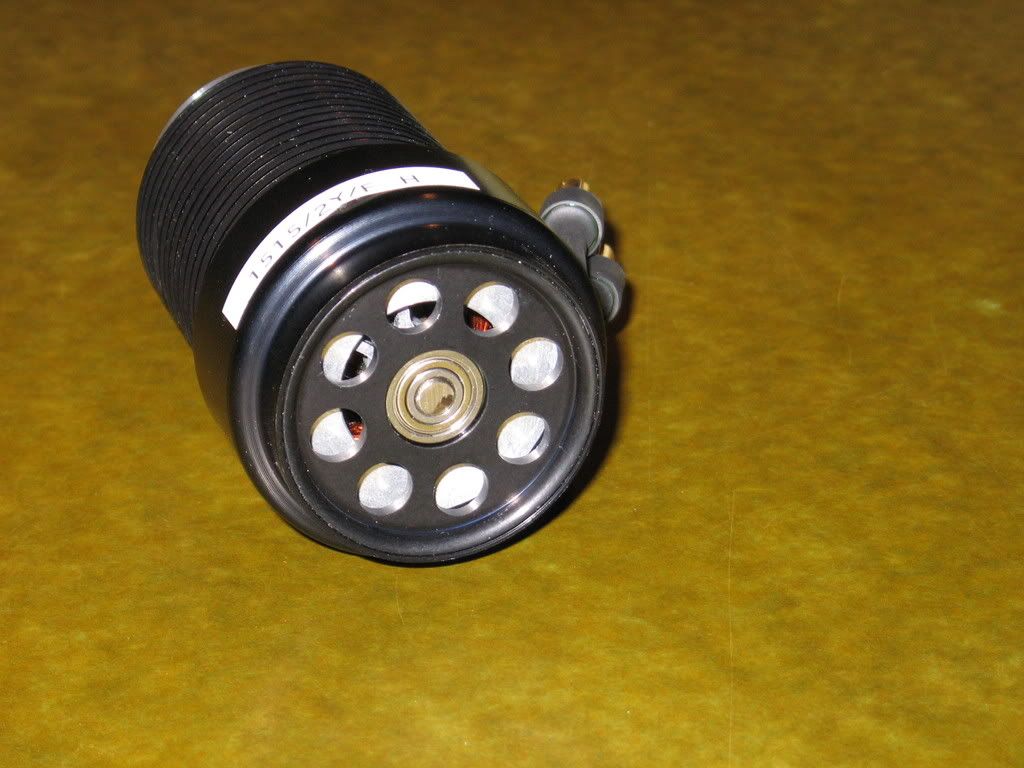 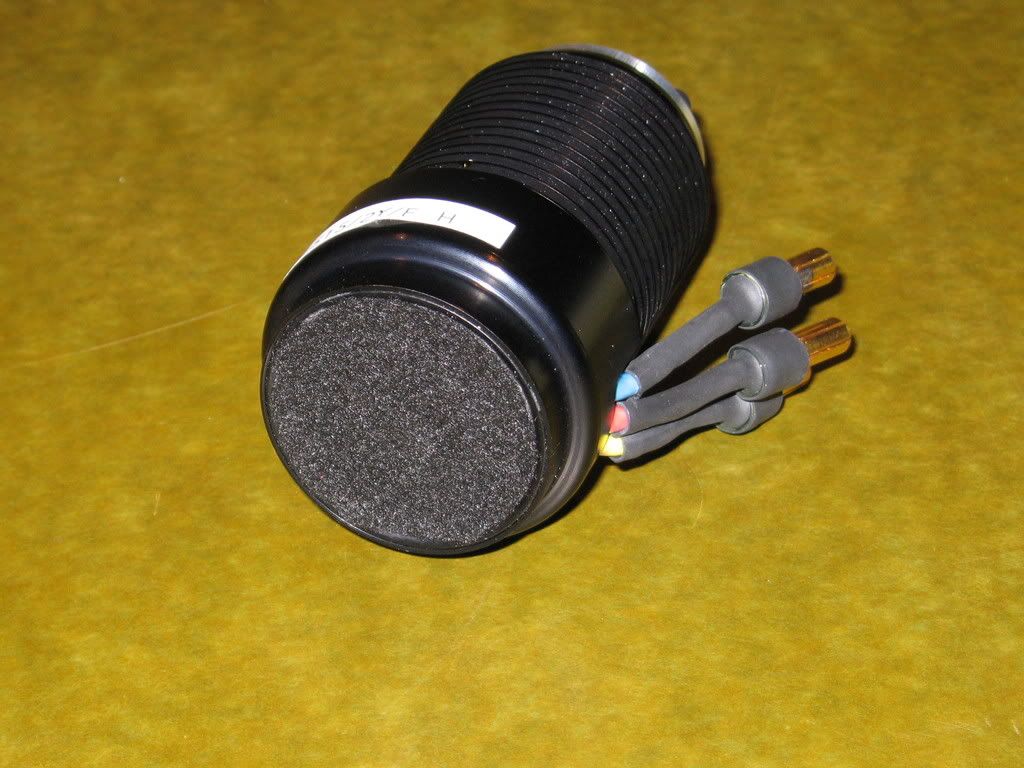
|
|
|
|
|
|
|
|
(#12)
|
|
|
RC-Monster Dual Brushless
Offline
Posts: 5,139
Join Date: Sep 2006
|
04.21.2008, 05:33 PM
Quote:
|
|
 |
|

|
|
|
|
(#13)
|
|
HV basher
Offline
Posts: 392
Join Date: Jun 2007
Location: Austria (Europe)
|
04.21.2008, 05:34 PM
Thanx for your big effort. I wonder why they covered a big part of the air intake holes with this "white shield". Doesn't make sense for me as it hinders air to get inside and will make the fan loud: not very efficient.
Did you make a testrun to check airflow with and without filter? Since you will run your motor with low rpms, airflow too will not be very high. Jazz 55-10-32, Neu 1515/2Y (1100kv), 9s2p A123 (27v), up to 3.1KW Latest video with eagletree Data inserts: Run on asphalt |
|
|
|
|
|
|
|
(#14)
|
|
RC-Monster Aluminum
Offline
Posts: 957
Join Date: Sep 2006
|
04.21.2008, 05:40 PM
Thanks guys - by the way, you know I'm joking about my "effort", right? Took me about 2 minutes to pull the motor out.
 Anyway, I haven't done any testing on this motor yet since I'm waiting for the MM to come out over the next week or two. But since it's such a low KV motor that will be running on 6s, I don't think it will have any trouble. My last Neu setup never got much hotter than 120 so this one should stay at 100 or lower. We'll see. And that shield you see inside is actually metal and spins with the shaft - for what it's worth. |
|
|
|
|
|
|
|
(#15)
|
|
Old Skool
Offline
Posts: 7,494
Join Date: Feb 2007
Location: Devon, England
|
06.06.2008, 10:55 AM
Thats pretty decent results.
I've wondered about temping the MMM too, guess you can just about see the fins through the slots in the case. |
|
|
|
 |
«
Previous Thread
|
Next Thread
»
| Currently Active Users Viewing This Thread: 1 (0 members and 1 guests) | |

 Hybrid Mode
|
|

Powered by vBulletin® Version 3.8.11
Copyright ©2000 - 2026, vBulletin Solutions Inc.
vBulletin Skin developed by: vBStyles.com
Copyright ©2000 - 2026, vBulletin Solutions Inc.
vBulletin Skin developed by: vBStyles.com