

Lst2 cvds and hubs on a Savage |

|

|
(#1)
|
|
Check out my huge box!
Offline
Posts: 11,935
Join Date: Aug 2007
Location: Slidell, LA
|
Lst2 cvds and hubs on a Savage -
02.07.2011, 02:43 PM
I have some new ideas and wanted to put this up in the right section.
So far I have figured a way to put the lst2 hubs on a stock savage arm. Not difficult at all. Here are the pics, pretty self explanatory:     Problem is the lst cvd required a 6mm longer lower arm, and a 126mm long upper arm. After looking alot I am finding it quite hard to find a suitable replacement for the lower arm. So I figure I can make some new hingepin braces that are 6mm wider on each side. The bulks will have to be trimmed so that the hingepin can sit 6mm farther away from the bulk. The hingepin braces will be the only thing holding the pins, but most truggies are held this way, so it should be strong enough. I will likely use much thicker material so I can thread holes next to the pin holes and use m4 thread scres to hold the pins in. This is the hingepin brace, as stock, imagine the holes 6mm farther away from the center. 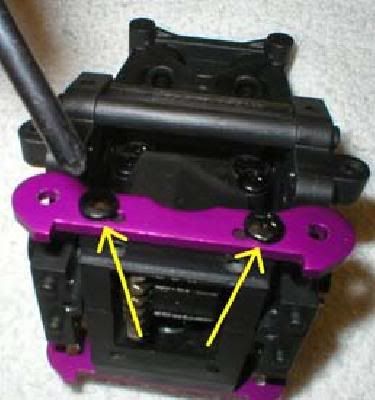 Here is a pic of the plastic bulk. The red area indicates where I would remove material. I will try to retain as much material as possible, so a 6mm slot would provide clearance.  So we have retained the stock lower arms, and hingepins. Only part to make will be the pin brace. |
|
|

|
|
|
|
|
(#2)
|
|
Check out my huge box!
Offline
Posts: 11,935
Join Date: Aug 2007
Location: Slidell, LA
|
02.07.2011, 02:49 PM
On to the custom upper arm. The lst2 hub uses 4mm hingepins. Same diameter as the stock savage hingepins.
So I am thinking of using the savage X SS adjustable upper arm kit with some mods and a new turnbuckle. Have a look at this pic with my notes on it: 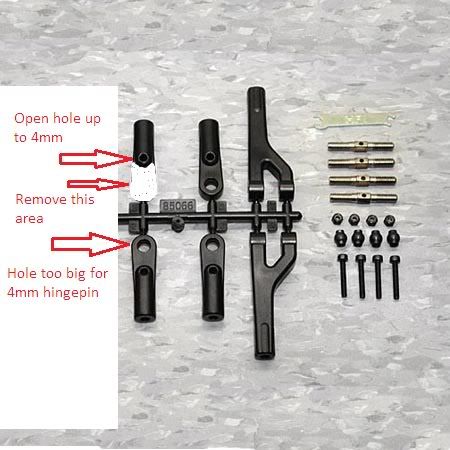 The nomal end hole that has a ball end is too big for a 4mm hingepin. But the next hole is slightly less than 4mm, so it can be enlarged to fit. The area I have marked white would be removed. This will require a 60mm long m5 thread turnbuckle. About 10mm of the turnbucle on each end goes into the plastic ends. Spacers will be required to shim each side of the end where it connects with the lst2 hub. This will be nice as the shims can be moved to alter the caster. Off to look for a suitable turnbuckle... |
|
|
|
|
|
|
|
(#3)
|
|
Check out my huge box!
Offline
Posts: 11,935
Join Date: Aug 2007
Location: Slidell, LA
|
02.07.2011, 02:59 PM
Only thing I have found so far that is 5x60:
http://www3.towerhobbies.com/cgi-bin...?&I=LXALWC&P=7 Any ideas? |
|
|
|
|
|
|
|
(#4)
|
|
RC-Monster Titanium
Offline
Posts: 1,007
Join Date: Apr 2010
|
02.07.2011, 03:43 PM
wow... i had a feeling that you were going to want to remove that area of the bulk... i guess this mod is a no go for me with my alloy Bulks...
but here is some help... Considering you will need to make the hinge pin holders out of something tough like stainless steel... you will also need a solid system... Here is a guy that made something for the stock savage, but maybe new braces which offer the extension needed either side to fit the CVDs... here are the pics of what he created... here is what he sells on ebay.. it took him ages to come up with this... he is over on savagecentral and is called MRSNUGGLES...  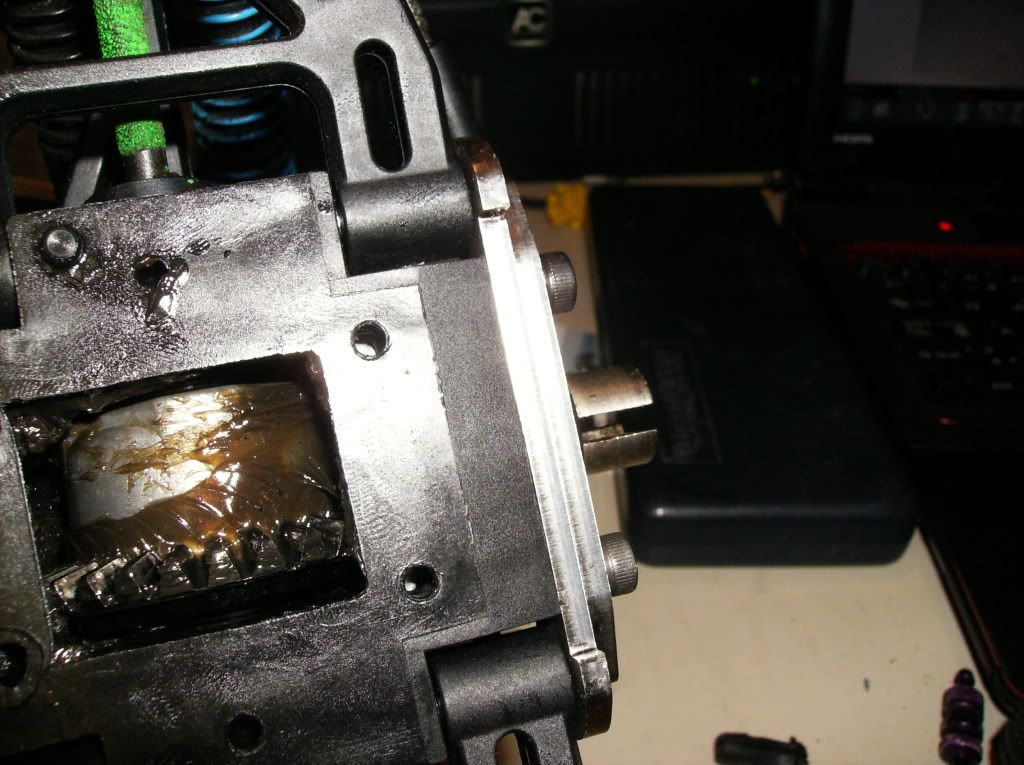 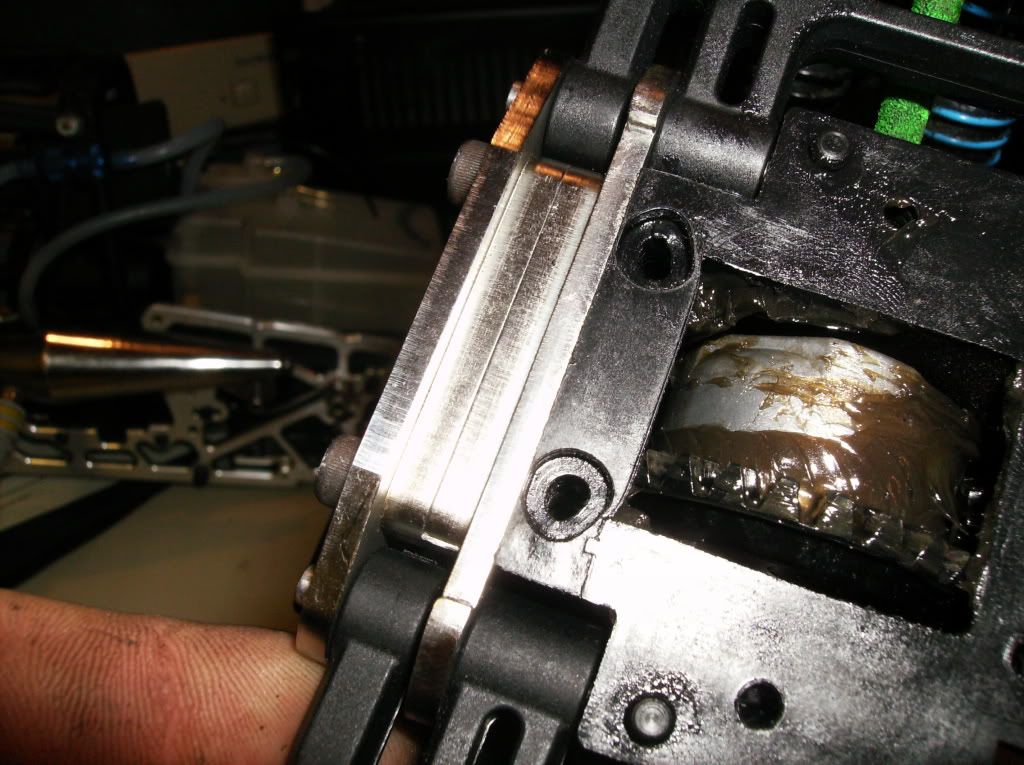 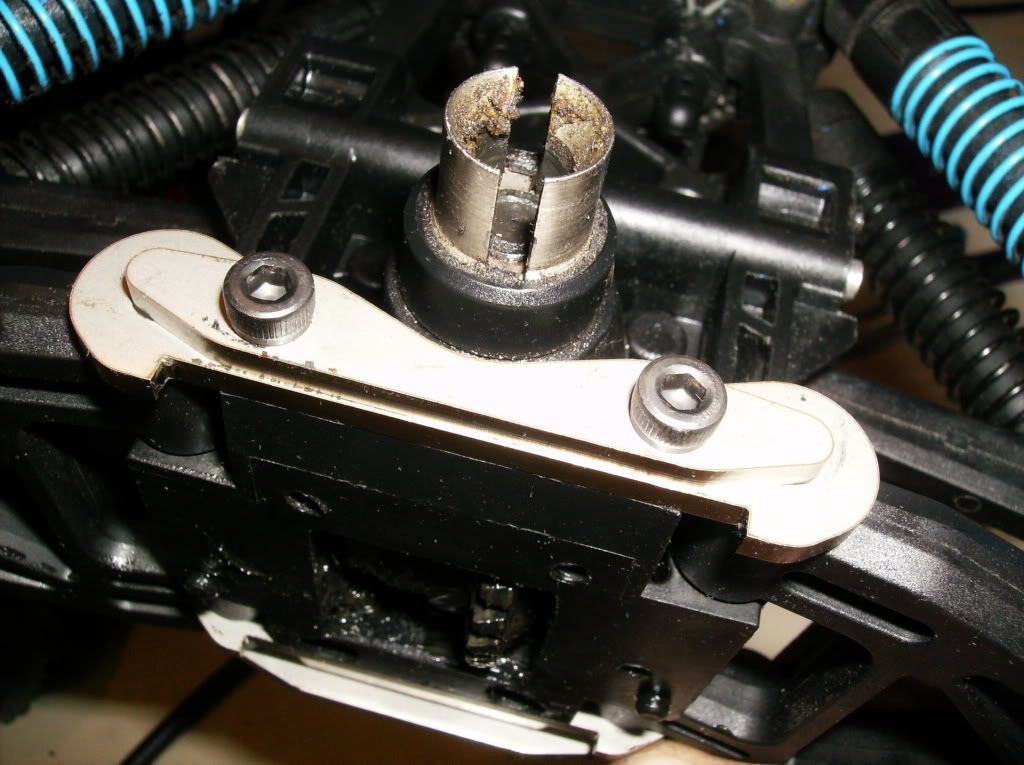 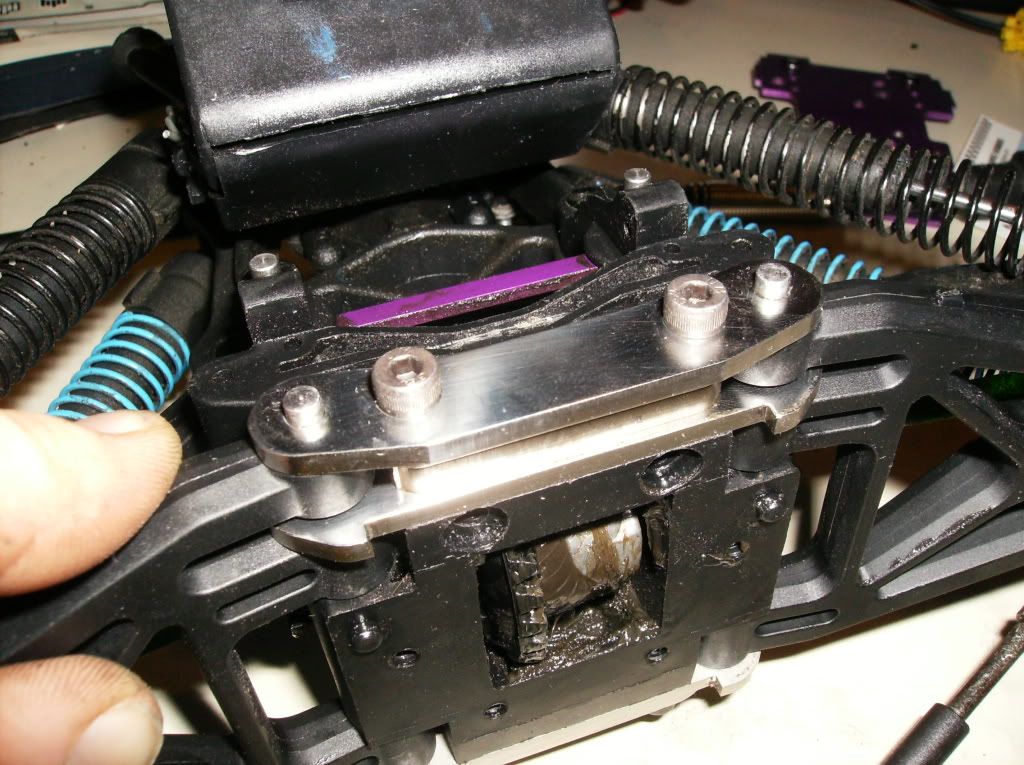  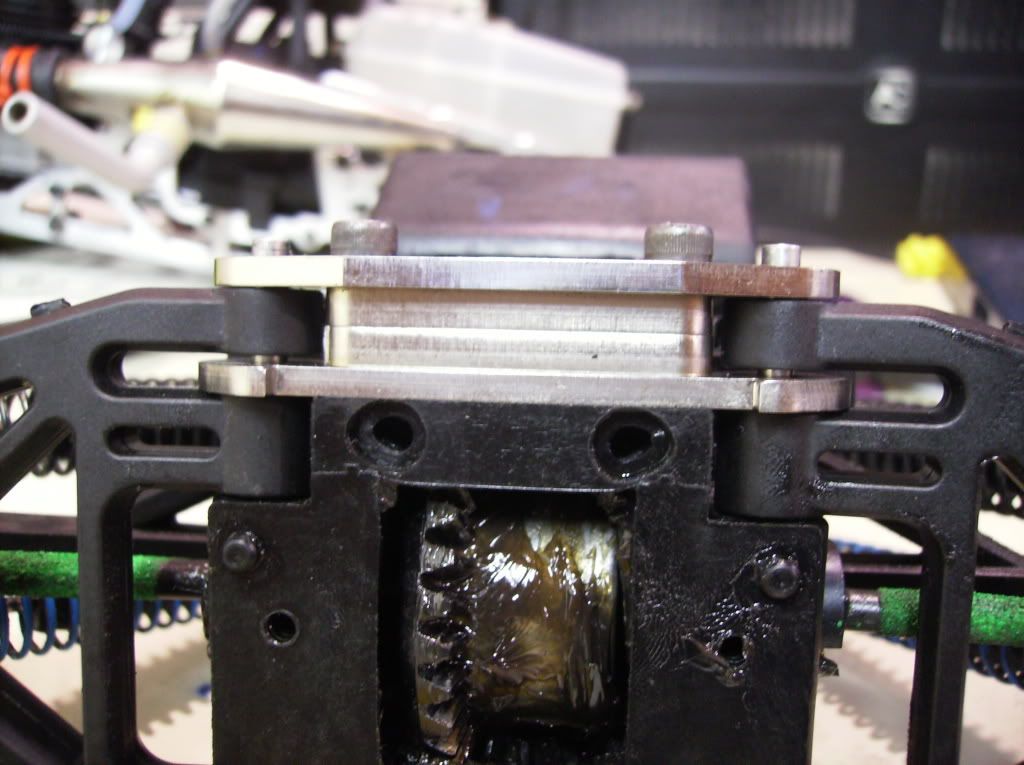 I saw a guy that had ripped his bulk apart and it was being held together with just these ridiculously strong braces! What do you think edit... Where he sells tham http://cgi.ebay.com/ws/eBayISAPI.dll...ht_1001wt_1139 |
|
|
|
|
|
|
|
(#5)
|
|
RC-Monster Aluminum
Offline
Posts: 897
Join Date: Mar 2010
Location: Same town as "Brand P"
|
02.07.2011, 04:06 PM
Looks like he WAY overtightened those allen cap screws and it is distorting the bulkhead.
|
|
|
|
|
|
|
|
(#6)
|
|
RC-Monster Titanium
Offline
Posts: 1,007
Join Date: Apr 2010
|
02.07.2011, 04:10 PM
maybe he did... but what ever... you would have thought he would have ruined the thread before distorting anything
|
|
|
|
|
|
|
|
(#7)
|
|
Check out my huge box!
Offline
Posts: 11,935
Join Date: Aug 2007
Location: Slidell, LA
|
02.07.2011, 04:13 PM
Just grind the area off the alloy bulk, I really do not see it doing much at all for strength.
I would use thicker material than he did for the braces, or shorten the pins so I could use a screw to retain them. Like this, see arrows in pic:  I would use thicker material than the stock hpi braces, and likely trim/grind the hingepins to the correct length. Then just use a m4 thread short cap head screw to hold the pin from sliding out. I have moced up most of what I have to do, will keep searching for turnbuckles and see if I can score a set on the cheap. |
|
|
|
|
|
|
|
(#8)
|
|
Check out my huge box!
Offline
Posts: 11,935
Join Date: Aug 2007
Location: Slidell, LA
|
02.07.2011, 04:40 PM
Found some helfire turnbuckles, m5x60mm. Should be perfect, bought 2 packs (4 total).
http://cgi.ebay.com/HPI-93627-FRONT-...item35af45dabd |
|
|
|
|
|
|
|
(#9)
|
|
Check out my huge box!
Offline
Posts: 11,935
Join Date: Aug 2007
Location: Slidell, LA
|
02.07.2011, 07:02 PM
Mocked it up some more. Cut the upper arm as described. The hole behind the pivot ball hole is alomst 4mm, used a 4mm drill bit by hand to open it up. Cut the shaded are off and rounded it, fits very nice.
In the pic I have a spare lst hinge pin acting as a turnbukle. I have ordered the hellfire m5x60 turnbuckles and will swap them out when they arrive. 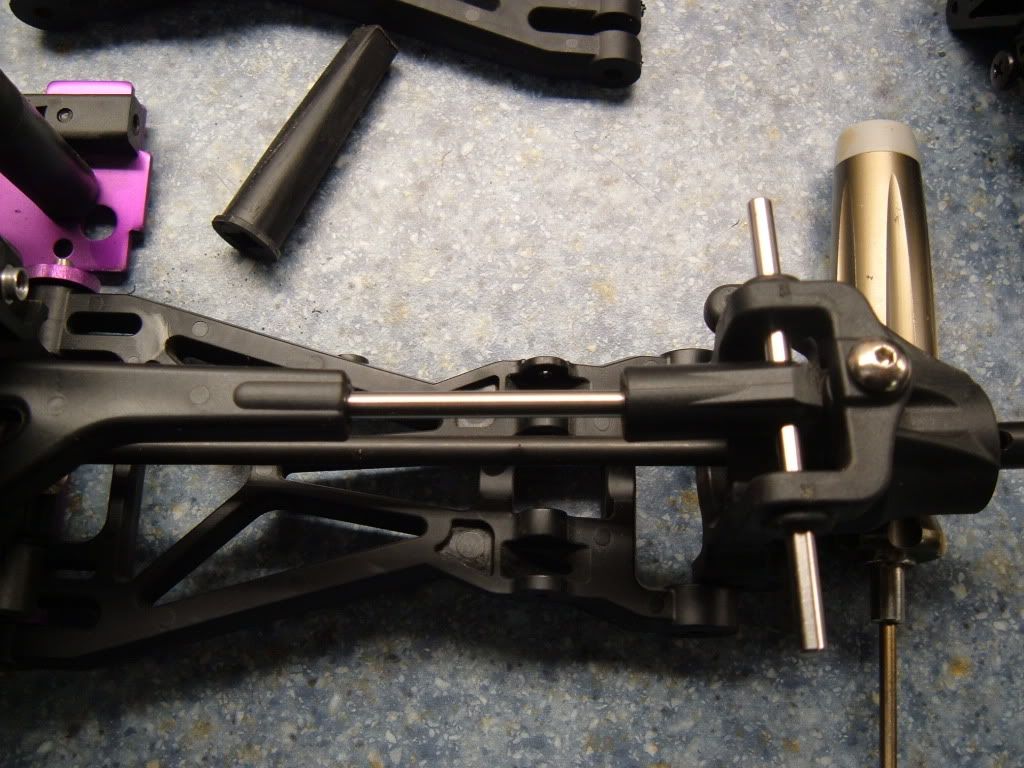 1st pic shows the lower arm attached to the bulkhead as it is on a stock savage, 2nd shows the spacing on the other end of the arm. 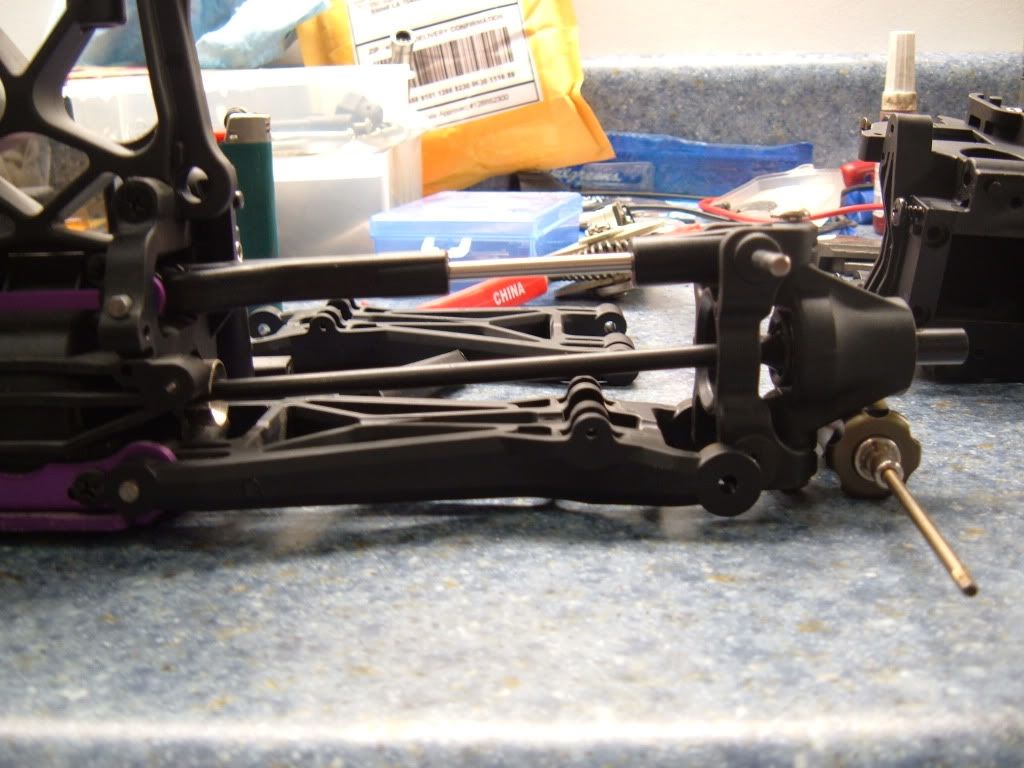 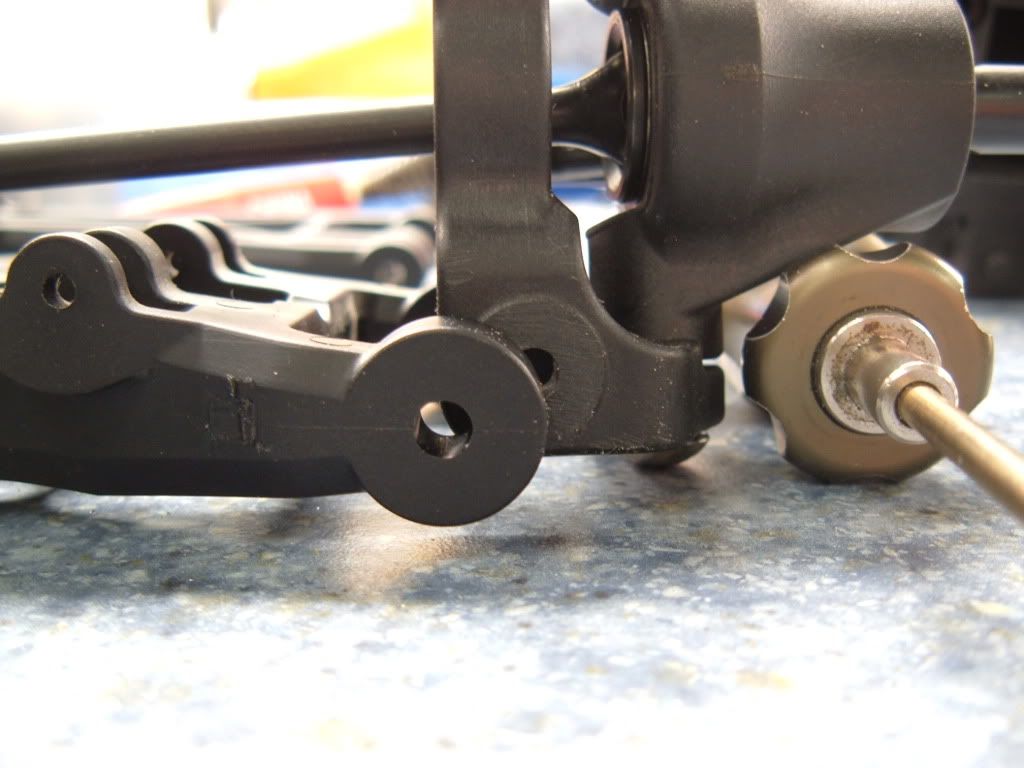 1st pic shows the savage lower arm connected to the lst2 hub, 2nd is a close up of the spacing between the stock hingepin brace and the stock arm. Measured it is right at 10mm. This gives enough clearance in the diff output cup for some negative camber to be dialed in via the upper arm turnbuckle. 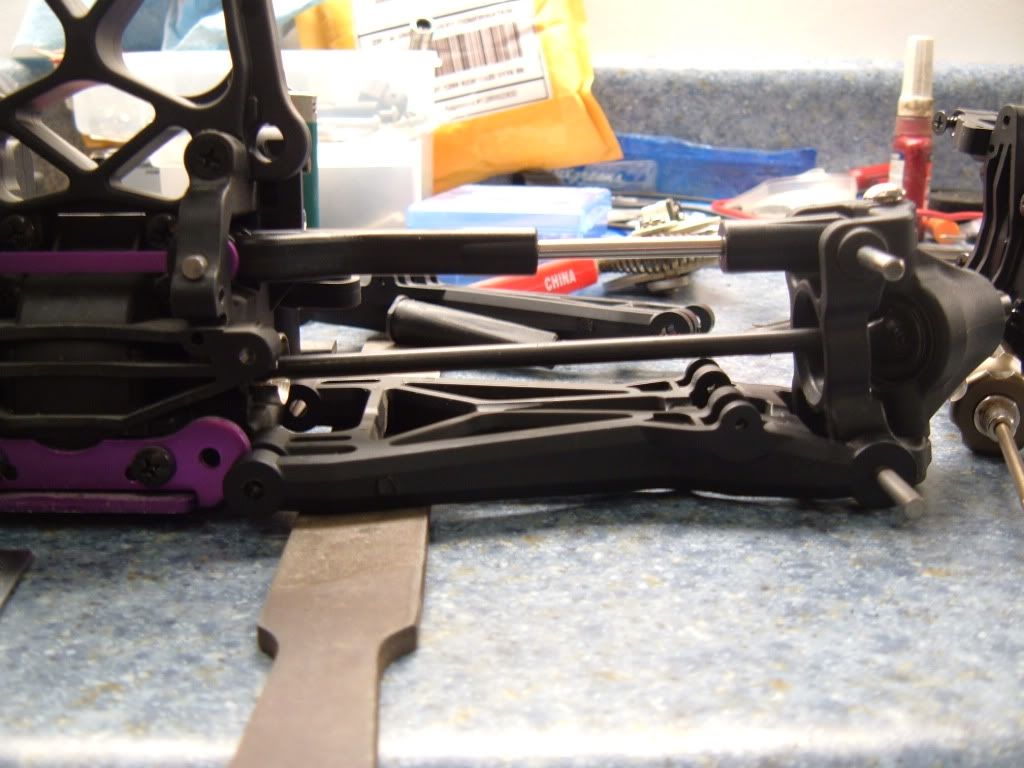  So I will pull off one of the braces, trace it on some al stock I have and add 10mm to each side. I also measured the width difference and I should end up with more than 1/2" extra width per side. Probablt 15mm or more, and that was just eyeballing it with a ruler. The hingepin brace will add 10mm per side, and the longer cvd axle and hub design add about 5mm. I may even widen the hingepin brace so that the hingepins will clear the center bulkhead area so that the bulks will not need to be modified at all. Now for some issues I have noticed. Since the upper arm will be longer than the lower arm the truck will experince positive camber as the suspension is compressed. Not good. I am working on an idea to fix this. Best thing I have come up with is to make a spacer block that mounts to the top of the c hub thru the hincepin hole and effectively moves the hingepin pivot closer to the bulk, so that the upper arm can be shortened to the same length as the lower arm. Bur we will cross that bridge when we come to it. Right now I would like to get it working as show. Positives: No mods to lower arm. Minimal mods to c hub, cheap part Minimal mods to upper arm, cheap part Addl parts inexpensive. Better axle, stronger, cvd type allow for better steering throw(will also require mods) Larger inner bearing, wider bearing spacing, possibility of 3rd added bearing in hub Stock lst2 rear hubs will eliminate rear tierods wider stance without using axle extenders Use of std hex adapter from 1/8 scale buggy/truggy and I am sure there is more stuff I am not thinking about. |
|
|
|
|
|
|
|
(#10)
|
|
RC-Monster Aluminum
Offline
Posts: 897
Join Date: Mar 2010
Location: Same town as "Brand P"
|
02.07.2011, 07:42 PM
this might sound stupid, but maybe you could use a heat gun and stretch the middle of the savage arm the 6mm that you need? One of my old co-workers was really into frankensteining rc cars and i remember him telling me he used a heatgun to stretch some plastic parts before. he even said it was still strong after he was done. Couldnt hurt to try it out.
|
|
|
|
|
|
|
|
(#11)
|
|
RC-Monster Titanium
Offline
Posts: 1,007
Join Date: Apr 2010
|
02.07.2011, 09:32 PM
linc... thanks for that detailed write up with all the images as well!!!!
really shows how close it is to working! I think the FLM XL arms would really work!!! but, i never thought about the problem with the upper arm being longer than the bottom... i guess flm would cure this problem right... Im quite interested to see how you get round this one! I wish i had the cash to fork out for the XL arms! i would only want the bottom arms as the top arms are not necessary. JOsh9 does have an idea though!!! i am going to heat up one of my broken savage lower arms tomorrow and see how well it reponds to heat and being stretched... ill get pics for you. |
|
|
|
|
|
|
|
(#12)
|
|
Check out my huge box!
Offline
Posts: 11,935
Join Date: Aug 2007
Location: Slidell, LA
|
02.07.2011, 10:10 PM
Made a new hingepin brace just now. Real ugly, but it proves that this will work. Lower hingepin fully clears the bulkhead, so no trimming or grinding needed.
Even though I do not have a turnbuckle that will work I have rigged something up to give me the correct length for the upper arm. Sitting with the lower arm dropped, so normal ride height I move the arm thru its travel and the longer upper arm is not changing the camber much at all. Camber may change 1/4 deg thru the travel, so we are all good with this. I have a feeling I know why. When I figured it was going to be a problem I thought the pin spacing on the bulk was the same as the c hub. Turns out the ch pin spacing is more than the bulkhead, so it negates the effect of the upper arm getting longer than the lower arm as the arms move thru their respective motions. End result: I have something that works. Properly. I will make another pin brace tomorrow and clean this one up. Then I will take pics. |
|
|
|
|
|
|
|
(#13)
|
|
Check out my huge box!
Offline
Posts: 11,935
Join Date: Aug 2007
Location: Slidell, LA
|
02.07.2011, 10:22 PM
Oh yeah, I put the new hole 10mm out from the old ones. So about 15mm per side wider than stock.
|
|
|
|
|
|
|
|
(#14)
|
|
RC-Monster Titanium
Offline
Posts: 1,007
Join Date: Apr 2010
|
02.08.2011, 04:59 AM
NICE ONE BUD!!!
cannot wait to see what you have come up with! So you have extended either side by 0.59-0.60" which is a nice increase... plus the increase of the LST hub which prob brings you to around 1.3-1.5" increase either side!!! Nice added width without any bearing strain! Looks like the FLM arms would have fallen short haha |
|
|
|
|
|
|
|
(#15)
|
|
Check out my huge box!
Offline
Posts: 11,935
Join Date: Aug 2007
Location: Slidell, LA
|
02.08.2011, 11:05 AM
Thanks!
Not sure if we have that much extra. I will lay out a lst2 cvd and a savvy dogbone and axle. By comparing the pin locations we can get an idea of the addl width. |
|
|
|
 |
«
Previous Thread
|
Next Thread
»
| Currently Active Users Viewing This Thread: 1 (0 members and 1 guests) | |
 Linear Mode

|
|

Powered by vBulletin® Version 3.8.11
Copyright ©2000 - 2026, vBulletin Solutions Inc.
vBulletin Skin developed by: vBStyles.com
Copyright ©2000 - 2026, vBulletin Solutions Inc.
vBulletin Skin developed by: vBStyles.com