RC-Monster Forums  

Go Back   RC-Monster Forums > Support Forums > HPI Savage

Reply
 
Thread Tools Rate Thread Display Modes
Old
  (#46)
Joey
The Big Cheese
 
Joey's Avatar
 
Offline
Posts: 125
Join Date: Mar 2009
Location: Georgia, USA
03.28.2009, 10:04 PM

I got the axles on and the shafts in and everything is pretty much good to go...

Well I just rolled it around a little and moved the wheels with my hand, and there is a TON of resistance. I know its coming from the diffs, but not from the gears. I think its from the green goo thats on the diff casing and on the big bevel gear. The little pinion gear now has all the goo on it too and its really thick, so I think thats creating the resistance. Im hoping that after the first time its run the goo will get flung around and will barely be on the gears letting it move alot more freely. Does anyone else have this problem? Does it go away after the first run?
__________________
   
Reply With Quote
Old
  (#47)
littlegiant
RC-Monster Carbon Fiber
 
Offline
Posts: 165
Join Date: Mar 2009
03.29.2009, 01:40 AM

Quote:
Originally Posted by Joey View Post
I got the axles on and the shafts in and everything is pretty much good to go...

Well I just rolled it around a little and moved the wheels with my hand, and there is a TON of resistance. I know its coming from the diffs, but not from the gears. I think its from the green goo thats on the diff casing and on the big bevel gear. The little pinion gear now has all the goo on it too and its really thick, so I think thats creating the resistance. Im hoping that after the first time its run the goo will get flung around and will barely be on the gears letting it move alot more freely. Does anyone else have this problem? Does it go away after the first run?
__________________

Could be a case of over tightened diff housings (If you are using plastic gear housings). Try loosing each screw for half a turn.
   
Reply With Quote
Old
  (#48)
Joey
The Big Cheese
 
Joey's Avatar
 
Offline
Posts: 125
Join Date: Mar 2009
Location: Georgia, USA
03.29.2009, 03:45 PM

Thanks littlegiant Ill check it out.

Just to make sure, the buggy/truggy pinions are usually Mod1 48p right? Im having a hard time finding a pinion like that under 10 bucks.... :confused:

More pics...
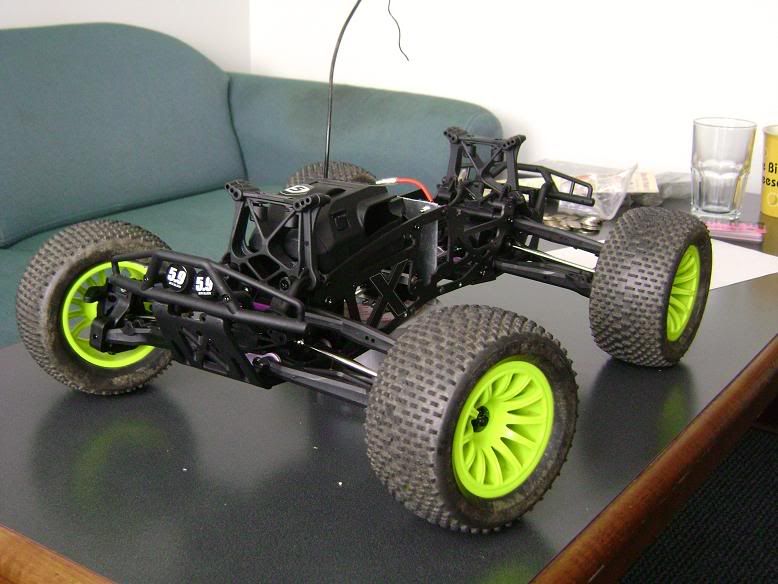
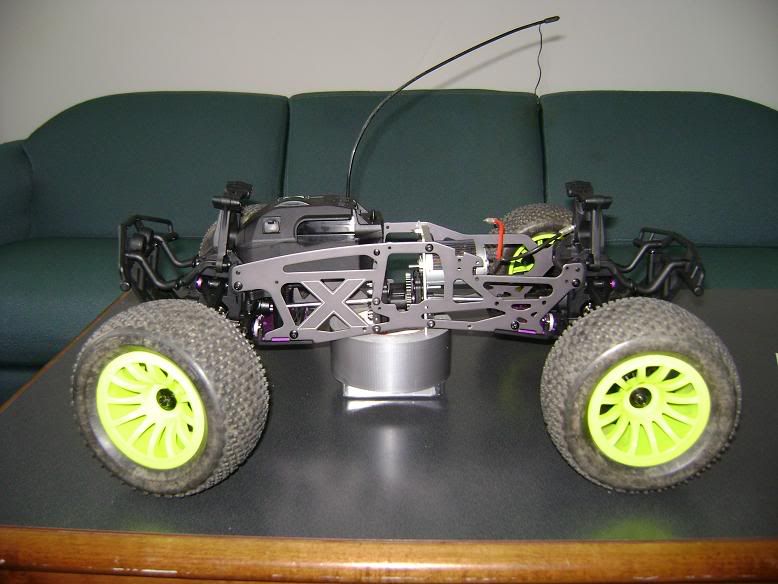


Reply With Quote
Old
  (#49)
Joram
Nitro?? BL rulezzz
 
Offline
Posts: 179
Join Date: Aug 2008
Location: Almelo , NL
03.29.2009, 03:52 PM

You need to use MOD1 pinions, no 48p or other p!!!!!!!!!!

Greetz,
Joram


Quote:
Standard is not an option!
  Send a message via MSN to Joram  
Reply With Quote
Old
  (#50)
Joey
The Big Cheese
 
Joey's Avatar
 
Offline
Posts: 125
Join Date: Mar 2009
Location: Georgia, USA
03.30.2009, 09:00 PM

Well i went back to the senior design workshop and found the perfect sheet of aluminum for an esc plate. The holes are EXACTLY the right size for an M4 screw and were in the EXACTLY perfect spot to line up with the holes already in the chassis for the GP motor mount braces. So I snipped it up to size and here is what I have for an esc mount now. Notice it leaves just enough space for the motor to clear the top of it. Man I lucked out on this one!


Reply With Quote
Old
  (#51)
Takedown
WARNING: May become violent.
 
Takedown's Avatar
 
Offline
Posts: 2,426
Join Date: Mar 2007
Location: Wisconsin
04.02.2009, 01:06 PM

Looks like a fun build joey. Make sure you get the pinion perfectly meshed with the CD/spur. Seems as of the motor is tilted towards the mount making the pinion set lopsided onto the cd/spur. If you ruin it this way it could give you issues with heat and excessive wear.


RIP- Tammy (9/14/08)
Lamborghini's= True Engineering Marvel's
  Send a message via AIM to Takedown  
Reply With Quote
Old
  (#52)
Joey
The Big Cheese
 
Joey's Avatar
 
Offline
Posts: 125
Join Date: Mar 2009
Location: Georgia, USA
04.03.2009, 03:33 AM

Quote:
Originally Posted by Takedown View Post
Looks like a fun build joey. Make sure you get the pinion perfectly meshed with the CD/spur. Seems as of the motor is tilted towards the mount making the pinion set lopsided onto the cd/spur. If you ruin it this way it could give you issues with heat and excessive wear.
Hmm you have a point.. I just checked it and its actually no problem at all though, very miniscule I think it will be fine. I did notice that the CD, from a top down view, is actually angled a TINY bit. Like the left side is slightly forward and rigth side angled towards rear. But its VERY small and I dont think it will be a problem.
   
Reply With Quote
Old
  (#53)
littlegiant
RC-Monster Carbon Fiber
 
Offline
Posts: 165
Join Date: Mar 2009
04.03.2009, 04:52 AM

Quote:
Originally Posted by Joey View Post
Hmm you have a point.. I just checked it and its actually no problem at all though, very miniscule I think it will be fine. I did notice that the CD, from a top down view, is actually angled a TINY bit. Like the left side is slightly forward and rigth side angled towards rear. But its VERY small and I dont think it will be a problem.
More updates please. And more pictures. It will be best if u have a video of it running. I am waiting.
   
Reply With Quote
Old
  (#54)
Joey
The Big Cheese
 
Joey's Avatar
 
Offline
Posts: 125
Join Date: Mar 2009
Location: Georgia, USA
04.03.2009, 09:30 PM

Hahaha LG Im wishing I could have something new to update! For now Im deadlocked into studying day in and day out... no time for fun.

I have 3 packages in the mail... Bearings for the servo saver to replace the 4 bushings, hinge pins for the lower axle to arm joint, and duratrax warhead towers. The shock towers on the savx are too high for my liking, and I already have some warhead shocks (about 128mm) so Im going to try to hack up the X tower and mount in the warhead tower for some low riding goodness. Updates when I can... video... not for a while ;)

Oh and I balanced my wheels. They were WAY out of balance. I used small strips of duct tape on the inside of the rim and it worked great. Took the dogbones out and used the free spinning axle to balance, worked well. They are about 90% balanced now, definitely good enough but I may try to get it perfect sometime... just hard without a high quality balancing shaft thingy.

Last edited by Joey; 04.03.2009 at 09:35 PM.
   
Reply With Quote
Old
  (#55)
Takedown
WARNING: May become violent.
 
Takedown's Avatar
 
Offline
Posts: 2,426
Join Date: Mar 2007
Location: Wisconsin
04.04.2009, 12:46 PM

The wh towers are nice. Alot of shock adjustment options.


RIP- Tammy (9/14/08)
Lamborghini's= True Engineering Marvel's
  Send a message via AIM to Takedown  
Reply With Quote
Old
  (#56)
Joey
The Big Cheese
 
Joey's Avatar
 
Offline
Posts: 125
Join Date: Mar 2009
Location: Georgia, USA
04.09.2009, 05:57 PM

Seems like its gonna be more work than I thought to make those warhead towers work. Ill see what I can do when I find time.

Just put my short shocks on the savage with the stock towers, obviously the droop is completely gone but I did it just just so see how it rolls.

Well........

There is a HUGE amount of noise coming from the diffs, sounds like they need to be shimmed bad, but I didnt think savage diffs had that problem in stock form. Whats going on?!?!?!?!
   
Reply With Quote
Update with pics
Old
  (#57)
Joey
The Big Cheese
 
Joey's Avatar
 
Offline
Posts: 125
Join Date: Mar 2009
Location: Georgia, USA
Update with pics - 04.16.2009, 07:33 PM

Getting there....


Reply With Quote
Update with pics
Old
  (#58)
Joey
The Big Cheese
 
Joey's Avatar
 
Offline
Posts: 125
Join Date: Mar 2009
Location: Georgia, USA
Update with pics - 04.16.2009, 07:34 PM


Reply With Quote
Old
  (#59)
BL_RV0
RC-Monster Dual Brushless
 
BL_RV0's Avatar
 
Offline
Posts: 5,061
Join Date: Oct 2007
Location: Thousand Oaks CA
04.19.2009, 02:12 PM

Great truck! I have a couple questions for you. How much have you spend to date? Would you mind making me a list of the parts you bought? Thanks very much!


Get me back into RC!
  Send a message via Yahoo to BL_RV0 Send a message via AIM to BL_RV0 Send a message via MSN to BL_RV0  
Reply With Quote
Old
  (#60)
Joey
The Big Cheese
 
Joey's Avatar
 
Offline
Posts: 125
Join Date: Mar 2009
Location: Georgia, USA
04.19.2009, 10:36 PM

Suspension arms: --------------------Bought for $13 shipped.

Bulkheads + Diffs + Shock Towers: -- -Bought front and rear for $47.20 shipped.

Bumper + Skid assembly: -------------Bought front and rear for $8 shipped.

X TVPs: -----------------------------Bought for $15 shipped.

Axle dogbones + cups: ---------------Bought for $25 shipped.

Center diff/tranny and mount: --- ----Bought for $27 shipped.

Bellcrank/Servo Saver assembly: -----Bought for $6.50 shipped.

Axle carriers + bearings: -------------Bought for $13 shipped.

Suspension arm hinge pins: ----------Bought front and rear for $4 shipped.

Screw set + misc: -------------------Bought for $12 shipped.

F/R Turnbuckles: --------------------Bought for $6.70 shipped.

Radio box: --------------------------Bought for $8 shipped.

Center dogbones: -------------------Bought for $15 shipped.

Chassis braces: ---------------------Bought for $10 shipped.

Extra screws/hardware: -------------Bought for $8.

17mm hex hub set: -----------------Bought for $10 shipped.

warhead towers + shock mount kit -- Bought for $15 shipped

Total cost so far... ----------------- $235


I already had the shocks, wheels, and servo. Hope this helps!
   
Reply With Quote
Reply


Currently Active Users Viewing This Thread: 1 (0 members and 1 guests)
 
Thread Tools
Display Modes Rate This Thread
Rate This Thread:

Posting Rules
You may not post new threads
You may not post replies
You may not post attachments
You may not edit your posts

BB code is On
Smilies are On
[IMG] code is On
HTML code is Off

Forum Jump


Powered by vBulletin® Version 3.8.11
Copyright ©2000 - 2025, vBulletin Solutions Inc.
vBulletin Skin developed by: vBStyles.com