


|
|

|

|
(#1)
|
|
2 KiloWatt RACER
Offline
Posts: 2,496
Join Date: May 2007
Location: Houston
|
11.04.2010, 12:21 PM
Waiting for the motor action.
GTP-Pletty Big Maxximum+RX8. GTP-C50-6L Hacker+RX8. CRT.5-Pro4+ZTW esc. 24s2p EVG SX 49.6mph Ebike. 18s4p Raptor 60mph Ebike. 11.5KW |
|
|

|
|
|
|
|
(#2)
|
|
RC-Monster Titanium
Offline
Posts: 1,007
Join Date: Apr 2010
|
11.05.2010, 01:01 PM
keep us posted!!! Looks good!!! i want to do something similar!
|
|
|
|
|
|
|
|
(#3)
|
|
Guest
Posts: n/a
|
12.02.2010, 04:25 PM
Hi!
I got some parts in: - Magura Throttle - Astroflight servo tester - Sickbikeparts cranks, freewheel and sprockets I soldered a lot of stuff last weeks, today I made a movie of the motor running, nothing spectacular: Click! As you can see; the first 1/3 part of applying throttle the motor stays in neutral, I still have to fix that. Sickbikeparts: 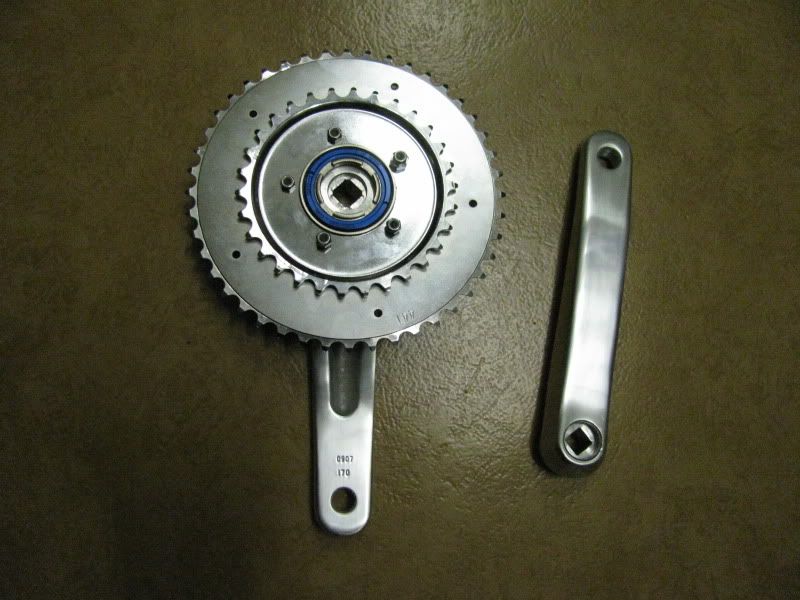
|
|
|
|
|
|
|
|
(#4)
|
|
RC-Monster Aluminum
Offline
Posts: 738
Join Date: Oct 2010
Location: Williston, ND
|
12.02.2010, 04:49 PM
WOW, never seen 10S plugged in before....
|
  |
|
|
|
|
|
(#5)
|
|
|
Guest
Posts: n/a
|
12.02.2010, 04:53 PM
Quote:
|
|
|
|
|

|
|
|
|
(#6)
|
|
RC-Monster Aluminum
Offline
Posts: 738
Join Date: Oct 2010
Location: Williston, ND
|
12.02.2010, 05:41 PM
yeah, haha. Saw ya jump a bit ;)
|
|
|
|
|
|
|
|
(#7)
|
|
RC-Monster Stock
Offline
Posts: 9
Join Date: Dec 2010
|
12.31.2010, 02:41 AM
Very nice. Have seen a few out of the ordinary projects with these turnigy motors now.
Might have to do ome myself one day.... Looking forward to seeing more progress. Oh by the way nice paint job. I done a similar job on a old bmx i had when i was about 16. |
|
|
|
|
|
|
|
(#8)
|
|
Guest
Posts: n/a
|
01.28.2011, 12:49 PM
Little update:
I opened up the Magura throttle... long story short: I twisted the pot a few times till the wires broke off  (I was thinking like "heh? why can I turn this pot so far?" And a few secs later the pot was loosened from the wires hehe (I was thinking like "heh? why can I turn this pot so far?" And a few secs later the pot was loosened from the wires hehe  ) I'll fix that soon. ) I'll fix that soon.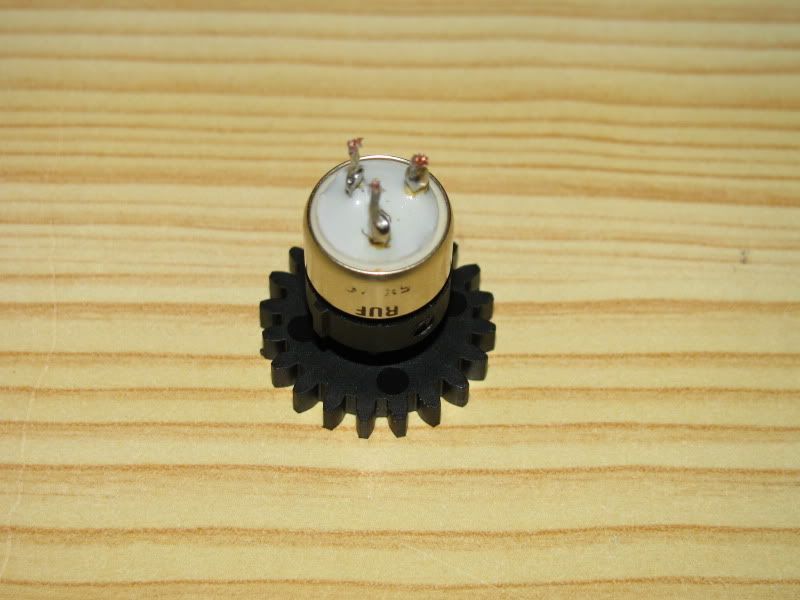 I received my order from SDP: - #25 Pitch 3 foot chain - 0.5" Dia. 5.5" Length Stainless steel shaft - #25 72 teeth spur - #25 14 teeth pinion - #25 connecting link And I also ordered 2 ball bearings at eBay. $140,- 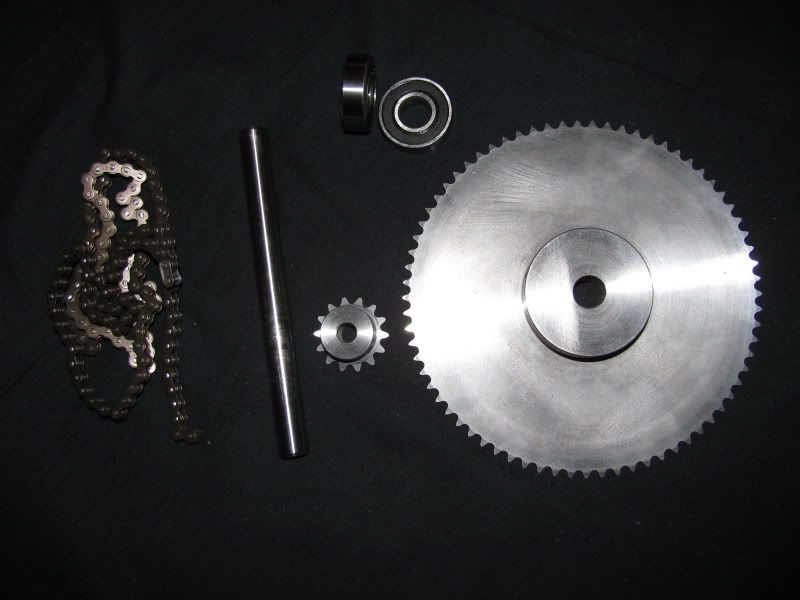 I also got a new workspace, my grandparents offered this to me. It's not big, but I love it. I also received the cross table you can see in the second picture, it's a heavy thing. Costed me about $130,- 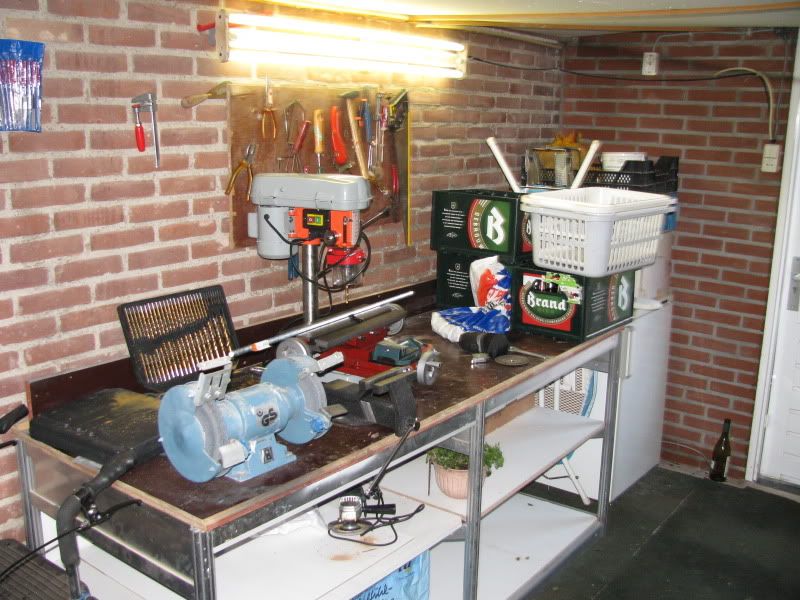 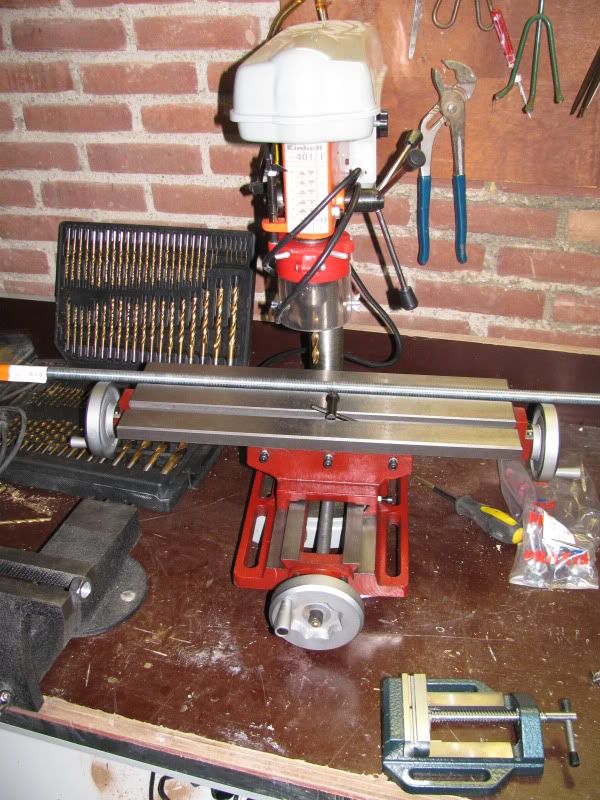 And I received my 7075 aluminium, all pieces are 12mm thick. This stuff was expensive: $80,- 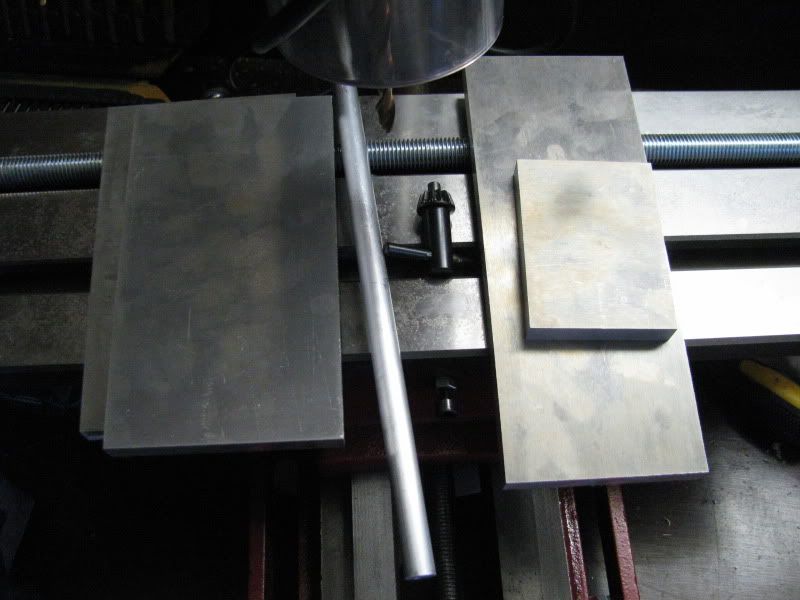 I will start working on the aluminium in a week (I'm busy now). - Patrick EDIT: Oh yes.. I ordered 2 pieces of plexiglass. One is just regular white transparant and the other one some kind of black color. |
|
|
|
|
|
|
|
(#10)
|
|
Guest
Posts: n/a
|
04.02.2011, 11:37 AM
after 2 months finally a update! After LOTS of hours of measuring, drilling, dremeling, filing and so on I came to this result. The aluminium 7075 is really strong stuff by the way! It's not finished yet, I need to make 3 pipes from aluminium to secure both pieces of alu with the 3 screws you can see. Also I need to drill out the bore of the small sprocket so it will fit the 12mm motorshaft and ofcourse I need to make something so that it can be mounted on the bike. (But I'm very busy with school, so it could take a while till I get that done)
Both pieces 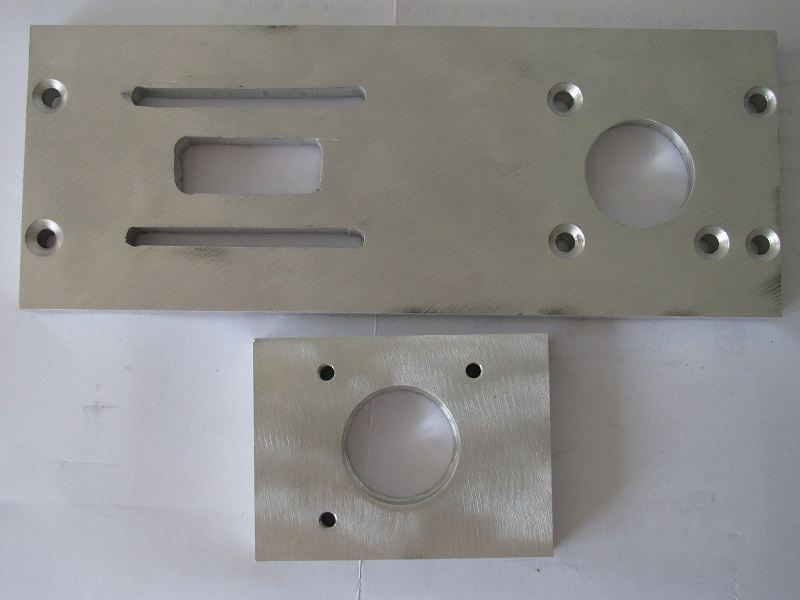 If you look closely you can see that I left just a little aluminium in the big hole so the bearing won't slip away. 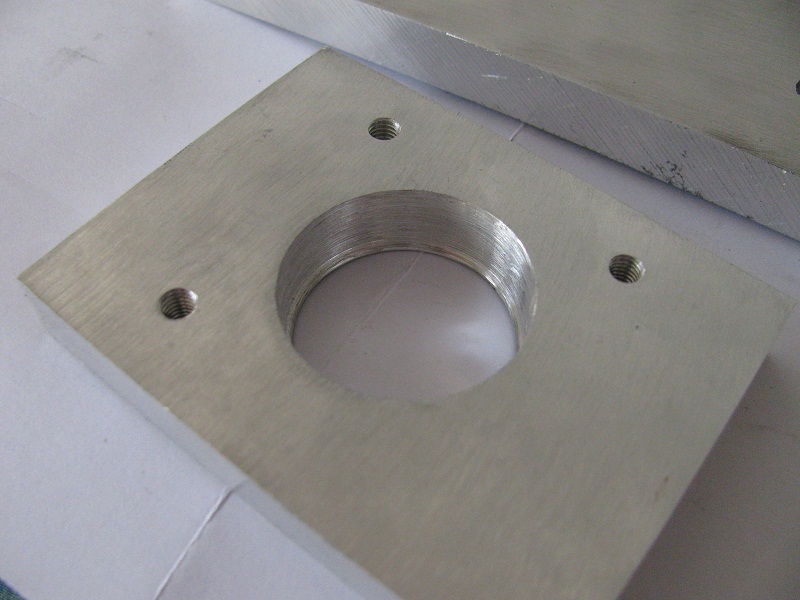 Fitted bearings and mounted the motor 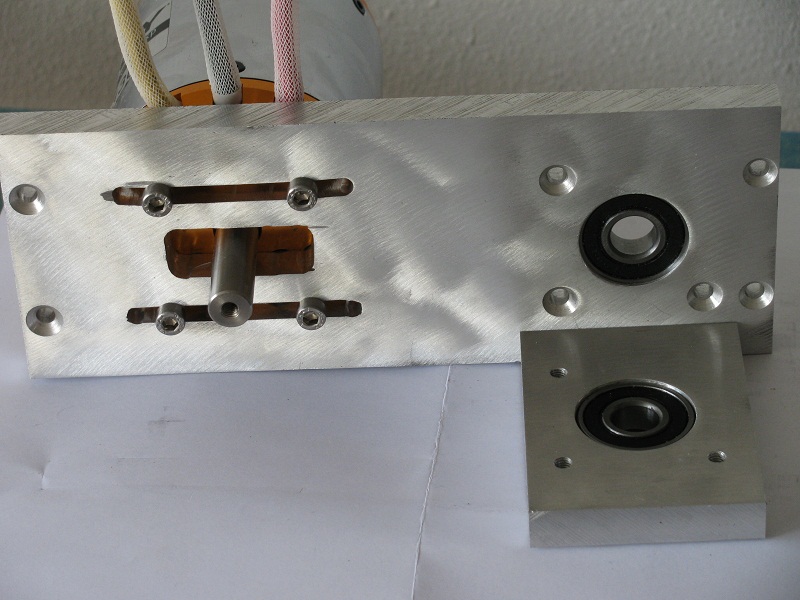 Complete drive unit front side 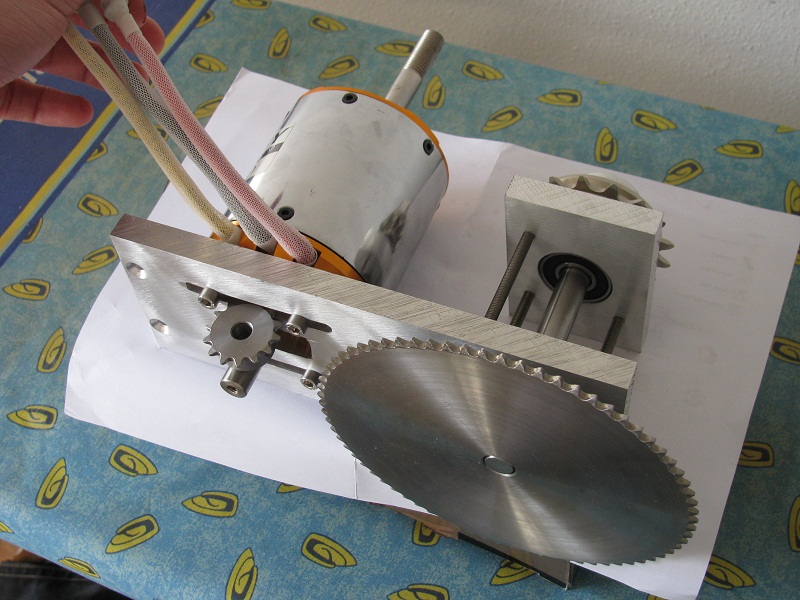 Complete drive unit back side 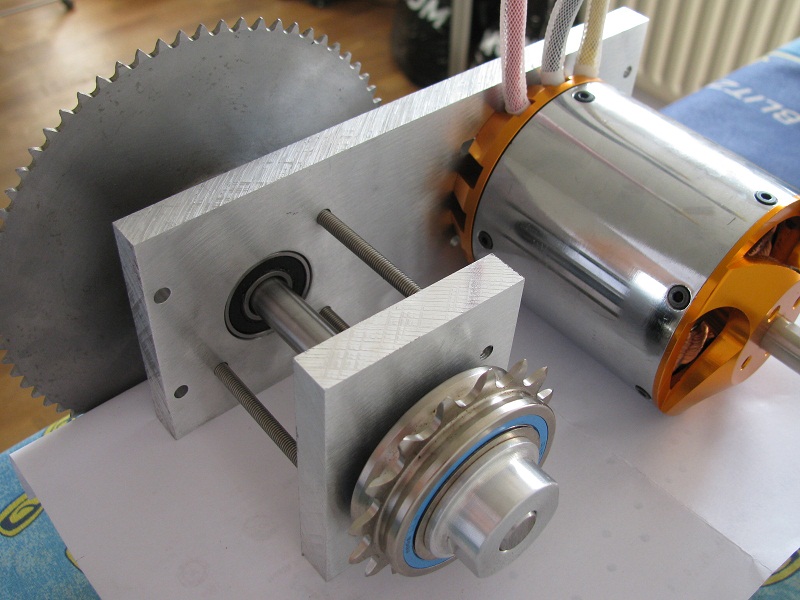 Complete drive unit up side 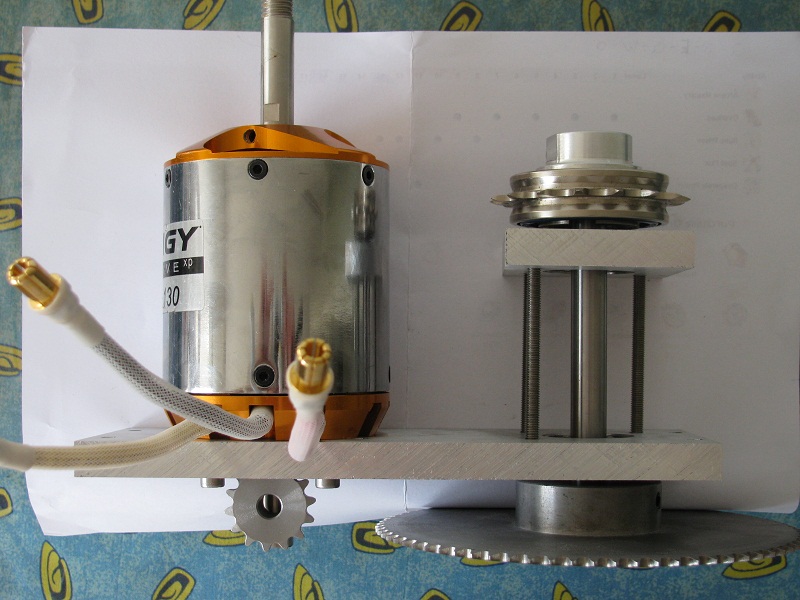 - Patrick |
|
|
|
|
|
|
|
(#11)
|
|
2 KiloWatt RACER
Offline
Posts: 2,496
Join Date: May 2007
Location: Houston
|
04.02.2011, 11:43 AM
Looking good man.
GTP-Pletty Big Maxximum+RX8. GTP-C50-6L Hacker+RX8. CRT.5-Pro4+ZTW esc. 24s2p EVG SX 49.6mph Ebike. 18s4p Raptor 60mph Ebike. 11.5KW |
|
|
|
|
|
|
|
(#12)
|
|
Soldermaster Extraordinaire
Offline
Posts: 4,529
Join Date: Apr 2007
Location: Plymouth, MA, USA
|
04.02.2011, 11:48 AM
Very nice. Yes, 7075 is really tough stuff, but that's why I like it!
 You are going to use washers on the motor mount screws, right? 
|
|
|
|
|
|
|
|
(#13)
|
|
Guest
Posts: n/a
|
04.02.2011, 01:28 PM
Thanks! Uhhhh, I didn't think about using washers for the motor actually but it might be a good idea indeed! :) I should have some 5mm washers laying around here, somewhere lol... need to find them first.
|
|
|
|
Nice project. |
|
|
|
(#14)
|
|
JERRY2KONE SUPERMAXX
Offline
Posts: 3,452
Join Date: Sep 2006
Location: HAYMARKET VIRGINIA
|
Nice project. -
04.02.2011, 02:38 PM
Your project is looking good. I will be truly interested in how exactly you set this up, and of course how it all works together once you get her going. Good machining work for a basement job as well. Very ambitious adventure. Our 14 year old son is also trying to get me to help him build something like this, but I told him he needs to save up some money if he plans to get involved in anything of this nature. What is your total investment so far on this?
|
|
|
|
|
|
|
|
(#15)
|
|
Guest
Posts: n/a
|
04.03.2011, 09:28 AM
Thank you Jerry. On page 2 I posted a 3D model, the driveline will look like that and will be mounted to the frame. Above, on the pictures, you can see a one-way bearing with normal bike size #25 pitch, this one-way bearing sprocket will drive the sprocket which is between the cranks. The rest of the driveline - to the wheel - will be like a normal bike. (It's hard to explain, especially because my English isn't that good. I hope you understand it, if not, just ask! :))
To be honest, I didn't expect it to be so expensive. Small things like the 2 one-way bearings costed me $160, which is quite expensive for some bearings imo. Just costs I overlooked... A rough estimation: 1500 (about $2100) including everything except the bike itself. Great to hear your son wants to do something like this. Sometimes it's really frustrating for me, I never did something like this before (I'm 17 myself) so it's very new for me too. But everytime I finish something (painted the bike, made the driveline etc.) I get a huge smile on my face which is awesome and keeps me motivated!
|
|
|
|
 |
«
Previous Thread
|
Next Thread
»
| Currently Active Users Viewing This Thread: 1 (0 members and 1 guests) | |
| Thread Tools | |
| Display Modes | Rate This Thread |


 Hybrid Mode
|
|

Powered by vBulletin® Version 3.8.11
Copyright ©2000 - 2026, vBulletin Solutions Inc.
vBulletin Skin developed by: vBStyles.com
Copyright ©2000 - 2026, vBulletin Solutions Inc.
vBulletin Skin developed by: vBStyles.com