 |
|
|||||||


 |
|
|
Thread Tools | Rate Thread | Display Modes |
|
|

|
(#16)
|
|
Where are the Rocks????
Offline
Posts: 191
Join Date: Jan 2007
Location: PA
|
04.14.2011, 07:37 AM
Next was getting the power plant in place.
First I installed the mount that housed the bearing. 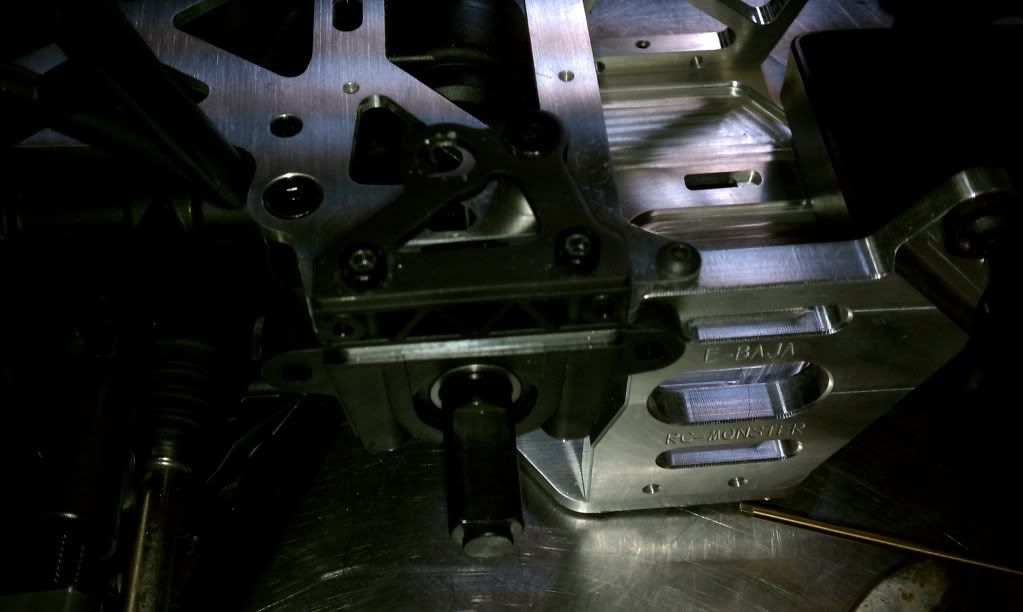 Then came the spur gear... 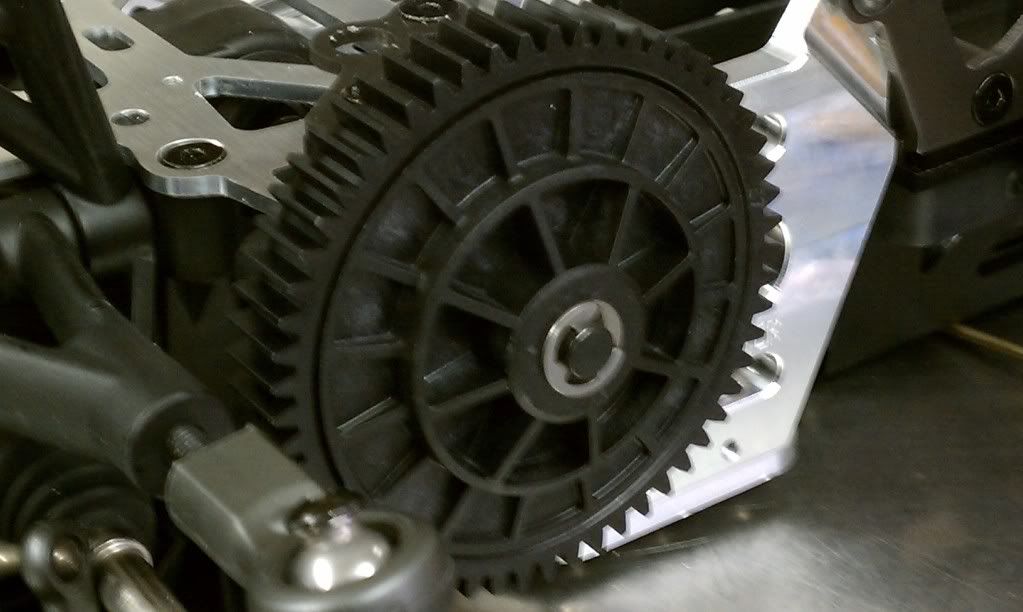 Enter stage left...the beer can 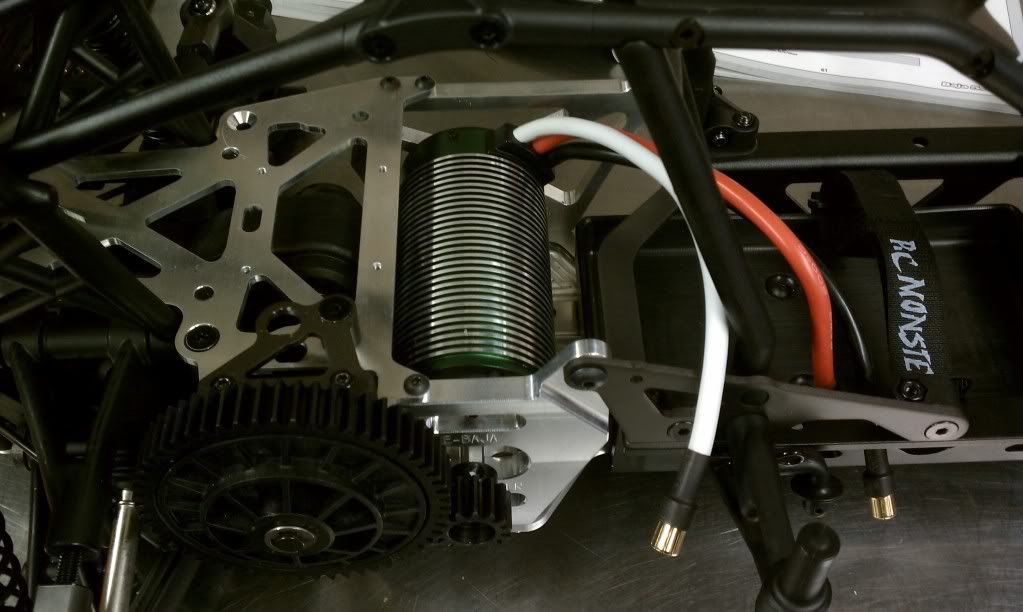 And the Chiller... 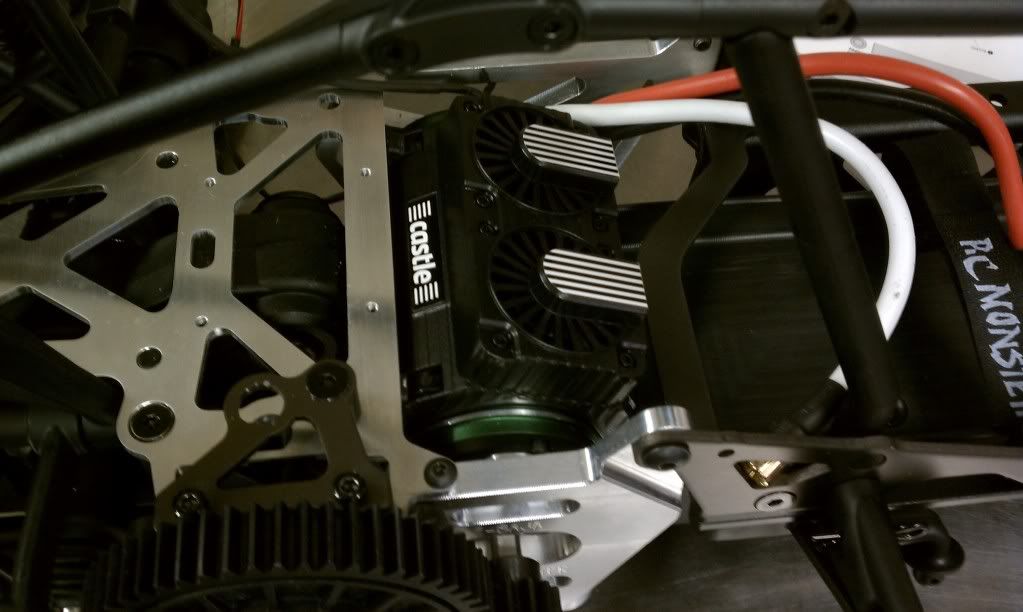 |
|
|

|
|
|
|
|
(#17)
|
|
Where are the Rocks????
Offline
Posts: 191
Join Date: Jan 2007
Location: PA
|
04.14.2011, 07:38 AM
Now a question:
Has anyone seen this beast run on 5s or 6s? I currently don't have 8s packs and would like to try it. Will there be enough juice to move the thing??? |
|
|
|
|
|
|
|
(#18)
|
|
|
Guest
Posts: n/a
|
04.15.2011, 12:28 AM
Quote:
|
|
|
|
|

|
|
|
|
(#19)
|
|
|
Where are the Rocks????
Offline
Posts: 191
Join Date: Jan 2007
Location: PA
|
04.15.2011, 05:22 AM
Quote:
6S is the "Sane" Set-up 8S is the "InSane" Set-Up 
|
|
|
|
|
|
|
|
|
(#20)
|
|
Where are the Rocks????
Offline
Posts: 191
Join Date: Jan 2007
Location: PA
|
04.18.2011, 08:15 PM
I just want to share with everyone how everything is just big on this thing.
Here is a comparison of the Bullet Plugs from what we are used to and the 8 mm ones that are needed to handle the 33.6 Volts that will be flowing through them. 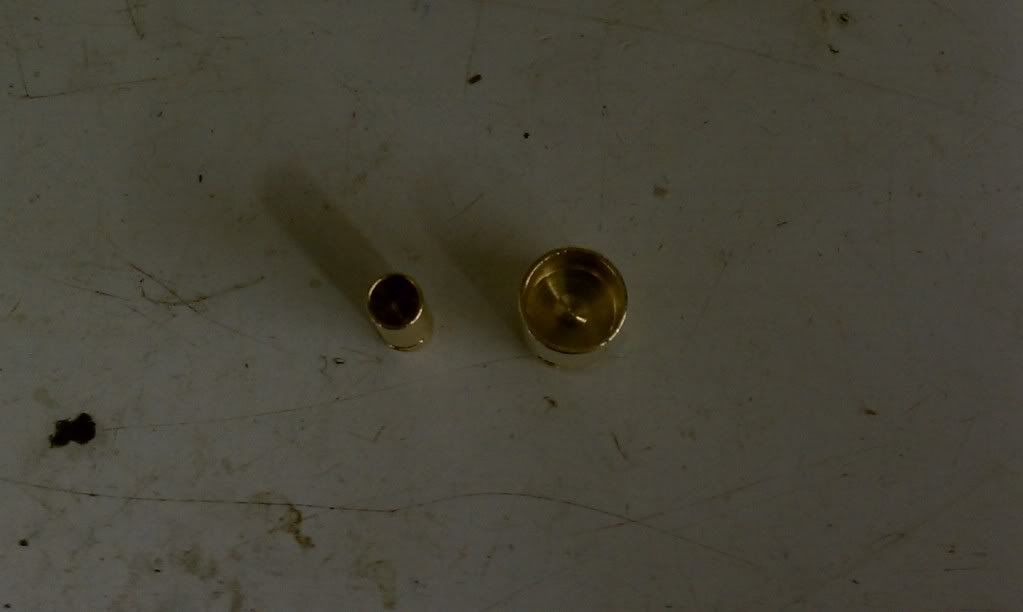 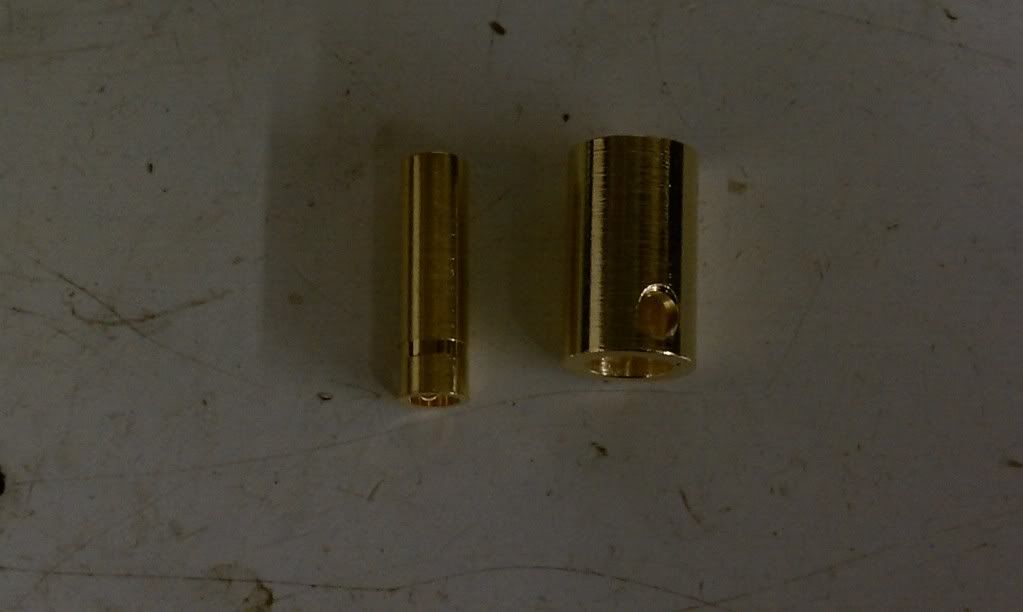 |
|
|
|
|
|
|
|
(#21)
|
|
Where are the Rocks????
Offline
Posts: 191
Join Date: Jan 2007
Location: PA
|
04.18.2011, 08:18 PM
I got the front and rear bumpers on...
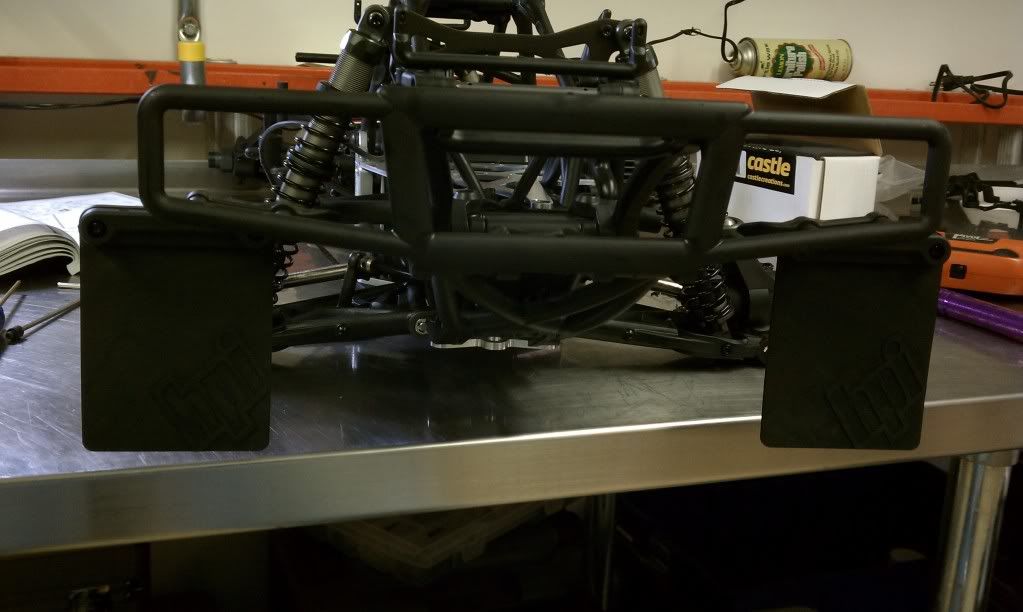 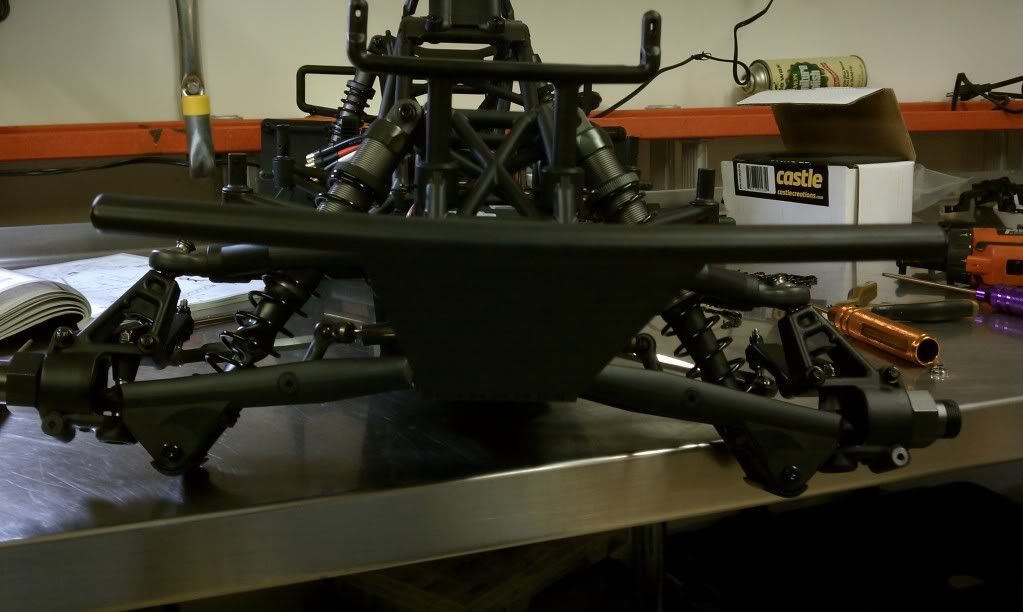 Mounted up the tires and did a dry fit of the body 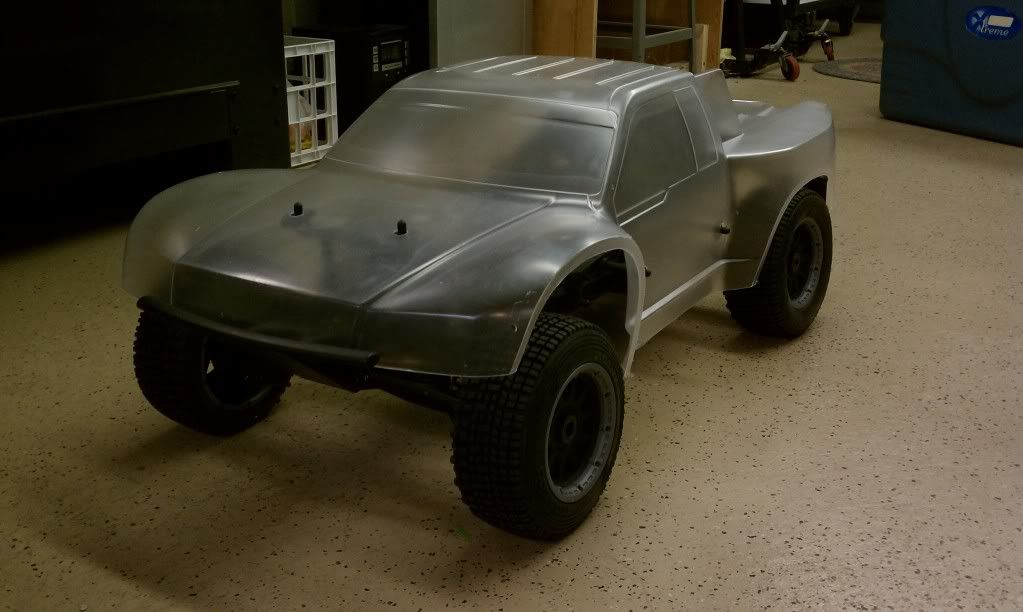 The excitement is building... |
|
|
|
|
|
|
|
(#22)
|
|
Where are the Rocks????
Offline
Posts: 191
Join Date: Jan 2007
Location: PA
|
04.18.2011, 08:29 PM
With it being nice out tonight, I figured I would shoot the body now.
ALERT!!!! If you are going to paint one of these bodies, purchase stock in Tamiya Paint before you do. I have always loved Tamiya Metallic Mica Red Ferrari. It is a Limited Edition Color. 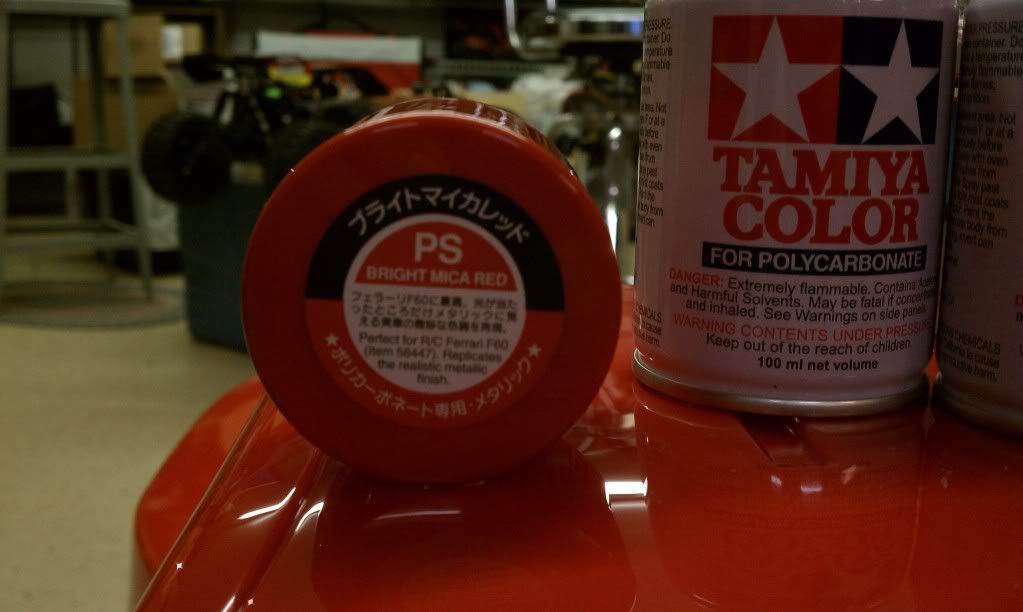 Well...3 cans of the red and 2 cans of white backer later...she is done and looks hot. 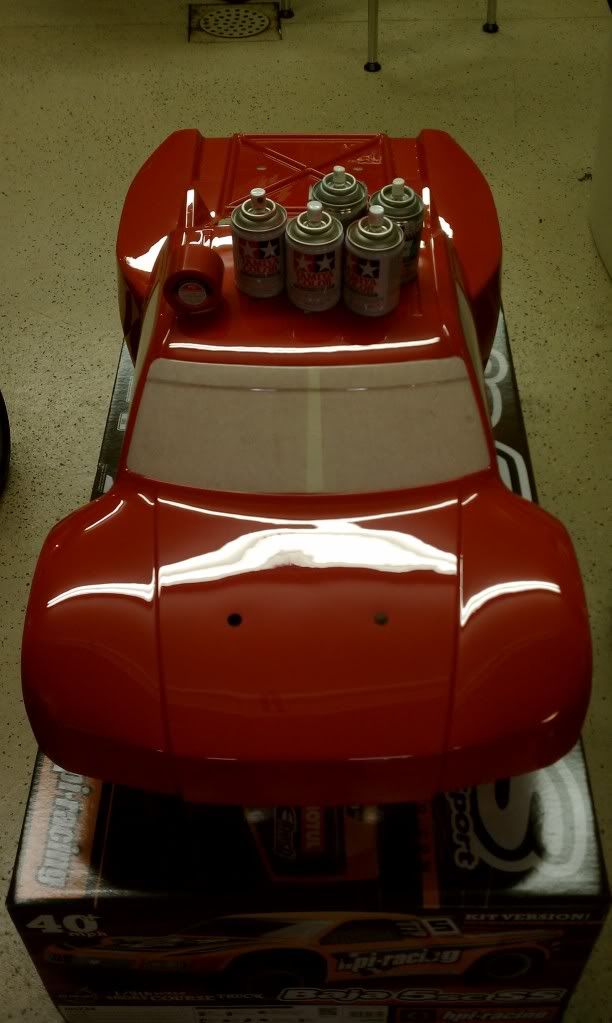 I will now let it cure for a couple days and then cover the inside of the body with Strapping Tape to ensure that it holds up and also reinforces the body from damage. I will also be laminating another piece of lexan at the mounting points to reinforce the body holes. |
|
|
|
|
|
|
|
(#23)
|
|
Where are the Rocks????
Offline
Posts: 191
Join Date: Jan 2007
Location: PA
|
04.19.2011, 10:58 AM
So I got up early this morning so I could Decal the body. This is so close to being done, I am having a hard time sleeping.
First thing to remember when applying decals...don't do it early in the morning. Now, with these decals being so big, I flashed back to when I used to do this at a buddy's body shop. First thing you need to do is cut as much of the excess backing from around the decal so you have a better vision of how it is going to set. Proceed to place it on the location that you want it to be, in this case, the hood. 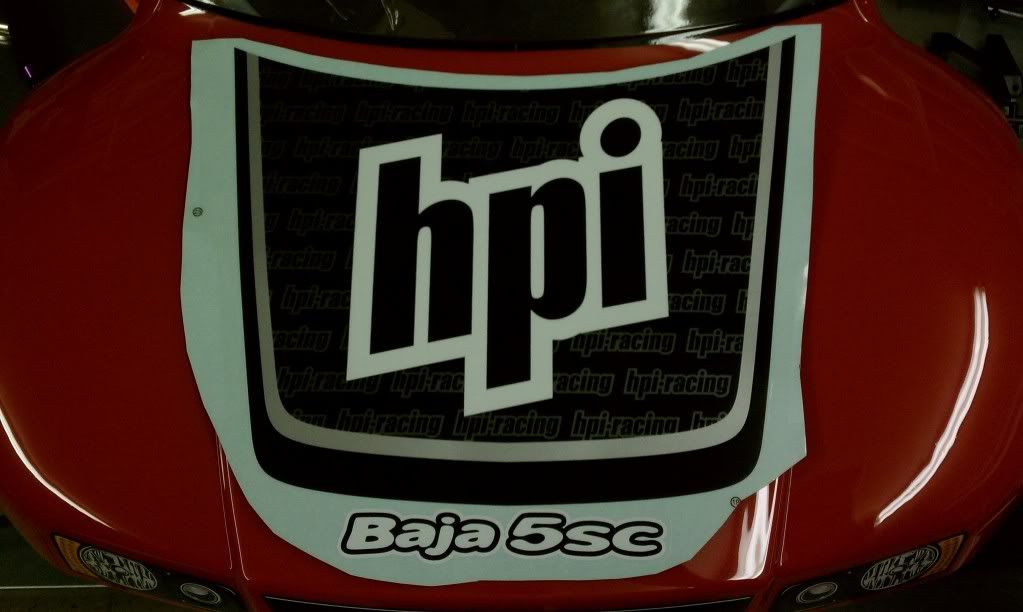 Align it by using static measuring points to ensure that it is straight. I used the same locations on the wheel wells. 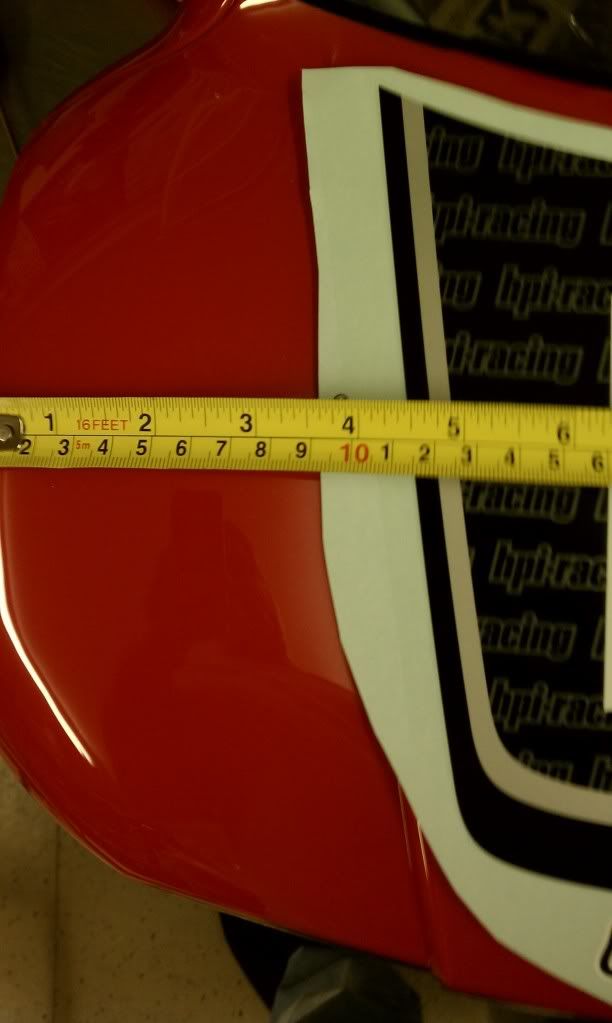 Now that you have it where you want, very carefully hold it in place and get some tape and place it down the center of the decal, making sure you overlap onto the surface that the decal is going to be applied to. 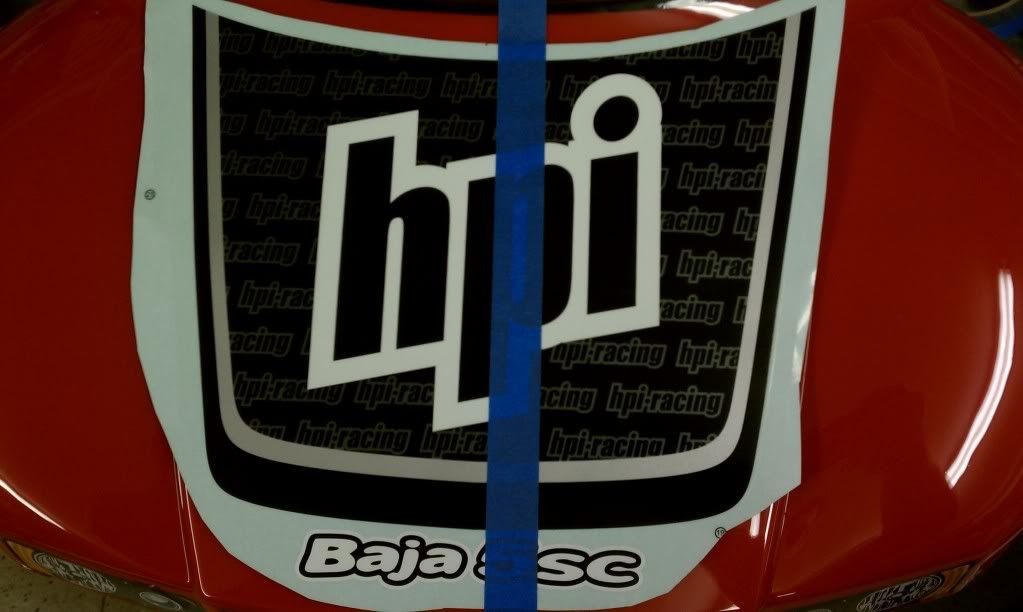 It is extremely important that you make sure that the tape is secure. Gently peel back the decal off one side. It doesn't matter which one. Peel it from the outside back to the tape and lay it over the other half. Be very careful not to crease or tear it. 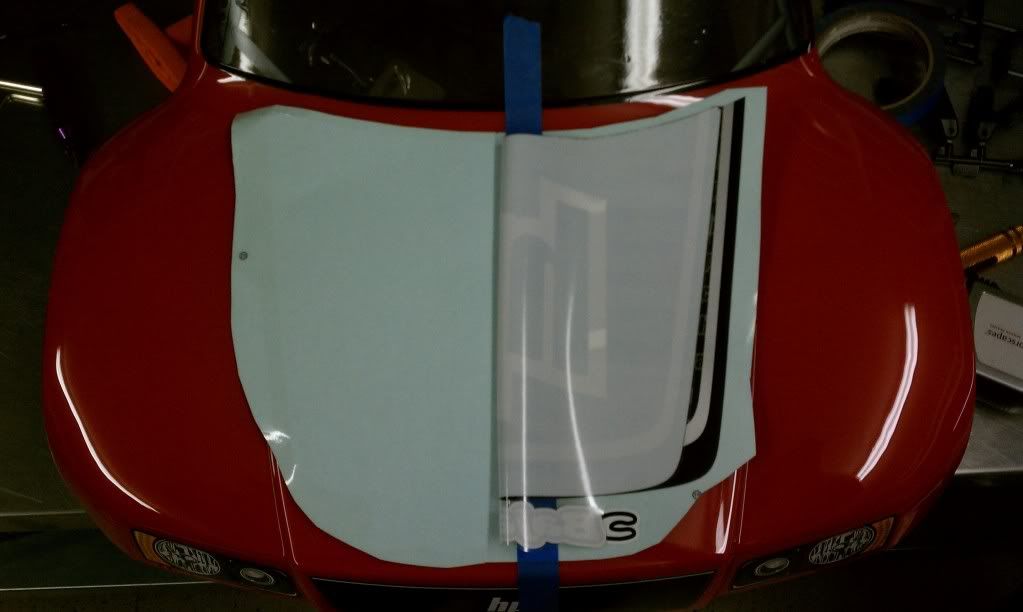 With scissors or an X-acto knife, cut the exposed backing about 3/4" from the tape. 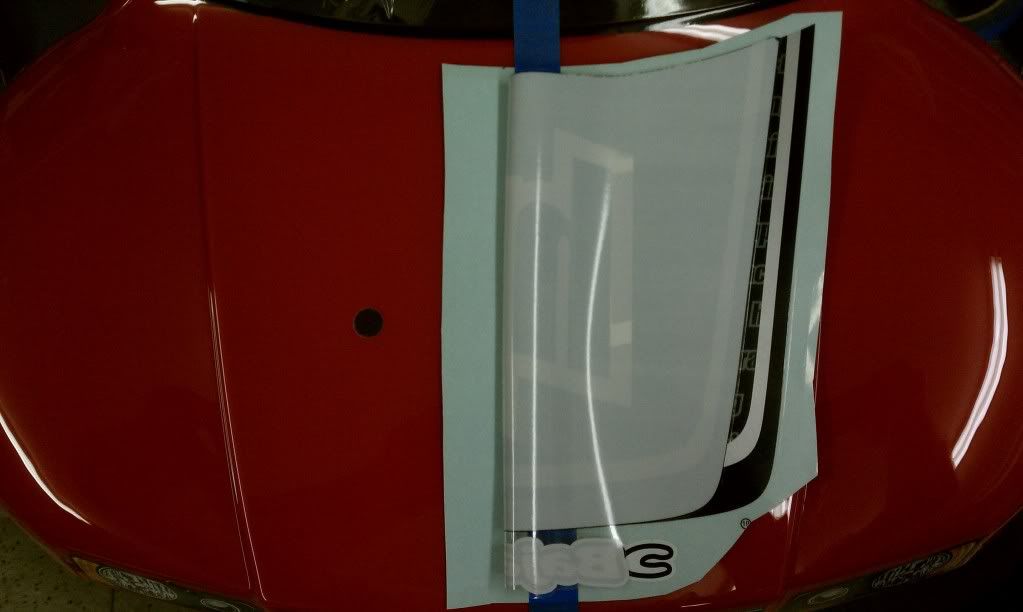 With this situation, using your left hand, hold the decal at a 45 degree angle from the surface. With your right hand (fingers), rub the decal, parallel to the tape, starting at the tape and slowly working it to the edge. Only allow enough decal with your left hand as needed. This will avoid premature adhesion.  Now with half the decal in place, you can gently remove the tape. Make sure not to pull, tear or stretch the decal. Once removed, flip the unstuck (right) side over the left side. 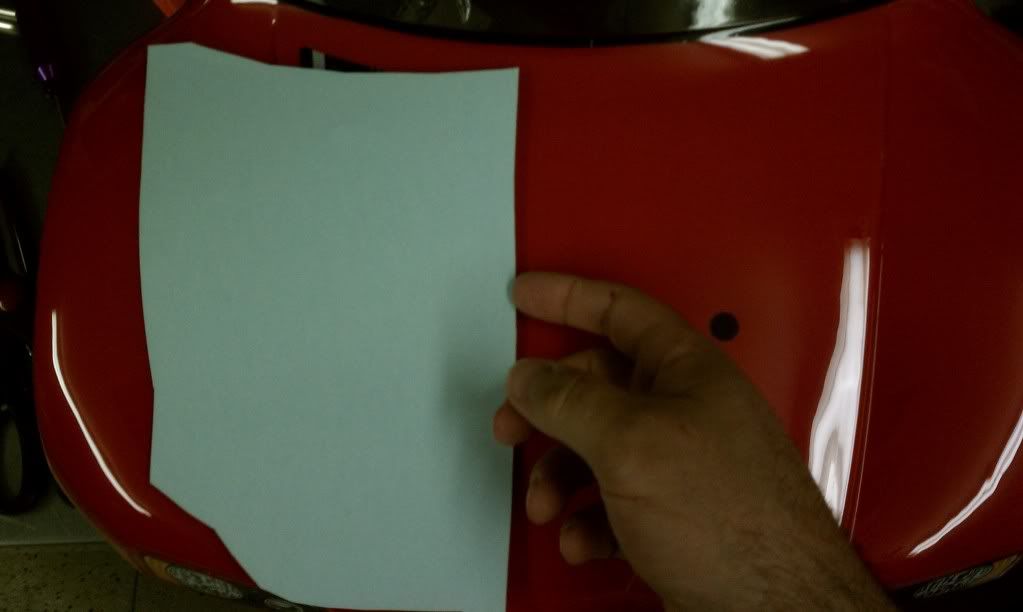 Repeating the process as you did the left side, only this time, hold the backing from the center cut. Using your "left" hand, slowly work it out to the edge until it is completely adhered. 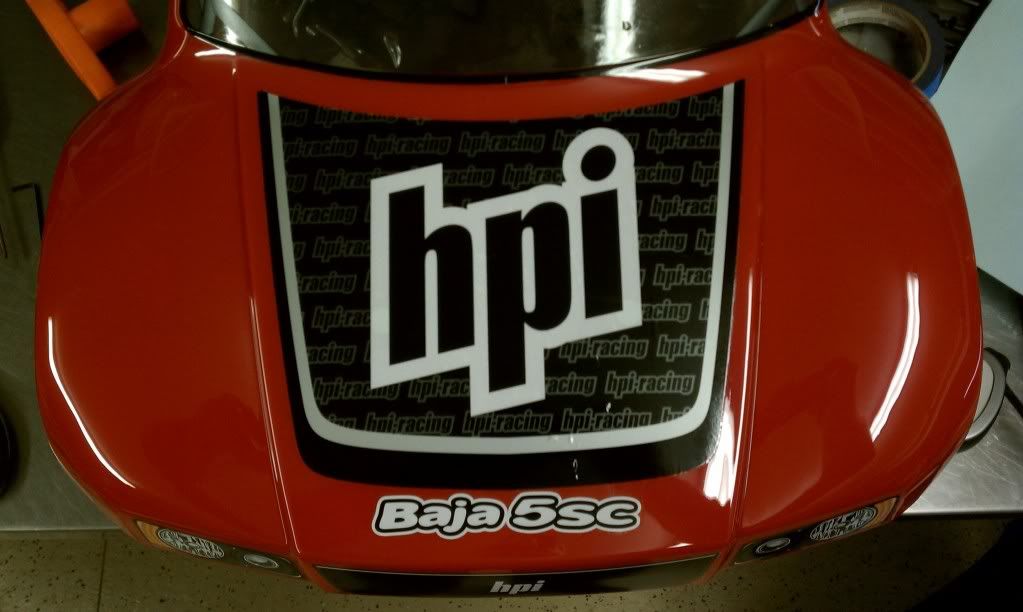 Finished product!!!! 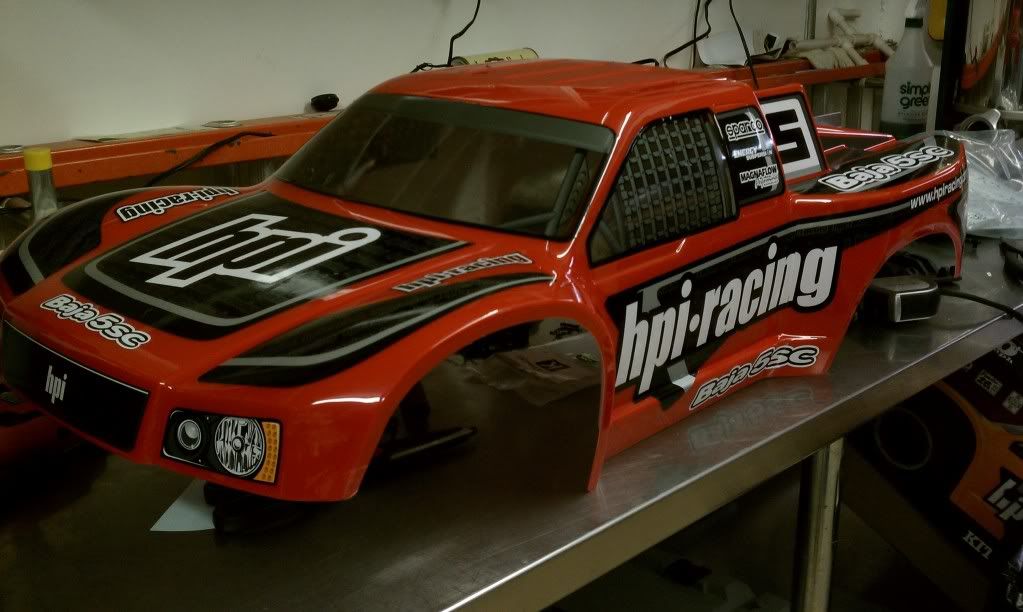 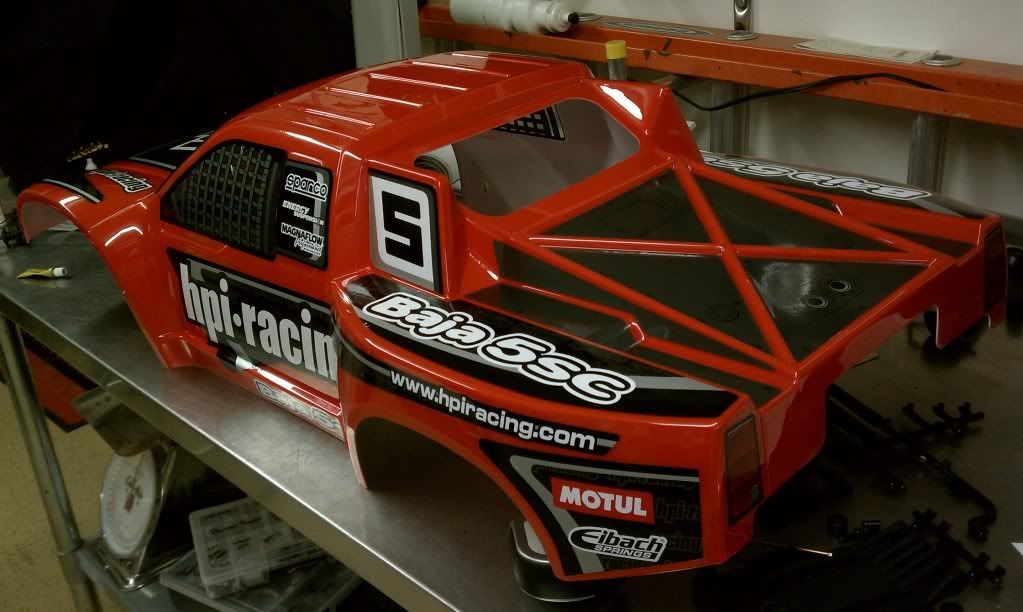 |
|
|
|
|
|
|
|
(#24)
|
|
RC-Monster Aluminum
Offline
Posts: 738
Join Date: Oct 2010
Location: Williston, ND
|
04.19.2011, 11:28 AM
that is a lot of decals...wow.
|
  |
|
|
|
|
|
(#25)
|
|
|
Where are the Rocks????
Offline
Posts: 191
Join Date: Jan 2007
Location: PA
|
04.19.2011, 11:32 AM
Quote:

|
|
|
|
|
|
|
|
|
(#26)
|
|
working on a brushless for my wheelchair.....
Offline
Posts: 4,890
Join Date: Mar 2007
Location: minnesnowta
|
04.19.2011, 12:22 PM
I see bubbles!
I'm just givin' ya crap. That is definitely a good technique for lining up decals. It looks good. Now get 8s, the "insane setup". 
It's "Dr. _paralyzed_" actually. Not like with a PhD, but Doctor like in Dr. Pepper. |
|
|
|
|
|
|
|
(#27)
|
||
|
Where are the Rocks????
Offline
Posts: 191
Join Date: Jan 2007
Location: PA
|
04.19.2011, 12:31 PM
Quote:
I sometimes will use a dish soap mixture to move them around a little but didn't here. It will be going fast enough that the bubbles won't be noticeable. Quote:

|
||
|
|
|
|
|
|
|
(#28)
|
|
RC-Monster Aluminum
Offline
Posts: 812
Join Date: Mar 2008
Location: bay area california
|
04.19.2011, 01:30 PM
man i cant wait to see this thing in action
|
|
|
|
|
|
|
|
(#29)
|
|
Where are the Rocks????
Offline
Posts: 191
Join Date: Jan 2007
Location: PA
|
04.20.2011, 09:31 AM
So I was ready to put the Team Chase Cage on and reached out to Kevin "Chase".
Now I'm not sure if he was pulling my leg being the Newbie on the site or what, but he said to soak it in a bath of hot water for 15 mins. His case made sense so I asked my wife if she could assist... :D Now this video is NWS so enter at your own risk. There is explicit bare exposure and lots of seductive moves. YouTube - Team Chase Cage Taking a bath |
|
|
|
|
|
|
|
(#30)
|
|
Where are the Rocks????
Offline
Posts: 191
Join Date: Jan 2007
Location: PA
|
04.20.2011, 09:41 AM
Now that you pigs are calmed down...lets get to the tech part of this.
I had build the 5sc to spec. Knowing that I was going to add the Team Chase Cage, I decided to do it now. First thing you need to do is remove the OEM cage. This is basically the two vertical bars and the roof support. 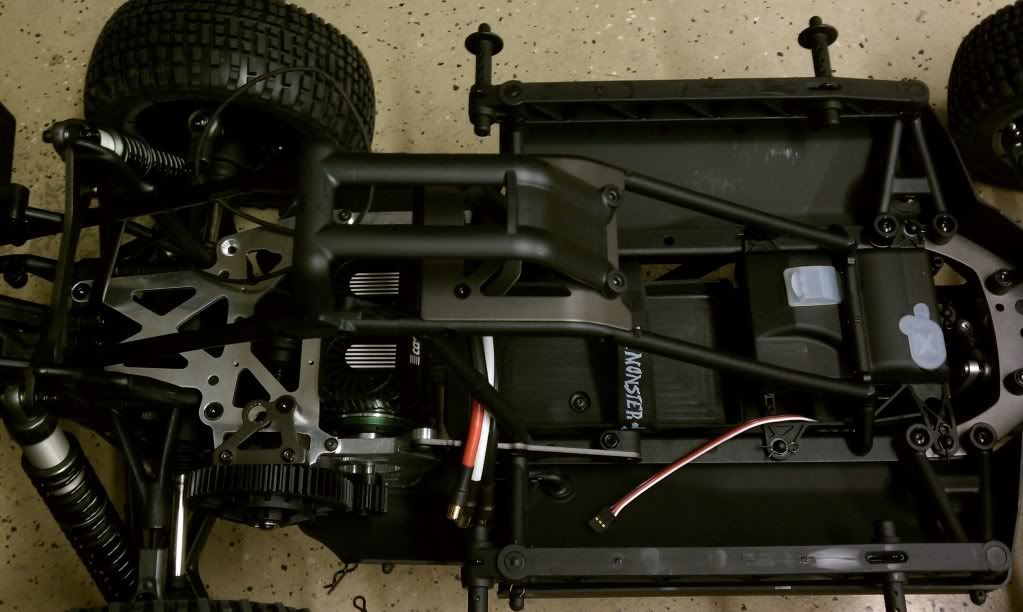 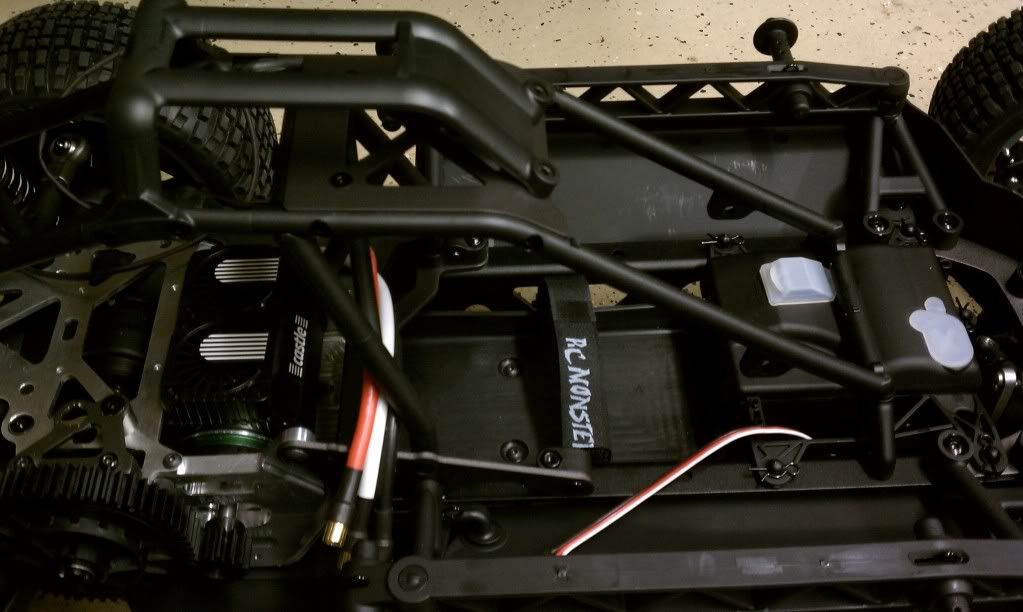 Once that is removed...it is time to give your cage a bath. Team Chase suggests that you soak it in Hot Water (Bathtub works best) for 15 mins to soften the plastic. This will give you a custom fit when it cools. While soaking, I removed the front and side body mounts. So I did that, now mind you, I dry fitted it and it was like wrestling a bear.  I then removed it from the bath and could feel that it was pliable. I quickly hit it with a towel to get the excess water and than placed it on the chassis. Wow, what a difference. I would suggest that you place it on and then secure the front Body Mounts and push the all the way down so that they are holding the cage in place. Next start adding the side mounts. These will need to be placed in the cage first and then thread them through the OEM mount. This makes it easier than trying to get through both at the same time. After than, just let it cool and you have your own custom fit Team Chase Roll Cage that will help protect your valuable body on your 5T/5SC or for a different look, add some panels to the cage and run it as a tubed rig. 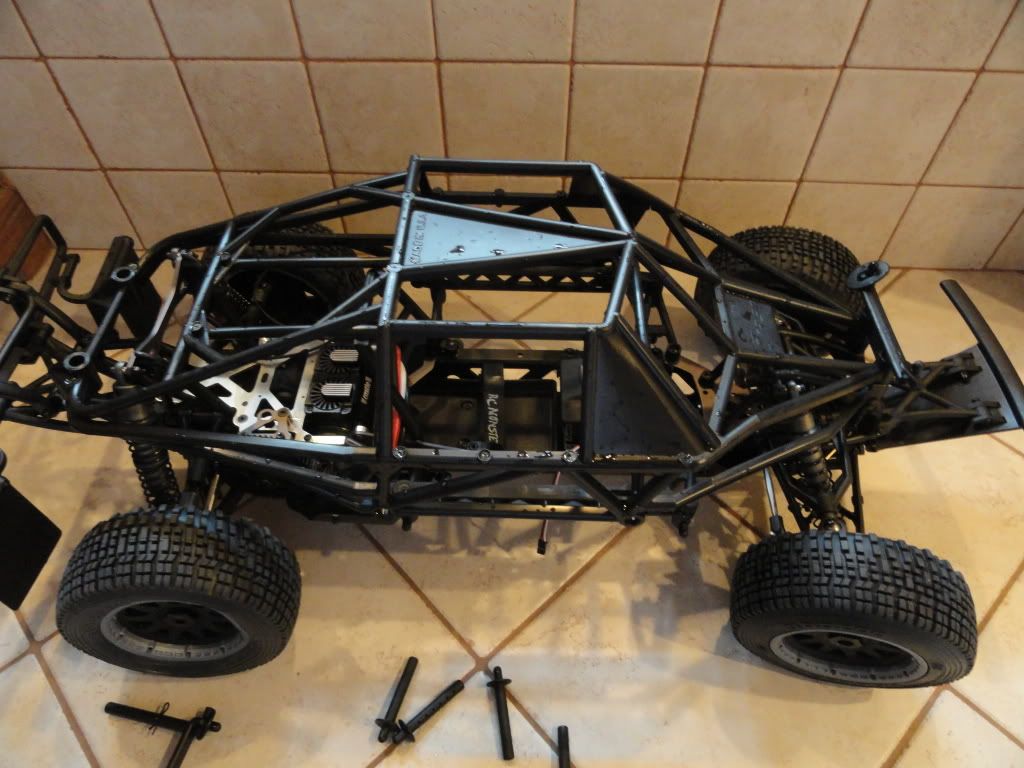
|
|
|
|
|
«
Previous Thread
|
Next Thread
»
| Currently Active Users Viewing This Thread: 1 (0 members and 1 guests) | |
 Linear Mode

|
|

Powered by vBulletin® Version 3.8.11
Copyright ©2000 - 2026, vBulletin Solutions Inc.
vBulletin Skin developed by: vBStyles.com
Copyright ©2000 - 2026, vBulletin Solutions Inc.
vBulletin Skin developed by: vBStyles.com