


|

|
(#61)
|
|
RC-Monster Titanium
Offline
Posts: 1,419
Join Date: Dec 2008
Location: Louisville, KY
|
06.04.2010, 11:36 PM
LOL You knew i didn't!!! How convient though. Too bad you learned otherwise! LOL The latest one I did paint... and I think it looks better than the professional one.
Yeah EDS, I love it! I wish you still lived in mobile like I learned on that mobile forum so I could come see it. Looks professional. I think I speak for everybody when I say that I want to see the chassis. It does look great with the body on though. You know using BB16's logic you could leave the body unpainted. |
|
|

|
|
|
|
|
(#62)
|
|
|
Guest
Posts: n/a
|
06.06.2010, 02:08 PM
Quote:
Kcaz25: I'm actually still in Mobile till the end of this month. I have to get this project done before I leave so I can ship it up to my friend in Michigan for him to put electronics in it. Thanks for the compliments. Hmm I like the idea of keeping the body clear.. the only thing is I'll be sending pictures of it to various magazines and like to see color. |
|
|
|
|

|
|
|
|
(#63)
|
|
Guest
Posts: n/a
|
06.10.2010, 05:35 PM
Small update..today I got a shipment of parts...I got:
Team Associated Rc8 Black Wing Team Associated Rc8-e motor mount Team Associated RC8 Plastic Spur 50t Team Associated Rc8 Steel Steering TurnBuckles Traxxas Screws Traxxas Slash Decals Traxxas Revo Decals Traxxas Variable Dampening Kit Traxxas Slayer Springs Double Purple Traxxas Slayer Springs Double Black 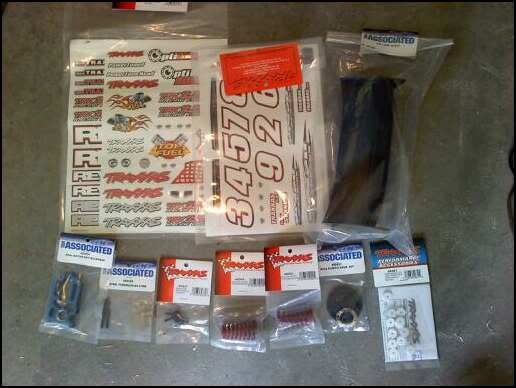 Because it was so hot today I felt like doing some de-anodizing. So I went to good will and got a $2 pot. Then went to Lowe's found some Greased Lighting. Went home poured the Greased Lightning in the pot and put all the blue parts in. I let them sit for about 20 minutes while shaking the pot everyonce in awhile. I took them out and used a high pressure water sprayer to spray them off. I learned this is a very important step because otherwise they will oxidize and turn blackish. The 17mm hubs I had bought had been thru the same process but weren't sprayed off so I re-did the process on them BEFORE 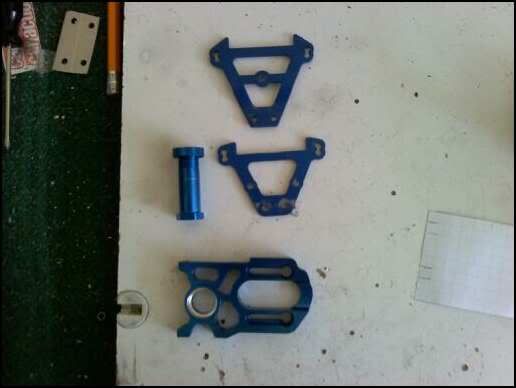 AFTER 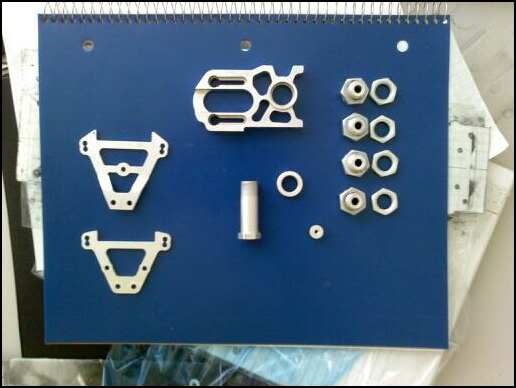 Ah thats much better. Sorry about the small pictures don't know what happened their. =/ Anyway.. The next step would be to get these Anodized red.. but I don;t have the money to get them anodized and I will also be selling this project once I'm finished I will just leave them like this. I figure silver matches red and black alot better then blue. I have been working on the battery mounts and chassis stiffeners and hope to show you guys those mounted up soon. |
|
|
|
|
|
|
|
(#64)
|
|
Guest
Posts: n/a
|
06.12.2010, 10:46 PM
With only a week till I have to take pictures of this project finished I figured it was time to get down to business. Today I spent about 3 hours in the hot garage working on the buggy. I got the chassis braces completely mounted, the front of the battery mounting system finished and mounted, and the shocks mounted on the new upper chassis. Oh and I also got the steering linkages bolted on and they fit perfectly. The front in is basically finished..I just have to fit a servo linkage and mount the servo mounts. Yesterday I worked some on the rear of the buggy so its not too far behind.
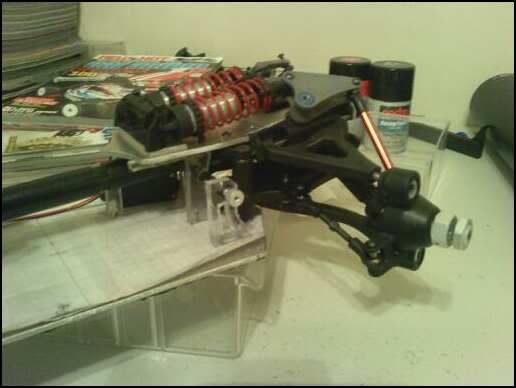 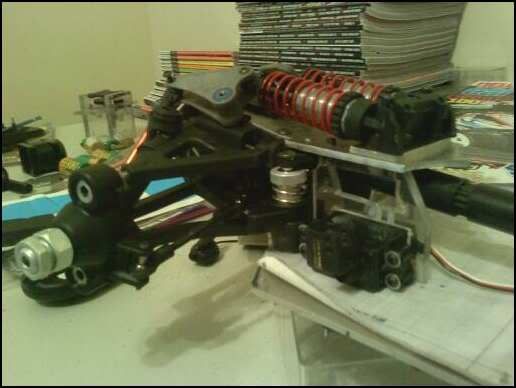 I also recieved a couple feet of matte black vinyl that I got off of ebay for cheap. I figure that I can try wrapping the chassis and upper chassis's with it to see what it looks like. I think that it will actually look good if I can do it with out all the air bubbles. I think what made my last vinyl wrap job look bad was the vinyl was shiny and had lots of air bubbles it it. So I will try again with the matte black. Just to see and if it looks good I will take the finished pictures of it with the vinyl on it. 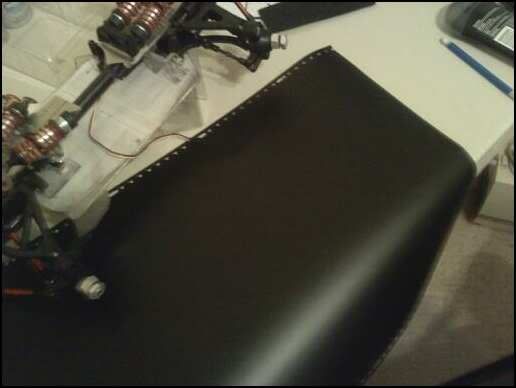 Oh and sorry about the small low quality pictures large high quality ones will be taken when I'm finished. |
|
|
|
|
|
|
|
(#65)
|
|
Guest
Posts: n/a
|
06.14.2010, 09:27 PM
Another small update....
Today I was exciting becuase I got the tires and wheels in.  I decided it would be a good day to try my 2nd chemical "experiment" so i decided to dye the rockers and wheels black to match the rest of the buggy... Before: 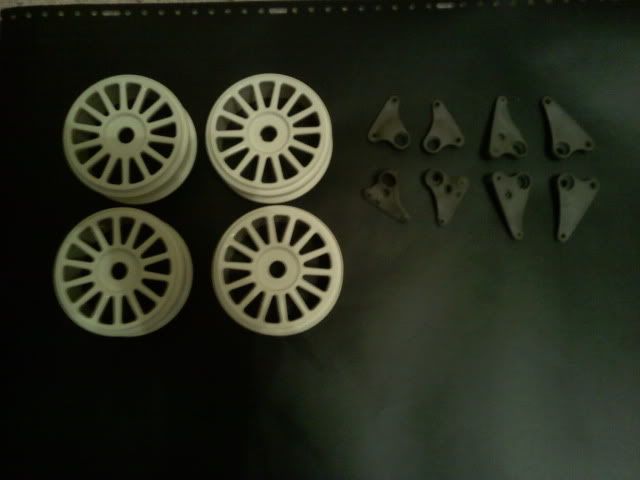 After: 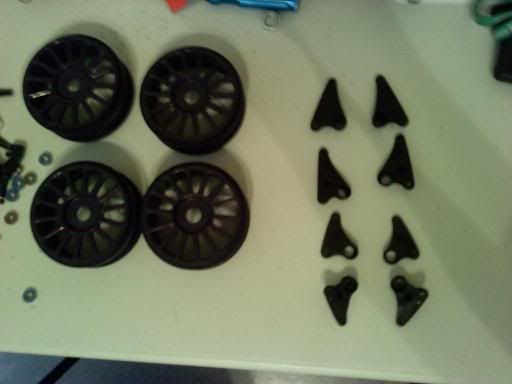 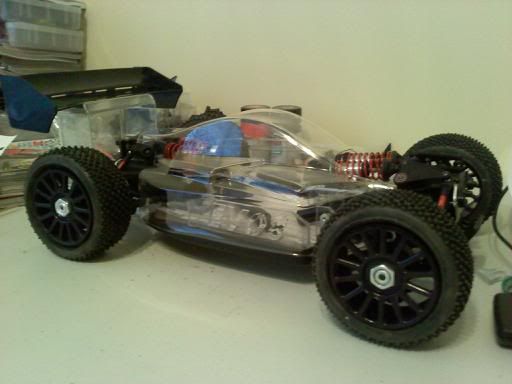 Anybody else getting excited yet?? |
|
|
|
|
|
|
|
(#66)
|
|
Im not dark, Im over ripened! xD
Offline
Posts: 5,607
Join Date: Sep 2007
Location: Westampton NJ
|
06.14.2010, 09:46 PM
I am.....to be a test driver xD
R/c Monster Team Driver Jq the car, LST, Sportweks turmoil pro Unconventional Techniques, Superior Results |
    |
|
|
|
|
|
(#67)
|
|
RC-Monster Titanium
Offline
Posts: 1,419
Join Date: Dec 2008
Location: Louisville, KY
|
06.14.2010, 09:52 PM
I'm excited! Looks great!
|
|
|
|
|
|
|
|
(#68)
|
|
Guest
Posts: n/a
|
06.16.2010, 11:47 PM
I finished the battery compartment today. It is a quick release set-up. At one end is a screw that acts as a hinge while at the other end their is a pin (screw) that I cut the top off and screwed on end into a thumb screw. You unscrew the rod using the thumb screw and then pull the pin and the battery strap can pivot upwards. On the side I decided to do some work with the scroll saw and cut out the buggie's name. I will be painting all these parts since they are lexan. Next I just have to finish up the back of the buggy and make wing mounts and body mounts. I'll be working on that stuff tomarrow and friday.
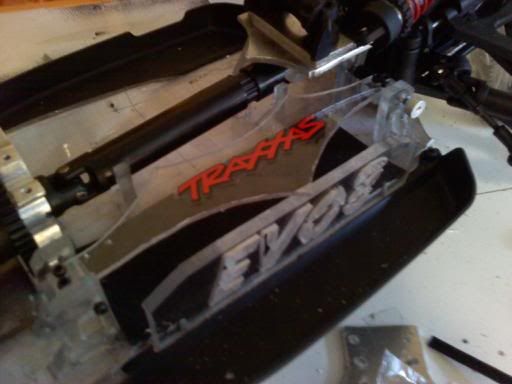 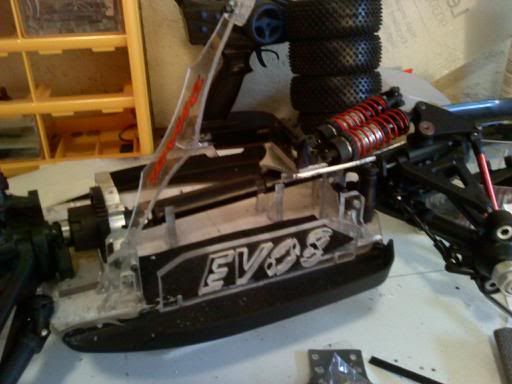 Finished pictures.....Saturday night.They will be posted on my website www.Teamkassanova.webs.com before anywhere else. |
|
|
|
|
|
|
|
(#69)
|
|
Smelly Nitro meet your maker!
Offline
Posts: 832
Join Date: Nov 2009
Location: So close to hell I see Sparks.
|
06.17.2010, 12:19 PM
This is truly an awe inspiring build, cudos.
|
|
|
|
|
|
|
|
(#70)
|
|
Guest
Posts: n/a
|
06.19.2010, 10:47 PM
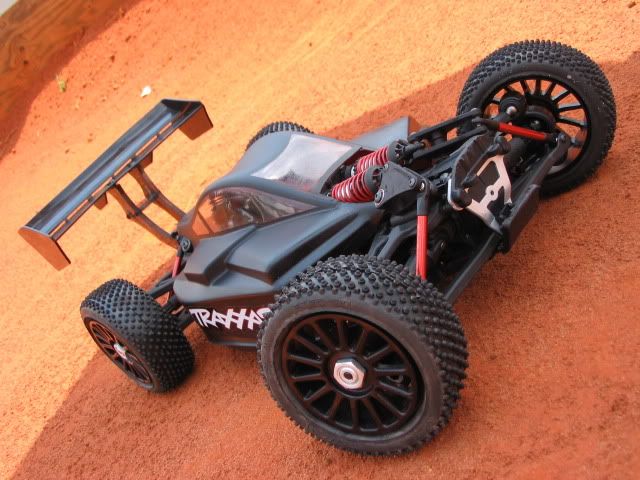
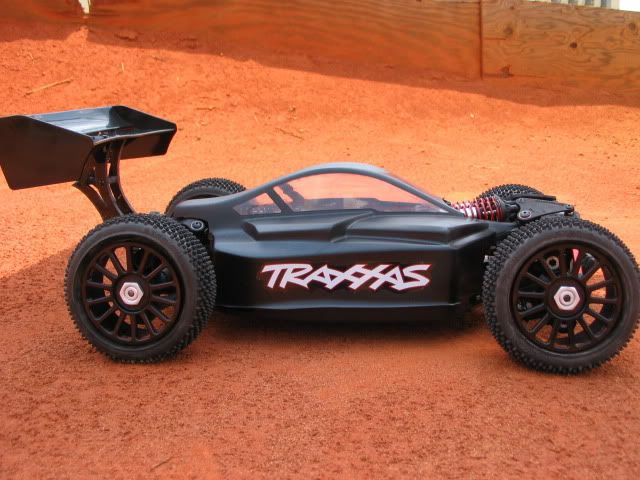
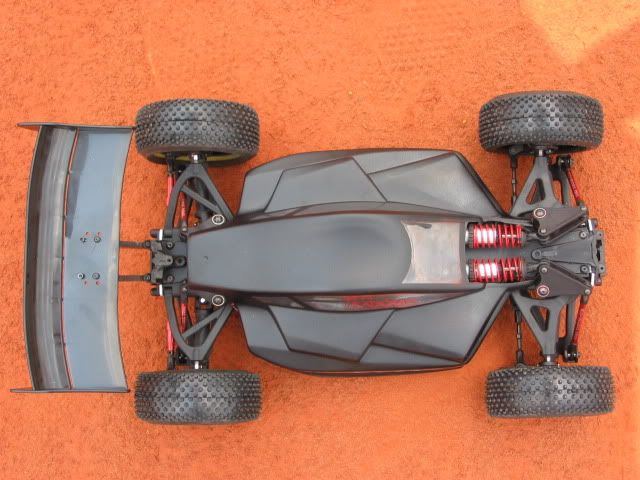
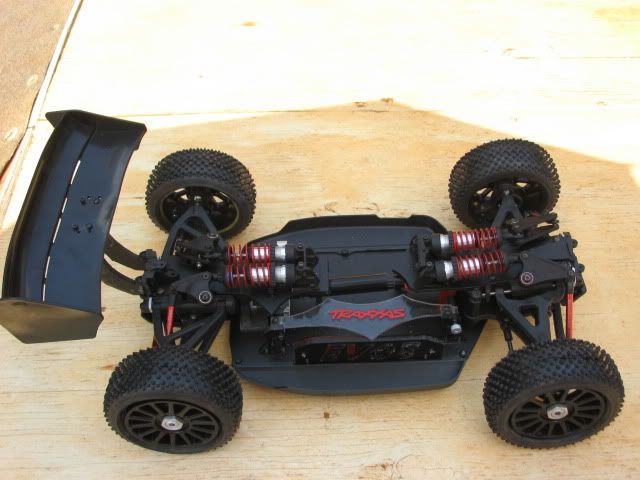
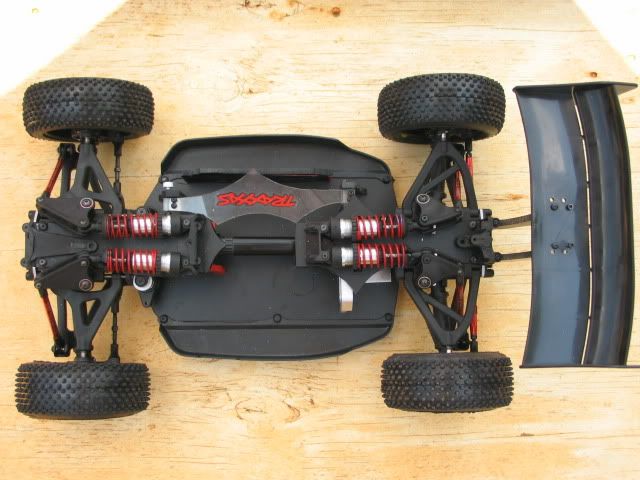
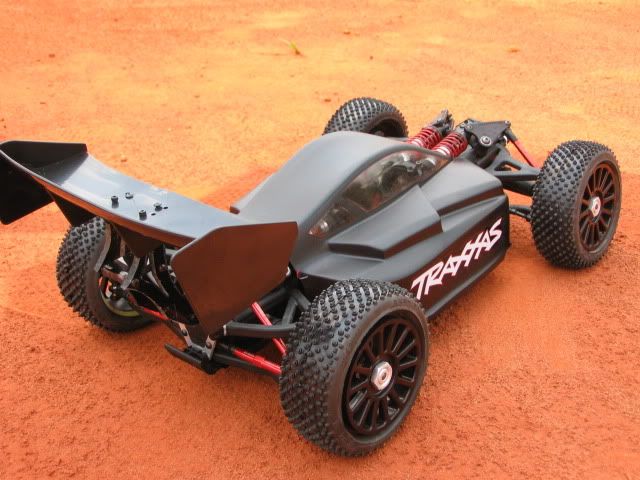
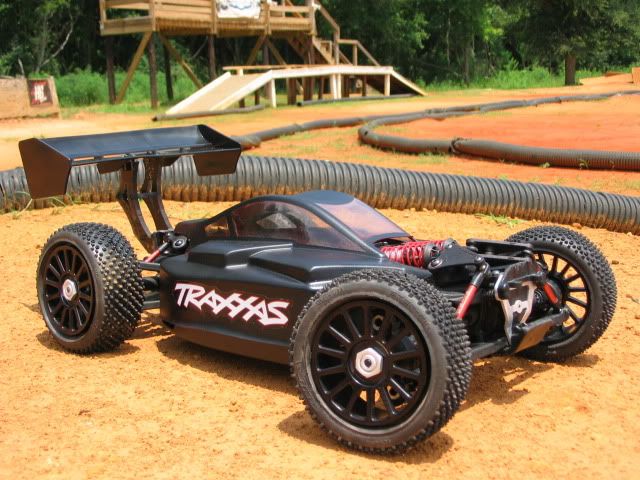
Hey guys took it to the track for a photoshoot. It was the last chance I had to get it to the track for this. The roller is pretty much done. I have a few things I have to do like mount body posts, make small adjustments, set it up correctly, and mount servo mounts. I also am having problems with the center diff spinning freely so I have to fix that tomarrow. But other than that the roller is DONE! I'm shipping this out hopefully Monday priority mail to my friend in Michigan for him to load it up with electronics.. he will take pictures of it with the electronics in it..then do some testing on the track.. I will report back with the pics and with test results.. if everything goes good he will be racing it July 10th. Also be looking for videos. Now to the pics!
       |
|
|
|
|
|
|
|
(#71)
|
||
|
RC-Monster Titanium
Offline
Posts: 1,402
Join Date: Aug 2008
Location: Twin Citys Mn
|
06.20.2010, 11:50 AM
you do understan that the rear wing greatly affects your center of gravity right, thats why we are mounting then as low as possable
other than that you need some sway bars whats the weight of your roller? Quote:
Quote:
|
||
|
|
|
|
|
|
|
(#72)
|
|
RC-Monster Aluminum
Offline
Posts: 655
Join Date: Jan 2008
Location: foothills, North Carolina
|
06.20.2010, 04:16 PM
wow! looks good! but a little funky with that wing....lol

|
|
|
|
|
|
|
|
(#73)
|
|
RC-Monster Titanium
Offline
Posts: 1,884
Join Date: Jul 2009
|
06.20.2010, 09:47 PM
Awesome and unique! Tekno sway bars should work out perfectly, check them out.
|
|
|
|
|
|
|
|
(#74)
|
|
RC-Monster Carbon Fiber
Offline
Posts: 247
Join Date: Dec 2007
|
06.21.2010, 09:41 AM
In addition to tekno sway bars, I'd condsider some sort of mud guard for the front. I can imagine that all of the exposed shock linkage would get pretty filthy and clogged with dirt quite often.
|
|
|
|
|
|
|
|
(#75)
|
|
|
Guest
Posts: n/a
|
06.21.2010, 07:11 PM
Quote:
I installed sway bars on it.. you can see them in the picture of me holding the car. I'm not sure of the weight of the roller.. Ill get a weight of it rtr though then can subtract the electronics from that number. Killajb: too late haha I shipped it out today.. Finally I'm finished with this project...well for now.. I spent all yesterday trying to figure out why the center diff wasn't turning the rear diff smoothly. I ended up having to shim it with a spacer plate I made out of a divider you would find in fishing takkle box. I also replaced the rear out put on the center diff with the stock Rc8 outdrive and epoxied a pin in the output shaft of the revo diff. This is much smoother. I just up it will hold up. Last night I stayed up till about 3:30 doing finishing touch type of stuff like counter sinking the chassis, making body mounts,installing sway bars, making a extra battery compartment part, and generally making sure everything was ready for testing. I finished everything up this morning and packed it up and took it to the post office.. Should get to my friend on thursday. I was going to insure it.. but they said if it got lost I would need a receipt to make a claim with usps. Well how the heck do you have a receipt for a custom creation??? Anyway.. took a couple last pictures of it before I sent it out.. The creator with the creation 
|
|
|
|
|
 |
«
Previous Thread
|
Next Thread
»
| Currently Active Users Viewing This Thread: 1 (0 members and 1 guests) | |
 Linear Mode

|
|

Powered by vBulletin® Version 3.8.11
Copyright ©2000 - 2026, vBulletin Solutions Inc.
vBulletin Skin developed by: vBStyles.com
Copyright ©2000 - 2026, vBulletin Solutions Inc.
vBulletin Skin developed by: vBStyles.com