


|
|

|

|
(#1)
|
|
UE Supermaxx Addict!
Offline
Posts: 1,006
Join Date: Feb 2009
Location: Gadsden, Alabama
|
06.21.2009, 11:51 PM
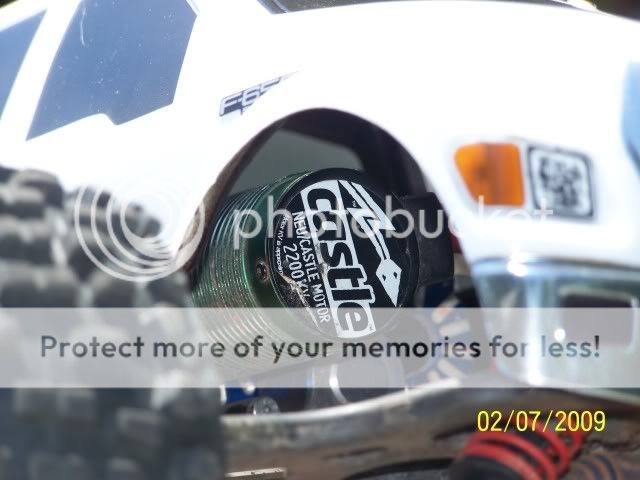
Wow! You need to clean that PC board in the WORST way!!!
PM ME IF YOU HAVE THE BELOW: VBS, CVDs, GM Single-Speed, OTB, Ultramaxxed, Super6, Strobe, Sprong, CNR Brake, UE Hex, DUH Towers, Predator, Blackbird, GA Blue Screws, HCR F/R Skids & Mutant |
 |

|
|
|
|
|
(#2)
|
|
UE Supermaxx Addict!
Offline
Posts: 1,006
Join Date: Feb 2009
Location: Gadsden, Alabama
|
06.22.2009, 03:08 AM
Hmmm...weird, that's for sure.
PM ME IF YOU HAVE THE BELOW: VBS, CVDs, GM Single-Speed, OTB, Ultramaxxed, Super6, Strobe, Sprong, CNR Brake, UE Hex, DUH Towers, Predator, Blackbird, GA Blue Screws, HCR F/R Skids & Mutant |
|
|
|
|
|
|
|
(#3)
|
|
NeuMaxx
Offline
Posts: 1,286
Join Date: May 2007
Location: Near New Orleans
|
06.22.2009, 11:12 AM
Jeesh Zack,
I miss your thread for a day and everything falls apart. First those are dual rate springs. Notice how part of the coils are father apart on the top than at the bottom where they are closer together? That is how you can tell. Second where is the flexing occuring? In the cae itself or at the attachement to the chassis? I think we have the same setup and mine does not flex. Did you hold the truck in your hand and throttle it to see what was going on? Mark |
|
|
|
|
|
|
|
(#4)
|
|
Old Skool
Offline
Posts: 7,494
Join Date: Feb 2007
Location: Devon, England
|
06.22.2009, 06:18 PM
If you wanna see a clean wiring layout, look no further than my truck:
http://i115.photobucket.com/albums/n...laMaxx/136.jpg Basically, flip your tranny around, mount the esc behind the tranny so that you have a shnort wire run, then bundle up the servo wires and tuck them down in between the servo and the rx (which will be mounted over the vacant servo slot). An rx box will help to hide excess wires to an extent yeah. Then run the rx cable along the underside of the chassis (downt hew center line more or less) and have it emerge by the esc- zipties and some cable sheeving work wonders. I would also take a look at some other FLM based trucks to see how they did it :) |
|
|
|
|
|
|
|
(#5)
|
|
|
RC-Monster Titanium
Offline
Posts: 1,419
Join Date: Dec 2008
Location: Louisville, KY
|
07.01.2009, 06:05 PM
Quote:
  So I'm just going to hit the highlights. So I'm just going to hit the highlights.Yeah Mark things get bad when you miss my thread!  This build still has a long way to go... This build still has a long way to go...  The whole case is flexing. Talked to FLM the issue is fixed. I'll be ordering one soon. Is my MMM board really that bad? How do I clean it? Is there a more durable(more dirt sealed) fan that is a drop in? I'm taking the plung, I'm getting the FLM Hybrids and HB Lightning diff to go with! What is the difference between the $62 HB lightning diffs and the $65 HB lightning Pro diffs??? On this RCM.com product page, 5 items from the bottom. |
|
|
|
|

|
|
|
|
(#6)
|
|
Old Skool
Offline
Posts: 7,494
Join Date: Feb 2007
Location: Devon, England
|
07.01.2009, 06:49 PM
The Pro diffs are truggy ratio, and lower your overall gearing quite a bit more than the Buggy ones do- not ideal as it means having to run a larger pinion/ smaller spur to get the correct overall ratio ( buggy diffs only need a pinion 1 tooth larger than if you ran stock emaxx diffs ).
To clean the MMM pcb, I would just use a can of compressed air, and an old fine paint brush to sweep away the dirt and grit. You can get better fans that are the same size (25mm square), but you have to switch the plug over with the stock one so it will plug into the MMM board. Brands elude me right now, but there are a few threads on the subject burried in the CastleCreations sub-forum... somewhere... |
|
|
|
|
|
|
|
(#7)
|
|
NeuMaxx
Offline
Posts: 1,286
Join Date: May 2007
Location: Near New Orleans
|
07.02.2009, 01:57 AM
Zack, like Neil said, get the buggy diffs. That is what I have. The truggy diffs will slow you down too much.
|
|
|
|
|
|
|
|
(#8)
|
|
RC-Monster Titanium
Offline
Posts: 1,419
Join Date: Dec 2008
Location: Louisville, KY
|
07.02.2009, 08:31 AM
Cool guys and yeah I'll look into the fan thing. Oh and my new body should be here this week or monday! I got an email saying the last shipment of bodies got stolen at UPS!!
|
|
|
|
|
|
|
|
(#9)
|
|
RC-Monster Titanium
Offline
Posts: 1,419
Join Date: Dec 2008
Location: Louisville, KY
|
07.02.2009, 07:32 PM
I'm having second thoughts on the Hybrids... What will it take to run my TRX 3.3 steel CVDs with UE Ultralite 8 spiders? Nothing? New cups? New diff outputs?
|
|
|
|
|
|
|
|
(#10)
|
|
UE Supermaxx Addict!
Offline
Posts: 1,006
Join Date: Feb 2009
Location: Gadsden, Alabama
|
07.02.2009, 09:06 PM
With 3.3 carriers everything will fit fine. With 2.5 carriers you might have to run the shorter Ofna Hyper7 diff outputs.
PM ME IF YOU HAVE THE BELOW: VBS, CVDs, GM Single-Speed, OTB, Ultramaxxed, Super6, Strobe, Sprong, CNR Brake, UE Hex, DUH Towers, Predator, Blackbird, GA Blue Screws, HCR F/R Skids & Mutant |
|
|
|
|
|
|
|
(#11)
|
|
RC-Monster Titanium
Offline
Posts: 1,419
Join Date: Dec 2008
Location: Louisville, KY
|
07.03.2009, 01:33 PM
Look at what just came in!! Proline Ford F-650, for those bigger MTs.
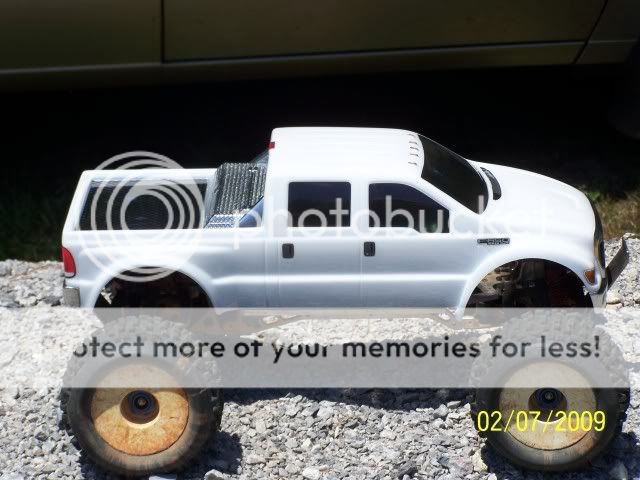   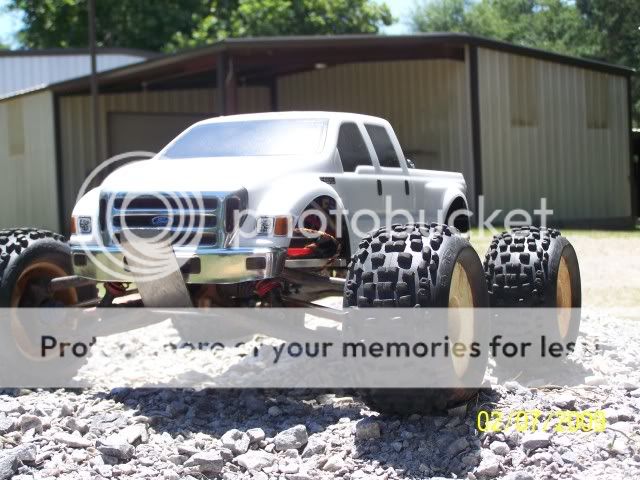    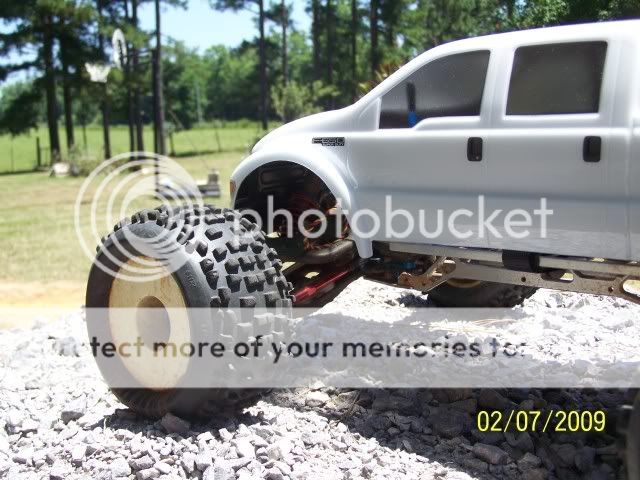   Now it looks good on the inside and on the outside!! Check out those sweet lightly tented windows! Should I put stickers on it? What is the best what to accurately cut the body post holes? Normally I just put alittle paint on the posts then set the body centered on the posts then cut the painted marks left by the painted post... Now it looks good on the inside and on the outside!! Check out those sweet lightly tented windows! Should I put stickers on it? What is the best what to accurately cut the body post holes? Normally I just put alittle paint on the posts then set the body centered on the posts then cut the painted marks left by the painted post...
|
|
|
|
|
|
|
|
(#12)
|
|
Old Skool
Offline
Posts: 7,494
Join Date: Feb 2007
Location: Devon, England
|
07.03.2009, 08:19 PM
Your method for body post placement is fine, thats what I do. Best for making the holes is to use a proper reamer, but I find starting with a 1mm drill bit, then working out to an 8-9mm bit is fone for a good finish.
Stickers is a personal taste thing, but a few of Mike's items wouldnt hurt for sure... 
|
|
|
|
|
|
|
|
(#13)
|
|
RC-Monster Aluminum
Offline
Posts: 809
Join Date: Jan 2008
Location: JAMAICA
|
07.03.2009, 11:10 PM
Wow... nice body... Loving the 'clean' white paint.
|
|
|
|
|
|
|
|
(#14)
|
||
|
RC-Monster Titanium
Offline
Posts: 1,419
Join Date: Dec 2008
Location: Louisville, KY
|
07.03.2009, 11:17 PM
Quote:
Quote:
 Thanks! I like it also! Thinking of getting another for show!  -Zack |
||
|
|
|
|
|
|
|
(#15)
|
|
RC-Monster Dual Brushless
Offline
Posts: 5,061
Join Date: Oct 2007
Location: Thousand Oaks CA
|
07.03.2009, 11:22 PM
Body looks great with the badlands.
|
  |
|
 |
«
Previous Thread
|
Next Thread
»
| Currently Active Users Viewing This Thread: 2 (0 members and 2 guests) | |

 Hybrid Mode
|
|

Powered by vBulletin® Version 3.8.11
Copyright ©2000 - 2026, vBulletin Solutions Inc.
vBulletin Skin developed by: vBStyles.com
Copyright ©2000 - 2026, vBulletin Solutions Inc.
vBulletin Skin developed by: vBStyles.com