


|

|
(#106)
|
|
Smokless Nitro
Offline
Posts: 61
Join Date: Sep 2009
Location: San Antonio, TX
|
02.27.2010, 12:18 PM
Okay, question to anyone who has this kit or Mike or jhautz. How am I supposed to mount the steering servo? On the stock chassis, its on it's side, so everything lines up perfectly. On this kit, the servo stands up and has the receiver mounting position on one side and the transponder on the other. Nice clean design, but there doesn't seem to be a way to connect the servo to the steering linkage in this manner. The connecting rod is mounted to the underside of the servo-saver arm by default, so it sits low. The servo saver arm has a captured nut for the 'screw with the ball on it', so it is only meant to be mounted one way. Even when I reversed it, which doesn't look very stable, there are still be some clearance issues on the transponder side of the board.
I took the stock mounts from the original chassis and they line up with the monster chassis perfectly. The allows me to mount the servo on its side and will work fine. BUT, now I lose the mounting positions for the transponder and receiver and unless I cut part of the aluminum brace from the original chassis, the servo mounts don't have a top-plate for support. I can take pictures if necessary. |
|
|

|
|
|
|
|
(#107)
|
|
Site Owner
Offline
Posts: 4,915
Join Date: Nov 2004
Location: PA
|
02.27.2010, 12:45 PM
If you go to the first page of this thread, you can see how Jhautz set his up with the steering linkage on the top of the servo saver arm and the bottom of the servo horn. The transponder mounts on the lower side of the plate. Instructions should be ready for download soon. :)
|
|
|
|
|
|
|
|
(#108)
|
|
Smokless Nitro
Offline
Posts: 61
Join Date: Sep 2009
Location: San Antonio, TX
|
02.27.2010, 01:46 PM
I guess I could have gone to the first page :) But that would be too easy, j/k.
Yeah, I see he flipped the ball screw (what the hell are these things called?) to the top side of the servo-saver arm. I was worried a bit about using this method since the arm was not designed to be mounted in that manner. Then again, how many conversions follow the original manufacturers rules? That is why we are here :) I do see my options now, but may still go with the stock servo lay-down method and figure out another way to mount the receiver and transponder. I could make some spacers out of scrap CF or aluminum and still be able to use the receiver/transponder plate on top of the servo. Thanks Mike. |
|
|
|
|
|
|
|
(#109)
|
|
RC-Monster Mod
Offline
Posts: 4,217
Join Date: Apr 2006
Location: Chicago, IL
|
02.27.2010, 02:00 PM
Havok,
Moving the steering servo linkage to the top of the arm works perfectly. Only downside is the the threads for the ball stud that stick out the bottom of the servo saver arm aren't long enough to reach the nylon lock inside the nut that goes on the bottom. So you need to use some threadlock on it. But it works perfect and the linkage alignment is perfect. We payed close attention to get the alignment of the llinkage in the correct position to have ideal geometry. Mike should have included a couple 3mm flat nuts in the package. take one of those nuts and thread it all the way onto the threads of the ball stud so its up against the flange on the ball stud. Then when you put the stud through the servo saver arm it will fill the gap that was intended for the nut when the linkage is installed on the bottom of the arm. Durability is not an issue. Ive been driving mine like this for almost a year and have had no problems or ill effects from it. Here is a quick picture of it flipped and installed on mine. 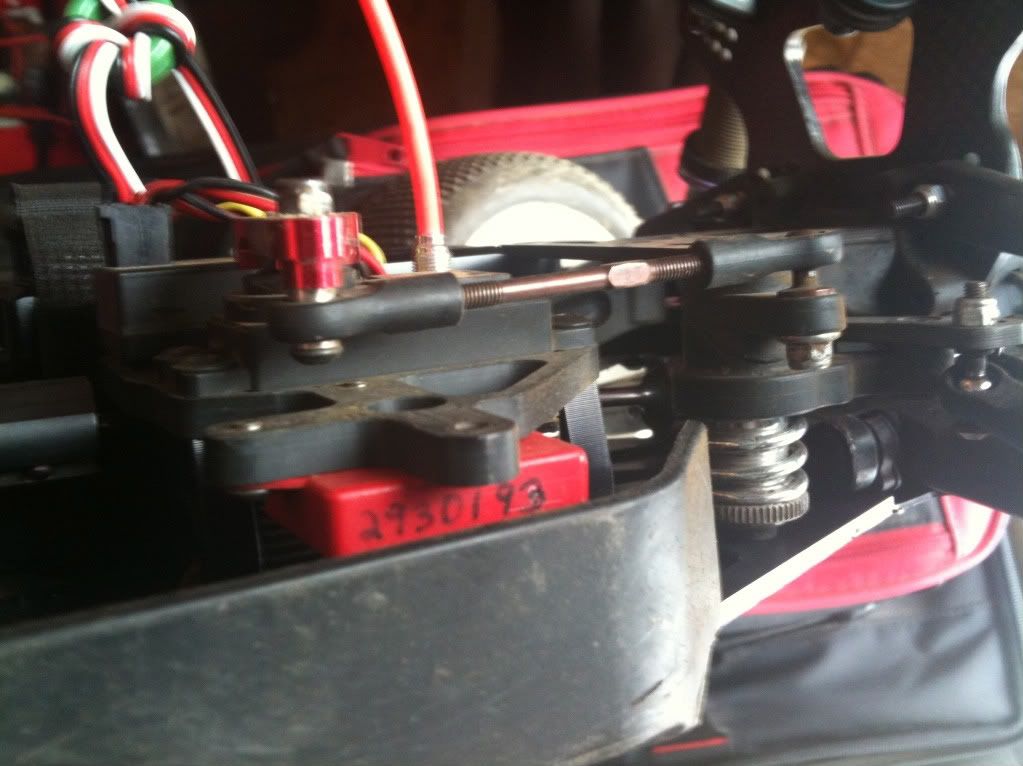 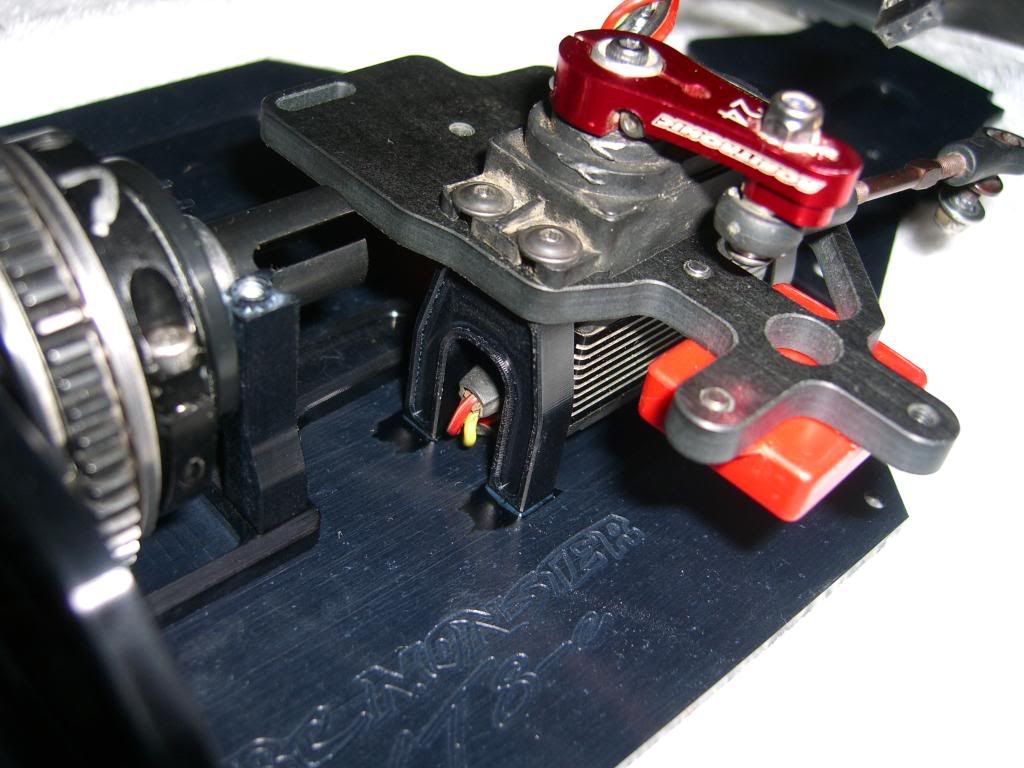 I will post up an instruction sheet on how to do this install in the next day or so to avoid any future confusion. to make it... or break it... Silent...But Deadly |
|
|
|
|
|
|
|
(#110)
|
|
Smokless Nitro
Offline
Posts: 61
Join Date: Sep 2009
Location: San Antonio, TX
|
02.27.2010, 09:45 PM
I was messing with it off and on all day. I got the servo mounting setup as you guys intended and it works great. I do need to fill the hole on the servo saver arm, that does have me concerned. I don't have 3mm flat nuts, but I may dremel out the arm so the ball stud (ahh, the name!!) fits flush. That way the nut can be threaded to the nylon portion.
I included a pic, I am not done yet, I am going to rotate and velcro the ESC and tie down all the lose wires. I still have to loctite a few things as well. Please ignore the anodized purple servo arm, I was young and needed the money :) It had been sitting in a box for 10 years, it was meant for some other 1/10th scale car. |
|
|
|
|
|
|
|
(#111)
|
|
RC-Monster Carbon Fiber
Offline
Posts: 322
Join Date: Jul 2006
Location: Brooklyn NY
|
02.27.2010, 10:55 PM
Hey guys I just purchased the xt8 conversion and also purchased a new xt8 so I can have everything I need to do the conversion, In this new run of the conversion is there anything I need to look out for
|
|
|
|
|
|
|
|
(#112)
|
|
RC-Monster Carbon Fiber
Offline
Posts: 412
Join Date: Nov 2005
Location: Monterey CA
|
02.28.2010, 12:04 AM
Whats the wheelbase on this chassis setup?
|
|
|
|
|
|
|
|
(#113)
|
|
RC-Monster Carbon Fiber
Offline
Posts: 322
Join Date: Jul 2006
Location: Brooklyn NY
|
02.28.2010, 12:28 AM
the 2008 wheelbase was 363~367mm and RCM is the 2009 spec which is 372mm
|
|
|
|
|
|
|
|
(#114)
|
|
|
Smokless Nitro
Offline
Posts: 61
Join Date: Sep 2009
Location: San Antonio, TX
|
03.01.2010, 06:30 PM
Quote:
The chassis comes pre-drilled for the CC Mamba Monster ESC and Tekin RX8. You have to purchase the eRevo mount to utilize this option for the Monster. I originally had mine mounted this way, but I found it easier to velcro and face the servo connecting wire and battery connector towards the battery tray. This gave me a little extra wire on both connectors to reach the receiver and battery. As jhautz had said: "Mike should have included a couple 3mm flat nuts in the package. take one of those nuts and thread it all the way onto the threads of the ball stud so its up against the flange on the ball stud. Then when you put the stud through the servo saver arm it will fill the gap that was intended for the nut when the linkage is installed on the bottom of the arm." I went ahead and used a 3mm nut (w/loctite) on the bottom of the ball stud as well and threw the stock nut in the spare parts drawer. The battery tray is very long, my hyperion 4S batteries have around an inch or so of space on each end if secured in the middle. I have learned on other cars that no matter how tight you make the straps, the battery is going to slide. I went ahead and put a velcro strip down in the bottom of the tray so I can mount my battery anyway I want. I can have it all the way forward, back, or in the middle with this method. Along with the included straps, the battery isn't going anywhere. All the other issues I worked out with Mike have been corrected for the later kits. I took mine to the track yesterday and had a blast. All the problems I had were related to the trucks previous owner and I corrected most of them at the track. Let me know if you have any other questions. |
|
|
|
|

|
|
|
|
(#115)
|
|
RC-Monster Carbon Fiber
Offline
Posts: 322
Join Date: Jul 2006
Location: Brooklyn NY
|
03.01.2010, 10:11 PM
Hey thanks alot havoc thanks i will keep an eye out for these things
|
|
|
|
|
|
|
|
(#116)
|
|
RC-Monster Carbon Fiber
Offline
Posts: 322
Join Date: Jul 2006
Location: Brooklyn NY
|
03.01.2010, 10:16 PM
Have you made any adjustments in the shocks the guy over at the xray forum say the shocks are sh_t did you upgrade, i am horrible at glueing tires prefer preglued i dont mind the build any place to get he tires newbie lol
|
|
|
|
|
|
|
|
(#117)
|
|
Smokless Nitro
Offline
Posts: 61
Join Date: Sep 2009
Location: San Antonio, TX
|
03.01.2010, 11:56 PM
The shocks seem to be okay after I drained/refilled them with 40wt, added the stiffer springs to the rear (dark blue) and corrected some screw-ups from the previous owner. They are the stock 2008 shocks, not the big bores or whatever comes stock on 2009 model and honestly, they seem to work really well. I don't have a great deal of drive time on this truggy yet, so time will tell.
Yeah, Xray makes some of the best buggies/truggies I have seen. There seems to be some overkill elitist on their forum who do nothing but complain about an already great product. I wouldn't take everything they say to heart. When someone can tell the difference between 35wt and 36wt in a shock or the difference a 1mm spacer makes on the spring, they are too good for me :) Give the stock shocks a shot. You can always blow the $100+ on big bores later. I hate gluing tires as well. I was given 5 full sets of truggy wheels/tires already glued when I got the truggy off of ebay, so I am set. Too bad they are all white, I like black wheels! |
|
|
|
|
|
|
|
(#118)
|
|
RC-Monster Carbon Fiber
Offline
Posts: 322
Join Date: Jul 2006
Location: Brooklyn NY
|
03.02.2010, 12:21 AM
 There is always stickers for those wheels or some paint lol There is always stickers for those wheels or some paint lol
|
|
|
|
|
|
|
|
(#119)
|
|
RC-Monster Aluminum
Offline
Posts: 516
Join Date: Jan 2008
Location: Boise, ID
|
03.02.2010, 12:44 AM
What bodies fit the XT8 09 spec? Will the MBx6t body fit? does it use the same mounting holes? I want the Bulldog body..
|
|
|
|
|
|
|
|
(#120)
|
|
Let non survive!
Offline
Posts: 56
Join Date: Jun 2007
Location: belgium
|
03.02.2010, 05:27 PM
Bulldog require lowered rear mounts.
|
|
|
|
 |
«
Previous Thread
|
Next Thread
»
| Currently Active Users Viewing This Thread: 3 (0 members and 3 guests) | |
 Linear Mode

|
|

Powered by vBulletin® Version 3.8.11
Copyright ©2000 - 2026, vBulletin Solutions Inc.
vBulletin Skin developed by: vBStyles.com
Copyright ©2000 - 2026, vBulletin Solutions Inc.
vBulletin Skin developed by: vBStyles.com