


Lucky. |

|

|
(#106)
|
|
JERRY2KONE SUPERMAXX
Offline
Posts: 3,452
Join Date: Sep 2006
Location: HAYMARKET VIRGINIA
|
Lucky. -
05.28.2008, 05:08 AM
Yea I have gotten very lucky, and mostly from reading here on RCM and researching through all of the threads. I started out with a stock E-Maxx and got the Integy hopups first. Then when I got on here and began learning what was really available I took a different path in my quest for the ultimate R/C Monster Truck. In teh engineering field you learn to search out the weak points and find a way to elimnate them. In the end giving you a product that is unbreakable ("Bulletproof"). That has been my goal. This hobby is definately not cheap by any means, but if you look steadily and keep your eyes open and don't get in too much of a hurry you can realized your goal without braking the bank. Although after just a few years I have already spent nearly $20K just getting setup for these four trucks. I just want my kids to see and feel the difference between a toy (RPM & Integy) and true quality R/C gear (UE & FLM). This hobby and this site RCM are just a blast to be a part of. I am having a lot of fun just building these trucks & reading about the experiences of our fellow RCM borthers. I am excited about getting the hang of racing some where down the line, but for now I am just learning the mechanics & electronics of the hobby and this is fun as hell for me. Thank you for shring your kind words as well Jordan. There are a lot of really good people here and I am proud to be a part of the gang. I just need to know where I can get one of those monkey butlers to clean up after me.
 
|
|
|

|
|
|
|
|
(#107)
|
|
"If you can't beat em'....shoot em'
Offline
Posts: 1,728
Join Date: Apr 2008
Location: Sunny So-Cal (Orange County)
|
05.29.2008, 12:46 AM
Good evening Jordan..
I was going through your post and had to say DDdaaammm.. Your truck is coming along GREAT!!!... I just love your updates and your comments, always make for a good educational reading.. Did I read your last post correctly your getting a WHAT????  1527???? That left me totally speechless and I'm extremely excited to see your next update.. 1527???? That left me totally speechless and I'm extremely excited to see your next update.. I'm sorry to here it going slow with Neu, but they probably still trying to find the plane to pull it off of at the local airport..
|
|
|
|
|
|
|
|
(#108)
|
|
|
one.five.two.seven
Offline
Posts: 427
Join Date: Oct 2007
|
05.29.2008, 02:27 AM
Quote:
thanks for the kind words Shaun!! Yep, you heard right 1527/1D (2300kv) should run NICE on 6s.Last night i sent a half angry e-mail to Neu how they had already charged my card and weren't updating me with progress and not replying to my emails blah blah blah..., and what do you know, i had a reply first thing this morning waiting in my inbox. Said they had a meeting yesterday about old orders and mine should ship by the end of the week hmmm... they took this long with no reply, and now can have it done in a couple of days...  anyway, more updates to come when i get the motor jordan |
|
|
|
|

|
|
|
|
(#109)
|
|
"If you can't beat em'....shoot em'
Offline
Posts: 1,728
Join Date: Apr 2008
Location: Sunny So-Cal (Orange County)
|
05.30.2008, 01:39 AM
I'm totally looking forward to your next post Jordan.. I've never seen a motor that big!!..
Question for you Sir, why only 6s?? Why not two 5s in series totaling 10s?? I'm assuming it's the ESC holding you back?? Again / regardless thanks for the great update and I'm stocked for you that Neu finally returned your email.. Have a great one and thanks for your time.. Shaun. |
|
|
|
|
|
|
|
(#110)
|
|
one.five.two.seven
Offline
Posts: 427
Join Date: Oct 2007
|
05.30.2008, 02:15 AM
hi shaun,
i pretty much chose the motor knowing i would be running on 6s, hence the 2300kv. Thats roughly 51k rpms, which is getting closer to the 60k limit Neu puts on their motors, but still leaves a nice margin under it. Now 10s, that would be insane, 85k rpms  , i think the motor would fry after a little while. If i was planning on running more voltage i would have got a little lower kv motor. , i think the motor would fry after a little while. If i was planning on running more voltage i would have got a little lower kv motor. Probably the most limiting factor apart from the ESC would be cost, don't really have an extra $500 to spend on lipos... oh yeah, not to mention all the replacement parts i would have to buy, tires, diffs, drive shafts, spurs, pinions... I'm broke as it is!!!
|
|
|
|
Really??? |
|
|
|
(#111)
|
|
JERRY2KONE SUPERMAXX
Offline
Posts: 3,452
Join Date: Sep 2006
Location: HAYMARKET VIRGINIA
|
Really??? -
05.30.2008, 04:25 AM
Ahh come on Jordan we are never broke. We are only waiting for our next check or windfall for purchasing the new items on our never ending R/C list. It is just like looking at a new car like the Dodge Viper knowing how badly we would love to dirve it to and from work every day. Except that with R/C the cost can be broken up in little hits from week to week and eventually acqiring whatever it is we hope to build, and finally completing the project. BROKE?? NEVER!!!!
|
|
|
|
|
|
|
|
(#112)
|
|
"If you can't beat em'....shoot em'
Offline
Posts: 1,728
Join Date: Apr 2008
Location: Sunny So-Cal (Orange County)
|
06.10.2008, 12:11 AM
Hay Jordan!!!
Any updates??? Hows that new (BAD BOY) motor working out for you??.  Let me guess you got your truck airborne over a jump and it now flying over the Atlantic ocean right??. Let me guess you got your truck airborne over a jump and it now flying over the Atlantic ocean right??.
|
|
|
|
|
|
|
|
(#113)
|
|
one.five.two.seven
Offline
Posts: 427
Join Date: Oct 2007
|
06.11.2008, 11:31 PM
sorry, no updates just yet. I contacted Neu the week before last and they said the motor would be shipped 'end of the week to beginning of next week'. Contacted them again last week and they said the same thing... Have not heard anything since so im going to write another e-mail today
i have been toying around with other CD positions though, but i haven't really achieved anything yet  updates to come as soon as i get this dang motor!! |
|
|
|
|
|
|
|
(#114)
|
|
"If you can't beat em'....shoot em'
Offline
Posts: 1,728
Join Date: Apr 2008
Location: Sunny So-Cal (Orange County)
|
06.12.2008, 02:45 AM
That SUCKS..... I'm sorry you keep getting the runaround from Neu..
|
|
|
|
|
|
|
|
(#115)
|
|
one.five.two.seven
Offline
Posts: 427
Join Date: Oct 2007
|
07.03.2008, 01:46 AM
Hi guys,
Its been a LONG while since the last update, but i finally recieved the motor today. Its an absolute monster  Instead of the fan being mounted on the endbell like the heli motors on Neu's website, its mounted on the front of the motor, like the LMT forced air motors. Honestly i like it better this way as it doesn't make the motor any 'fatter,' just longer by about 0.5 inches. Instead of the fan being mounted on the endbell like the heli motors on Neu's website, its mounted on the front of the motor, like the LMT forced air motors. Honestly i like it better this way as it doesn't make the motor any 'fatter,' just longer by about 0.5 inches.Anyway, here are the pics so you can see for yourselves  : :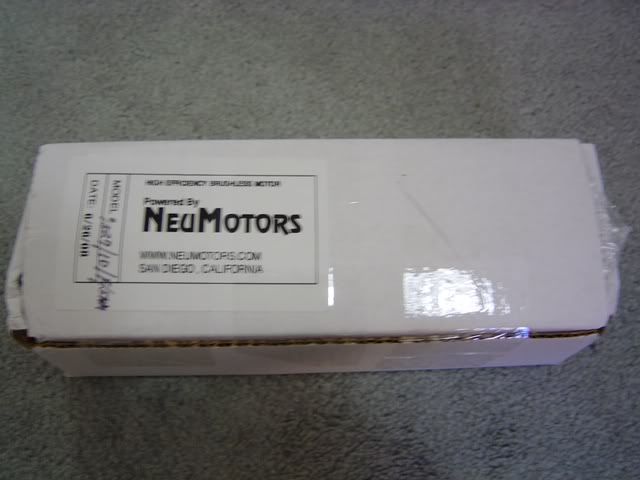  Here you can see the fan:  And i thought i'd throw in a nice comparison shot for you guys:  I've ordered a XB808 centre diff, because it comes with a 42t spur, so when that gets here i'll get to work on mounting the CD and motor on the truck. I'm working on some tricks with the centre diff position at the moment, and i'll post a full 'how to' when everythings done. Enjoy!!!! jordan |
|
|
|
|
|
|
|
(#116)
|
|
Check out my huge box!
Offline
Posts: 11,935
Join Date: Aug 2007
Location: Slidell, LA
|
07.03.2008, 02:25 AM
Jesus....
|
|
|
|
|
|
|
|
(#117)
|
|
RC-Monster Aluminum
Offline
Posts: 554
Join Date: Jan 2007
Location: Singapore
|
07.03.2008, 05:09 AM
The truck is Awesome but I gotta say...this motor is HUGE!!!
|
|
|
|
crappppppp |
|
|
|
(#118)
|
|
JERRY2KONE SUPERMAXX
Offline
Posts: 3,452
Join Date: Sep 2006
Location: HAYMARKET VIRGINIA
|
crappppppp -
07.03.2008, 06:32 AM
HOLY CRAPP BATMAN. Just looking at that thing is incredible. You could push quite a bit of weight with that monster. I shutter to think how hard it will be to control such power in that truck. With the right setup you should be able to achieve some pretty high speeds with that thing. If you do go for speed you are going to have to really think about your entire setup, like taping your tires and using beadlocks rims to keep them from flying apart. Your drivetrain should hoold up nicely. WOW that thing is amazing. Good luck with that Jordon.
|
|
|
|
|
|
|
|
(#119)
|
|
one.five.two.seven
Offline
Posts: 427
Join Date: Oct 2007
|
07.03.2008, 08:36 AM
Thanks alot guys, i can't wait to get this installed and ready to go.
Thanks for the tips Jerry, i've already got the tyres taped with multiple layers of duct tape , hopefully the superglue holds up At the moment, im thinking the most important thing to running this motor will be the ESC setttings just right, but we'll have to see i guess...
|
|
|
|
 |
«
Previous Thread
|
Next Thread
»
| Currently Active Users Viewing This Thread: 1 (0 members and 1 guests) | |
 Linear Mode

|
|

Powered by vBulletin® Version 3.8.11
Copyright ©2000 - 2026, vBulletin Solutions Inc.
vBulletin Skin developed by: vBStyles.com
Copyright ©2000 - 2026, vBulletin Solutions Inc.
vBulletin Skin developed by: vBStyles.com