


|

|
(#31)
|
|
Old Skool
Offline
Posts: 7,494
Join Date: Feb 2007
Location: Devon, England
|
01.20.2010, 03:01 PM
Heh, Im having flashbacks to how the suspension on my old Madbull used to work kinda. Looking great so far, but do you know what occured to me- when you pop the hood and see the motor sitting where there should be an engine, you should fit the CCblower ( if it'll fit ) to the motor to give it that bigblock engine touch.

|
|
|

|
|
|
|
|
(#32)
|
|
RC-Monster Carbon Fiber
Offline
Posts: 209
Join Date: Sep 2008
|
01.20.2010, 03:12 PM
haha! I don't think it fits the larger can size though?
I've been searching and searching for a 1/8th size model engine so I could build that, hollow out the middle and put it over the 1717 like a cover. This would also mean the motor has to run cool. Another idea I had was to make a fake radiator out of styrene but to put an operational fan and shroud on the backside which would technically be functional 
|
|
|
|
|
|
|
|
(#33)
|
|
Old Skool
Offline
Posts: 7,494
Join Date: Feb 2007
Location: Devon, England
|
01.20.2010, 04:02 PM
Ah yes, you're using the 1717, not a 15xx. Hmm, tricky one. Whenever I think of motor cooling I always keep looking at this. Completely daft and impractical, but big blowers just look epic. In your case, maybe a homebrew blower shroud is in order- all it is basically is a tube with the bottom 1/3 removed, and a square hole in the top for the fan to mount over/into. So long as its a tight fit around the motor ( pvc, or maybe even copper tube? ) the air has no choice but to be forced down around the motor through the fins, just like the normal blower, then add some details perhaps to make it look a bit nicer....
|
|
|
|
|
|
|
|
(#34)
|
|
Guest
Posts: n/a
|
01.21.2010, 08:07 AM
technically you could still call this a scale build even with the castle under the hood,just say its the prototype for a "green" prerunner LOL! great build,i've never seen a build built so to scale!--josh
|
|
|
|
|
|
|
|
(#35)
|
|
RC-Monster Carbon Fiber
Offline
Posts: 209
Join Date: Sep 2008
|
01.24.2010, 10:37 PM
Not the progress I was hoping to make but having a 3 month old at home will do that I suppose
Radius arm brackets and beam brackets are brazed on. Changed the caster on the beams so they're sitting correctly. Was hoping to get the shock mounts done but that's going to take some more work. I need to swap around the links that adjust the axle C's caster so that I have room for the shock to mount to the beam. The shocks can mount up now but I can't lean them back for the proper angle. Going to pack it all up tomorrow and take it into work to try and get the shock mounts bent up. Here's the full stuff now. I could get more if I change around some clearance on the beams. The beam mount contacts it and keeps it from being able to go all the way up to the frame. 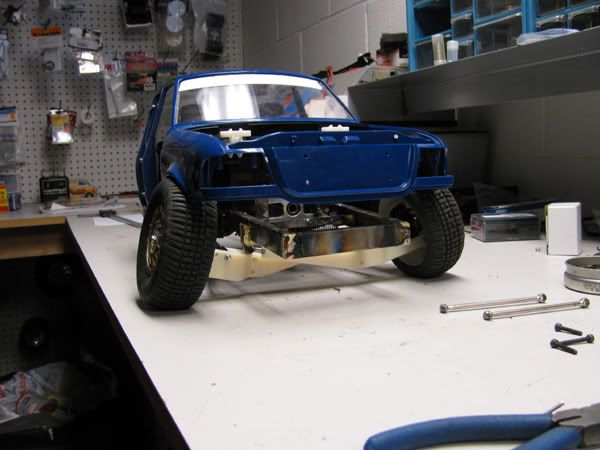 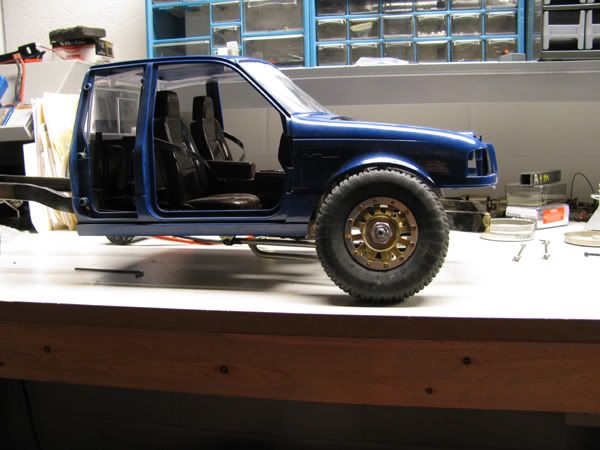 Won't know how much actual drop out it has until the shocks are mounted up but it's capable of a lot! 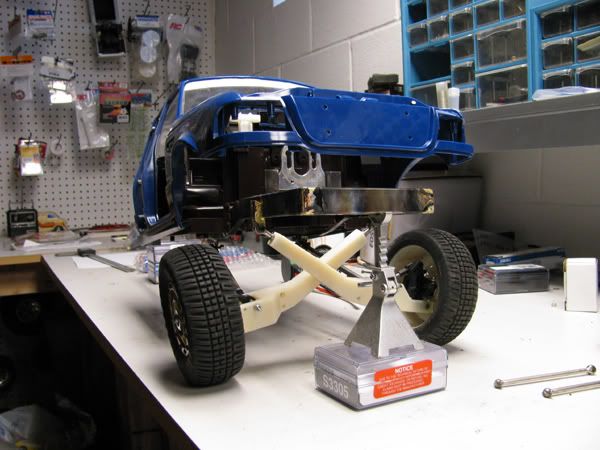 
|
|
|
|
|
|
|
|
(#36)
|
|
RC-Monster Stainless Steel
Offline
Posts: 240
Join Date: Sep 2008
Location: xyz
|
01.24.2010, 10:57 PM
nice progress and very much to scale. i think you should bend the frame rails up further behind the cab or do a completely tubular cab cage because your axle seems like it will make contact with the frame rails before full compression. just my 2 cents
-mikey09120
|
|
|
|
|
|
|
|
(#37)
|
|
|
RC-Monster Carbon Fiber
Offline
Posts: 209
Join Date: Sep 2008
|
01.25.2010, 12:18 AM
Quote:
|
|
|
|
|

|
|
|
|
(#38)
|
|
Check out my huge box!
Offline
Posts: 11,935
Join Date: Aug 2007
Location: Slidell, LA
|
01.25.2010, 12:47 AM
Looking good Nick, I really dig the TTB setup you are making. Will the next one(?) have a diff in one of the TTBs and 4wd...that would be too cool!
|
|
|
|
|
|
|
|
(#39)
|
|
|
RC-Monster Carbon Fiber
Offline
Posts: 209
Join Date: Sep 2008
|
01.25.2010, 09:35 AM
Quote:
|
|
|
|
|
|
|
|
|
(#40)
|
|
Guest
Posts: n/a
|
01.27.2010, 09:24 AM
where did you get the body ? and great job cant wait to see this thing run !
|
|
|
|
|
|
|
|
(#41)
|
|
RC-Monster Carbon Fiber
Offline
Posts: 209
Join Date: Sep 2008
|
01.27.2010, 09:59 AM
I got the body used off another RC forum. You can find them on ebay sometimes.
|
|
|
|
|
|
|
|
(#42)
|
|
RC-Monster Carbon Fiber
Offline
Posts: 209
Join Date: Sep 2008
|
01.28.2010, 12:54 AM
The front end is finally sitting on it's own! The springs are surprisingly close to the right rate too.
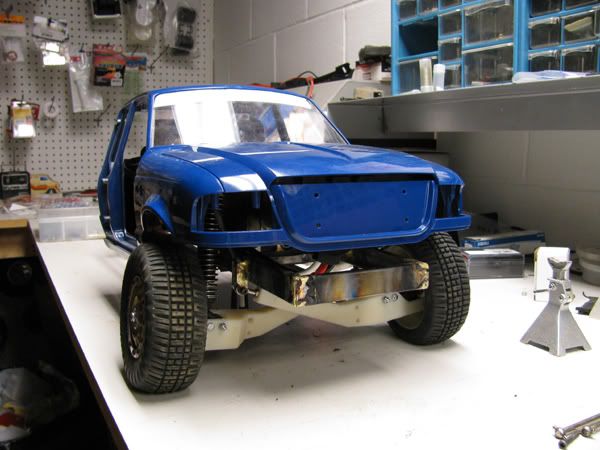 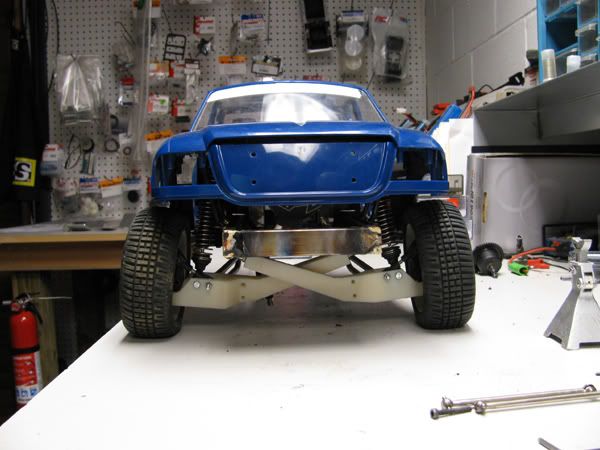  It has a bit more up travel than this 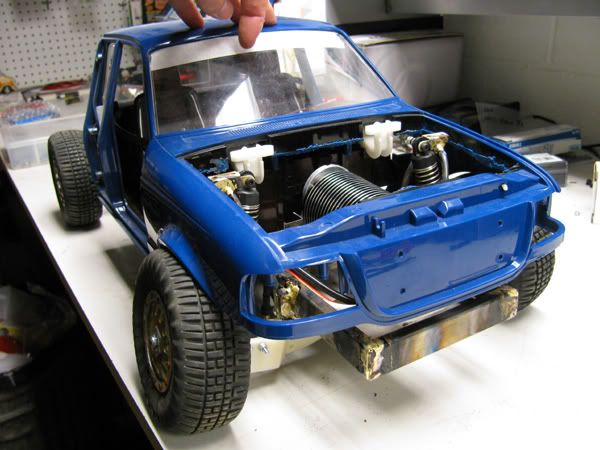 Lots of drop out! 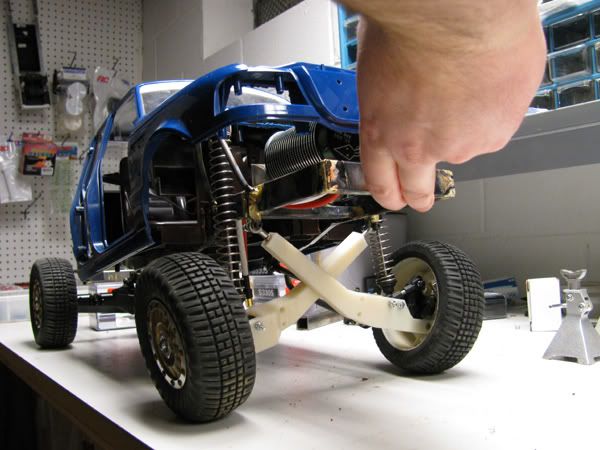 And a naked shot 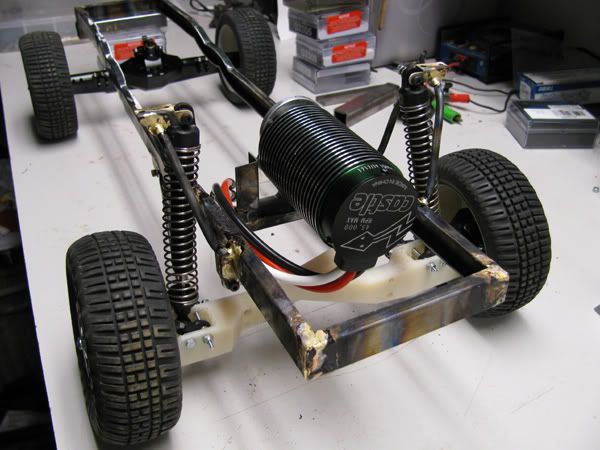 Everything went together good. Driver side spring on the shock grazes the beam mount on the frame rail. Not sure if I'll let that go or maybe smooth out the mount a bit. Didn't get a chance to do the cross bar for the mounts. I think I'll get the body mounted now that way I have a good working point for placing the rear axle. Then I'll tackle the steering. |
|
|
|
|
|
|
|
(#43)
|
|
WARNING: May become violent.
Offline
Posts: 2,426
Join Date: Mar 2007
Location: Wisconsin
|
01.29.2010, 09:50 AM
That really sweet. I like the placement of the motor.
Lamborghini's= True Engineering Marvel's |
 |
|
|
|
|
|
(#44)
|
|
Destroyer of Tires
Offline
Posts: 626
Join Date: Feb 2009
|
01.29.2010, 08:16 PM
This is an awsome build. Makes me feel like I'm not crazy for thinking of building similar stuff.
|
|
|
|
|
|
|
|
(#45)
|
|
|
Check out my huge box!
Offline
Posts: 11,935
Join Date: Aug 2007
Location: Slidell, LA
|
01.29.2010, 10:41 PM
Quote:
|
|
|
|
|
 |
«
Previous Thread
|
Next Thread
»
| Currently Active Users Viewing This Thread: 1 (0 members and 1 guests) | |
| Thread Tools | |
| Display Modes | Rate This Thread |


 Linear Mode

|
|

Powered by vBulletin® Version 3.8.11
Copyright ©2000 - 2026, vBulletin Solutions Inc.
vBulletin Skin developed by: vBStyles.com
Copyright ©2000 - 2026, vBulletin Solutions Inc.
vBulletin Skin developed by: vBStyles.com