


|

|
(#121)
|
|
"If you can't beat em'....shoot em'
Offline
Posts: 1,728
Join Date: Apr 2008
Location: Sunny So-Cal (Orange County)
|
07.04.2008, 03:54 AM
 Dam Dude... that's insane.. I cant wait for the Video!. Dam Dude... that's insane.. I cant wait for the Video!. .. so now that you've got it how are you going to mount it (??) and you'll be running what (2) 6s = 12s on it (??) .. so now that you've got it how are you going to mount it (??) and you'll be running what (2) 6s = 12s on it (??) NICE.... 
|
|
|

|
|
|
|
|
(#122)
|
|
one.five.two.seven
Offline
Posts: 427
Join Date: Oct 2007
|
07.04.2008, 04:11 AM
I'll be running 2x 3s, so 6s all up. Dude, 12s on a 2300kv motor = 102,120 rpm
  As for the mounting, i'm going to make up a carbon motor plate and mount in on top of the centre diff unit. Not too sure of the final position, but all i can say is the motor is going to be as LOW as possible  Also, thanks for the tips on dying the springs, they turned out really good.  I'll get some pics up when the diff is done, but yeh, blacked out springs go much better with the colour scheme of the car!!! I'll get some pics up when the diff is done, but yeh, blacked out springs go much better with the colour scheme of the car!!!thanks jordan |
|
|
|
|
|
|
|
(#123)
|
|
"If you can't beat em'....shoot em'
Offline
Posts: 1,728
Join Date: Apr 2008
Location: Sunny So-Cal (Orange County)
|
07.06.2008, 08:07 PM
Cool... It always nice when a plan goes together.. I'm looking forward to your next update.
Have a great week Jordan.. |
|
|
|
|
|
|
|
(#124)
|
|
RC-Monster Dual Brushless
Offline
Posts: 5,061
Join Date: Oct 2007
Location: Thousand Oaks CA
|
07.06.2008, 08:19 PM
Mother of God!

|
   |
|
|
|
|
|
(#125)
|
|
one.five.two.seven
Offline
Posts: 427
Join Date: Oct 2007
|
07.15.2008, 05:08 AM
Hi everyone,
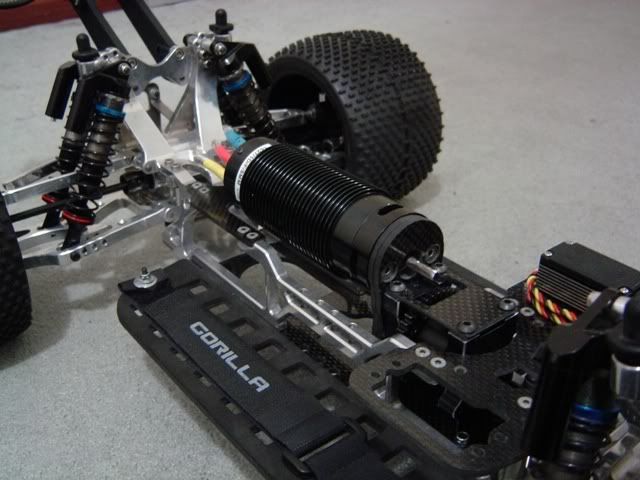
Well, I just finished making all the parts for my centre differential conversion and am going to post a full step by step guide of the installation. Hopefully it will help anyone wanting to do similar to their Gmaxx's. Okay, so here i've got a pic of all the parts needed for this install (the diff is an Xray XB808 centre diff with a 42t spur gear on it):  As you might be able to see, i have shaved the top and bottoms of the CD mounts down to lower the diff into the chassis a little more. I have also drilled a hole through one of the diff mounts which bolts to the motor mount too to help reduce flex. I am using two 3mm plates of carbon for the motor mount, again to reduce flex and hopefully prevent the stripping of spur gears.      Now that the motor mount is put together, the diff and top plate go on, nothing too complex here...     continued..... |
|
|
|
|
|
|
|
(#126)
|
|
one.five.two.seven
Offline
Posts: 427
Join Date: Oct 2007
|
07.15.2008, 05:16 AM
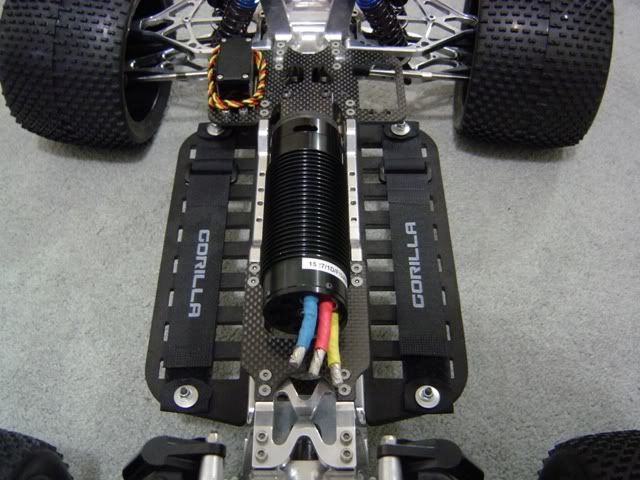
Now for the installation of the bottom plate, this is probably the most important part, because if the diff is not mounted in the exact right position the spur might hit the x-braces when on the chassis. Also important to countersink the screw holes so that the diff assembly can sit flush on the Gmaxx bottom plate:
   With that done, you can install the diff assembly onto the chassis plate. As you can see i've had to drill 4 holes in the lower Gmaxx plate to mount the assembly:      I've had to cut out another rear upper plate so that the 1527 can fit with this setup. obviously with a 1515 sized motor i don't think this step will be necessary:   continued....... |
|
|
|
|
|
|
|
(#127)
|
|
one.five.two.seven
Offline
Posts: 427
Join Date: Oct 2007
|
07.15.2008, 05:20 AM
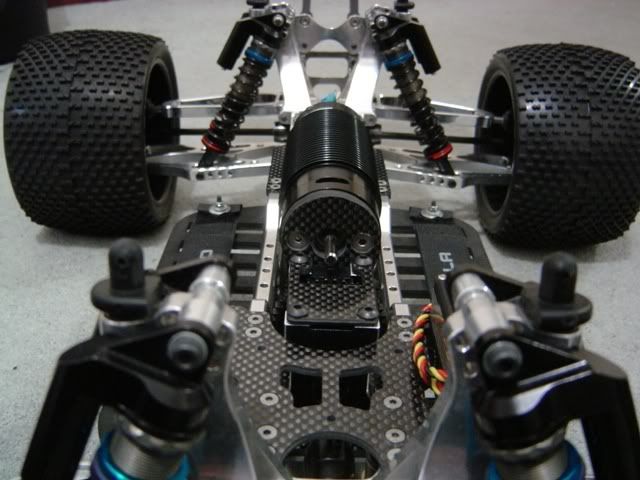
Nearly there....
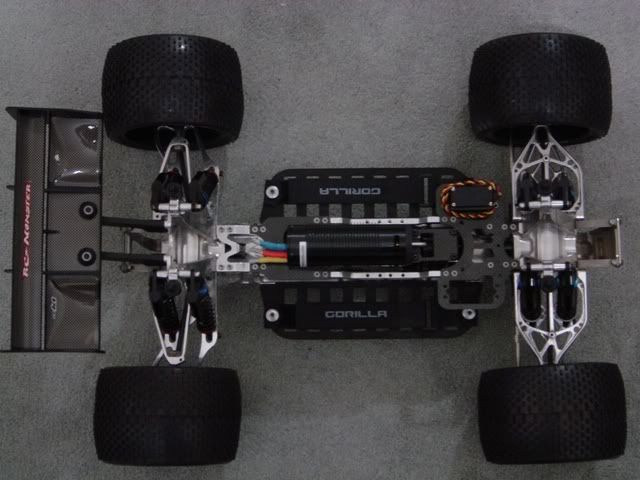
 Now with that done, the chassis plate with the diff assembly can be put back in. Again, it is pretty important that the holes in the lower plate for the diff and the chassis plate were measured properly so the diff sits central between the x-braces. With the 42t spur i have no problem with clearence between the braces!! No need for any dremeling there thank god : Now with that done, the chassis plate with the diff assembly can be put back in. Again, it is pretty important that the holes in the lower plate for the diff and the chassis plate were measured properly so the diff sits central between the x-braces. With the 42t spur i have no problem with clearence between the braces!! No need for any dremeling there thank god :    continued.... |
|
|
|
|
|
|
|
(#128)
|
|
one.five.two.seven
Offline
Posts: 427
Join Date: Oct 2007
|
07.15.2008, 05:26 AM
Now all thats left is to put in your motor!!!
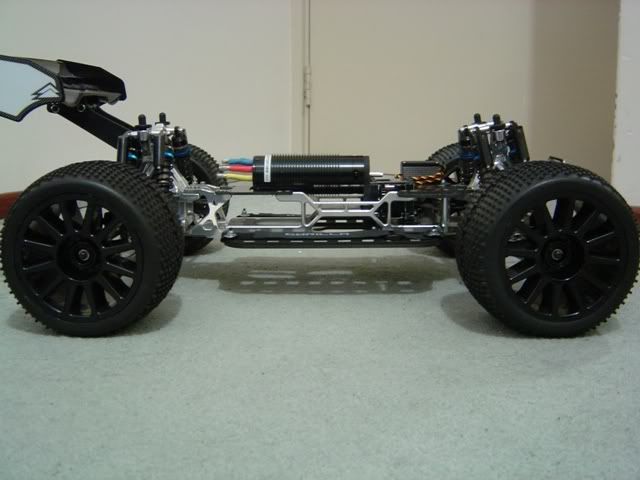       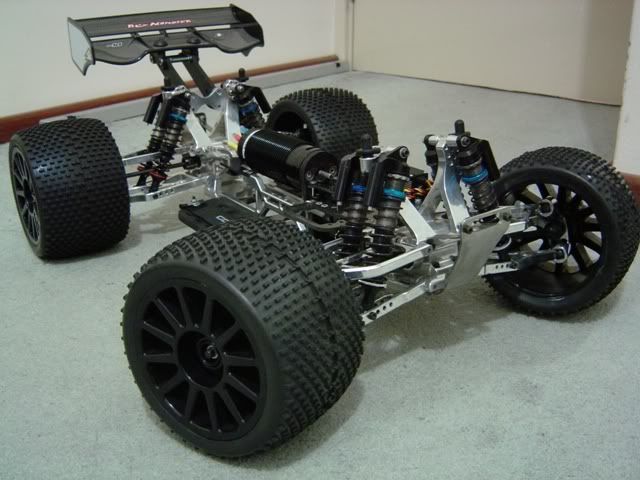 I also redid the front of the shell (again), now its got the CF grill and pink badge, very STI-ish i think: 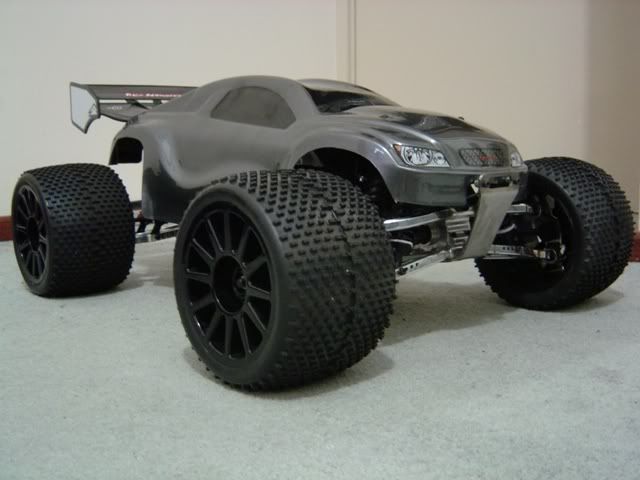 I hope this is helpful, it was an absolute blast putting it all together. It had its fair share of unexpected twists, which is why i finished it a week later than i thought i would. But hey, hopefully now you don't have those problems!!! Any questions/comments/criticisms welcome jordan |
|
|
|
|
|
|
|
(#129)
|
|
RC-Monster Stock
Offline
Posts: 16
Join Date: Jun 2008
|
07.15.2008, 06:57 AM
very very nice indeed, its a clean and mean set up you've got there how was the torque of that super long neu? man that thing rips...post some vid too
|
|
|
|
|
|
|
|
(#130)
|
|
RC-Monster Carbon Fiber
Offline
Posts: 120
Join Date: Jan 2005
|
07.15.2008, 08:29 AM
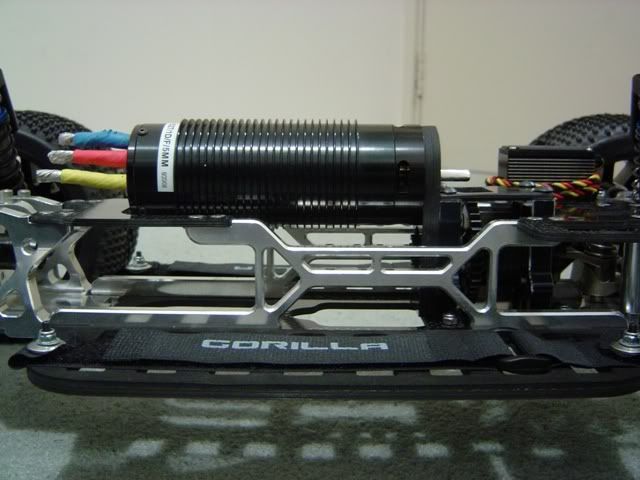
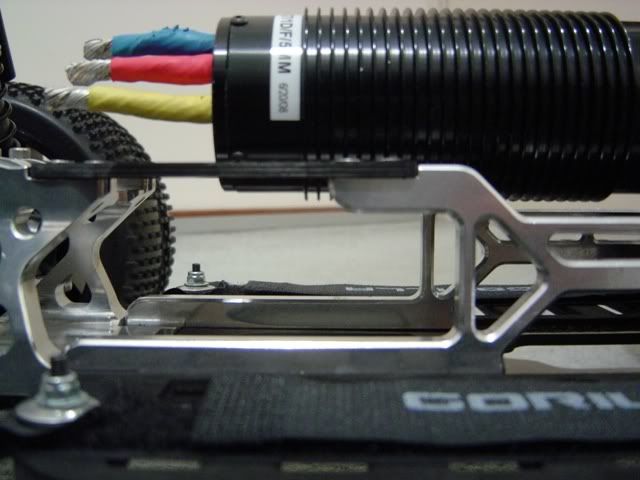
Real nice conversion Jordan, that neu motor does must weight alot, doesn't this strain alot on the single carbon fiber mount?
Maybe making another sort of mount on the back of the can? |
|
|
|
|
|
|
|
(#131)
|
|
one.five.two.seven
Offline
Posts: 427
Join Date: Oct 2007
|
07.15.2008, 08:35 AM
Thanks for the comments guys!!
@rommel, its not running yet, hopefully these 2nd batch MMM's aren't too far away... @supermaxx, thats a good point, i am going to make a brace under the back of the motor, but i need to get the driveshafts first to make sure i have enough clearence. It is surprisingly rigid though, with only one of the plates, it was flexing all over the place, but with two i can drop it from about 3 feet and there doesn't seem to be any flex in the motor mount. thanks again jordan |
|
|
|
|
|
|
|
(#132)
|
|
RC-Monster Aluminum
Offline
Posts: 554
Join Date: Jan 2007
Location: Singapore
|
07.15.2008, 08:36 AM
This limits you to one pinion size right?
Looking great..I've been wanting to do something like this for my maxx but no tools and materials to play with.... |
|
|
|
|
|
|
|
(#133)
|
|
|
one.five.two.seven
Offline
Posts: 427
Join Date: Oct 2007
|
07.15.2008, 08:47 AM
Quote:
 It wasn't too hard to do, all it took was a dremel and a couple of files... oh, and alot of time 
|
|
|
|
|

|
|
|
|
(#134)
|
|
RC-Monster Aluminum
Offline
Posts: 554
Join Date: Jan 2007
Location: Singapore
|
07.15.2008, 08:51 AM
Hmmm my dremel is coming so i guess if I can find a good CF of Alu seller I will be in business....
Good thing we are both bashers :).. |
|
|
|
|
|
|
|
(#135)
|
|
one.five.two.seven
Offline
Posts: 427
Join Date: Oct 2007
|
07.15.2008, 09:01 AM
Sweet, definately post some pics if you get some custom work happening. I got my cf from Fullforce RC
|
|
|
|
 |
«
Previous Thread
|
Next Thread
»
| Currently Active Users Viewing This Thread: 1 (0 members and 1 guests) | |
 Linear Mode

|
|

Powered by vBulletin® Version 3.8.11
Copyright ©2000 - 2026, vBulletin Solutions Inc.
vBulletin Skin developed by: vBStyles.com
Copyright ©2000 - 2026, vBulletin Solutions Inc.
vBulletin Skin developed by: vBStyles.com