


|

|
(#61)
|
|
|
RC-Monster Carbon Fiber
Offline
Posts: 453
Join Date: Mar 2006
|
03.30.2011, 11:10 AM
Quote:
This is the how to video. http://www.youtube.com/watch?v=EEZDk_0iNBk [YOUTUBE]http://www.youtube.com/watch?v=EEZDk_0iNBk[/YOUTUBE] |
|
|
|

|

|
|
|
|
(#62)
|
|
|
RC-Monster Aluminum
Offline
Posts: 800
Join Date: Oct 2009
|
03.30.2011, 11:11 AM
That would be a good idea too, but can you even get those anymore? Thought they discontinued the S5T... and I know you can't find them in the states. Thats why I proposed my solution which is similiar but uses existing easily attainable parts.
Quote:
|
|
|
|
|
|
|
|
|
(#63)
|
|
RC-Monster Titanium
Offline
Posts: 1,007
Join Date: Apr 2010
|
03.30.2011, 11:12 AM
oh yea... i keep forgetting that these parts were europe specific... and yes i had a little look, they are now discontinued
|
|
|
|
|
|
|
|
(#64)
|
|
RC-Monster Carbon Fiber
Offline
Posts: 138
Join Date: May 2009
Location: Denmark
|
03.31.2011, 04:56 AM
Thank you for the constructive feedback! :)
At the moment Im doing changes which will bolt onto existing HPI savage parts. Im at E-Savage v3.0... perhaps v4.0 will start adapting parts from other trucks. For a moment you had me worried that there would be slop in the hex, pin, axle, bolt, wheel setup. But after rechecking Im feeling better... when the bolt is tightened firmly the wheel is sitting rock solid on the axle... no slop, no nothing. The only issue is that Thzero experienced axle breakage when running BIG wheels. The truggy adapter would help in this area... but then we would be back to a situation where the two bearings sit very close to eachother. So I'll go along with the standard axles and see how it pans out. Jahay, I think the process time is about 2-3 hours. The plastic is quite hard but I do not know if it is strong enough to be used for anything more than prototyping... again time will tell. Otherwise we'll have to have them made in aluminium. The granulate used is a little expensive... but as it is a new machine in the toolshop, the guys have to use it to get experience in what they can and can't do. Might as well do wide hubs/knuckles instead of random test samples 
|
|
|
|
|
|
|
|
(#65)
|
|
|
RC-Monster Aluminum
Offline
Posts: 800
Join Date: Oct 2009
|
03.31.2011, 08:01 AM
Yeah, I've had one or two go boom on my nitro truck that is running 3.8" Big Joes with some beadlocks, and on some Baja 5B tires. I've yet to run into the issue with the 3.8" Trenchers now that I'm running my Flux in 'standard mode' with standard Flux axles.
Quote:
|
|
|
|
|
|
|
|
|
(#66)
|
|
RC-Monster Carbon Fiber
Offline
Posts: 138
Join Date: May 2009
Location: Denmark
|
03.31.2011, 09:28 AM
Any recommendations in regards to a good pivot ball / rod end combo?
Im not 100% sure of the servo placement yet but Im sure I can find or fab a rod that fits my needs... as long as the ball / rod end have no slack and is able to handle 40 series wheels I'll be in good shape. Working assumption is to have the servo laying flat on top of the batteries... might as welll place it low now that I can. |
|
|
|
|
|
|
|
(#67)
|
|
|
RC-Monster Stock
Offline
Posts: 24
Join Date: Feb 2011
|
04.05.2011, 12:30 AM
Quote:
Sorry but that is impossible to do on a drill press. Try a bridgeport. |
|
|
|
|
|
|
|
|
(#68)
|
|
|
RC-Monster Aluminum
Offline
Posts: 800
Join Date: Oct 2009
|
04.05.2011, 08:43 AM
Hadn't see that video before, but that was my plan. Had something done similiarly already for the Baja 5B hubs.
Quote:
|
|
|
|
|
|
|
|
|
(#69)
|
|
|
RC-Monster Carbon Fiber
Offline
Posts: 453
Join Date: Mar 2006
|
04.06.2011, 03:25 PM
Quote:
Anyway, here's one done. 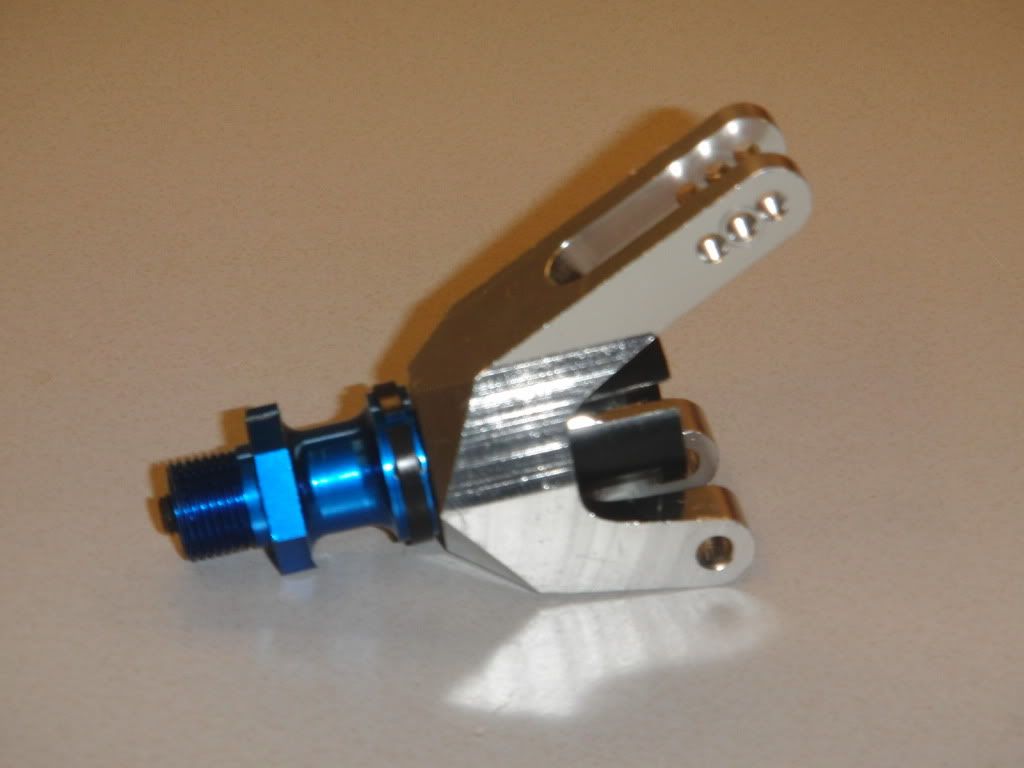
|
|
|
|
|
|
|
|
|
(#71)
|
|
RC-Monster Carbon Fiber
Offline
Posts: 138
Join Date: May 2009
Location: Denmark
|
04.27.2011, 02:48 AM
I guess this build ended up in a quest for a god damn low CoG... did we get there?
Well, for a Savage Id say we did :) Motor, ESC, Servo, 2,4GHz RX placement: The battery compartment in spe: The cut outs in the TVPs will be 155mm x 32mm... thats enough to fit most LiPo's out there... horizontal of course  Hmm lol the frontal part is sitting upside down... the dogbone cut out is supposed to open the part in the top... good morning! ;) Judging from rough mock ups the balance of the truck is pretty good... slightly tilted forward... but only slightly. |
|
|
|
|
|
|
|
(#72)
|
|
RC-Monster Carbon Fiber
Offline
Posts: 138
Join Date: May 2009
Location: Denmark
|
04.27.2011, 02:54 AM
The batteries will rest against the U-shaped alu part in the center line... which will protect dogbone from bats or is it the other way round? 10T pinion fitted on the motor :)
Servo setup: |
|
|
|
|
|
|
|
(#73)
|
|
RC-Monster Titanium
Offline
Posts: 1,007
Join Date: Apr 2010
|
04.27.2011, 06:02 AM
WOW that looks awesome and very solid!... also maybe a little heavy??? Could you maybe have braced the centre diff plates straight to the tvps???
I really cant wait to see how the lipo relocation works out!!! AWESOME STUFF! |
|
|
|
|
|
|
|
(#74)
|
|
RC-Monster Carbon Fiber
Offline
Posts: 138
Join Date: May 2009
Location: Denmark
|
05.04.2011, 06:41 AM
Finally got around to it... TVP's cut to allow horizontal battery placement:
Batteries inserted: They protrude 2 - 2½ cm to the sides: Im thinking that two vertical straps going from the skid plate to the TVP might be the best way to secure the bats... Another idea is a "gorilla style" strap going from the front of the cut out to the end. It should push the batteries inwards and against the U-shaped dog bone guard. Need a bit of counter sinking, final servo placement, wireing and a custom dogbone... then Im good to go :) Ohh... also need to drill the side holes in the CD mount and thread them... 12 m3 screws should hopefully do it!? |
|
|
|
|
|
|
|
(#75)
|
|
RC-Monster Carbon Fiber
Offline
Posts: 138
Join Date: May 2009
Location: Denmark
|
05.04.2011, 06:42 AM
Weight reducing this build will be looked at once Im up and running :)
|
|
|
|
 |
«
Previous Thread
|
Next Thread
»
| Currently Active Users Viewing This Thread: 1 (0 members and 1 guests) | |
 Linear Mode

|
|

Powered by vBulletin® Version 3.8.11
Copyright ©2000 - 2026, vBulletin Solutions Inc.
vBulletin Skin developed by: vBStyles.com
Copyright ©2000 - 2026, vBulletin Solutions Inc.
vBulletin Skin developed by: vBStyles.com