


Rummy's Savage E-5SC |

|

|
(#1)
|
|
RC-Monster Carbon Fiber
Offline
Posts: 209
Join Date: Sep 2008
|
Rummy's Savage E-5SC -
06.21.2011, 03:28 PM
First some questions.
I want to run a 1717. I've been reading up about the Alza mounts for them. What do you guys think about using these mounts with the TCS TVPs? Will I have to do a lot of hacking on the TVPs? I plan to run a Mamba XL on 6S with the 1717. I have a 1520 right now but bigger is better right?  Got a Savage roller a week or so ago with the TCS plates already. It's basically just a Savage 25. I'm not upgrading anything yet. I'll break stuff first. haha 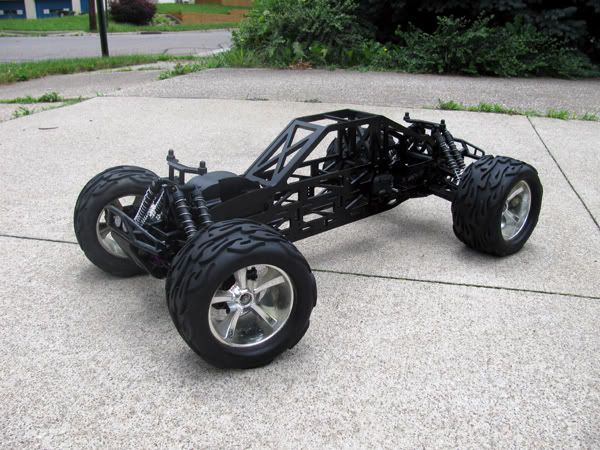 As of last night I had the battery boxes on and have a flux trans ready to drop in (with plastic spur). I also have the motor mounts hogged out for the 1520. Like I said, still thinking about just going to the 1717 depending on what you guys think. 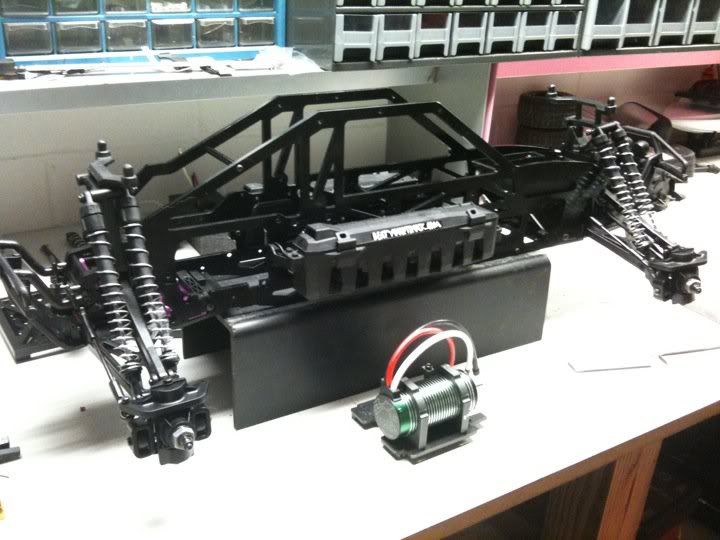 This showed up yesterday. 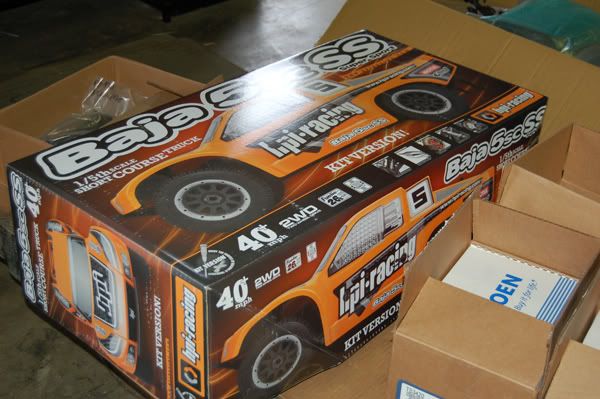 Easier to pull all the parts I need and part out the rest than buying the parts individually. Heck the body alone is $210 and not in stock.... Working on assembling wheels and side body mounts so that'll let me mock up the body mounts and get an idea of ride height. I'm planning on using SS front shocks all around and have the HPI 24mm savage adapters. Probably have to go to XL stubs to get the right track width? Feel free to give input. Good to be back on the board. Been a while since I've had an electric rig worth posting! Rummy out. |
|
|

|
|
|
|
|
(#2)
|
|
|
Where are the Rocks????
Offline
Posts: 191
Join Date: Jan 2007
Location: PA
|
06.21.2011, 03:52 PM
Quote:
|
|
|
|
|

|
|
|
|
(#3)
|
|
|
RC-Monster Carbon Fiber
Offline
Posts: 209
Join Date: Sep 2008
|
06.21.2011, 03:59 PM
Quote:
|
|
|
|
|
|
|
|
|
(#4)
|
|
|
RC-Monster Aluminum
Offline
Posts: 800
Join Date: Oct 2009
|
06.21.2011, 04:07 PM
Yes you will. I'm not even sure that the 1717 will fit length-wise with the TCS TVPs. The 1520 should be able to be mounted with a bit of grinding for to account for the length over the motor over the stock.
You can always grind out the Flux mounts to fit either the 1520 or 1717. I've got the GCM mounts for a 1520 as I was planning on mounting this up, but ended up putting it in my truggy. Quote:
|
|
|
|
|
|
|
|
|
(#5)
|
|
RC-Monster Carbon Fiber
Offline
Posts: 209
Join Date: Sep 2008
|
06.21.2011, 04:12 PM
The 1717 is actually shorter than the 1520 according to Castle's site. Not by much, 3/16" or so. I already ground the mounts for the 1520, you can see it sitting in the second picture in the OP. I'm just thinking about going to the 1717 now instead of spending time on the 1520.
|
|
|
|
|
|
|
|
(#6)
|
|
|
RC-Monster Aluminum
Offline
Posts: 800
Join Date: Oct 2009
|
06.21.2011, 04:15 PM
I would just grind the mounts for the 1717 then.
Quote:
|
|
|
|
|
|
|
|
|
(#7)
|
|
RC-Monster Carbon Fiber
Offline
Posts: 209
Join Date: Sep 2008
|
06.21.2011, 04:31 PM
Is there even enough room? I took off quite a bit for the 1520 and the 1717 is a lot larger in diameter.
How do you like the 1520 in your setup? Isn't that what you're running? What all did you have to mod on your TVPs to do it? |
|
|
|
|
|
|
|
(#8)
|
|
|
RC-Monster Aluminum
Offline
Posts: 800
Join Date: Oct 2009
|
06.21.2011, 04:40 PM
Actually I ran the 1800kv in the 5T as I put the 1600kv in my truggy. I was running the 1800 on 6S, thought it ran cooler than the standard 2200kv. I basically had to grind out the rear of the motor cutout area of the TVP (see attachment, the area where the red circle is).
Quote:
|
|
|
|
|
|
|
|
|
(#9)
|
|
RC-Monster Mod
Offline
Posts: 6,597
Join Date: Apr 2007
Location: NJ
|
06.21.2011, 06:36 PM
Please do it with the 1717 - As this is what I want to do...
|
|
|
|
1520 rocks! |
|
|
|
(#10)
|
|
Flux Fan
Offline
Posts: 70
Join Date: Jan 2011
|
1520 rocks! -
06.21.2011, 09:51 PM
I think the 1520 is more than enough to push that truck around. A 1717 would get less run time, wear out the truck faster due to excessive torque, heat up the batts quicker due to larger current draw, etc. Other than looking cool, it's a loose loose with the bigger motor. Just my opinion.
|
|
|
|
|
|
|
|
(#11)
|
|
|
Check out my huge box!
Offline
Posts: 11,935
Join Date: Aug 2007
Location: Slidell, LA
|
06.21.2011, 10:49 PM
Quote:
A 1717 would be the logical choice as it produces more torque. It has a larger diameter stator so it will be able to procue the needed torque. I have run both the 1520 and the 1717 and the 1717 is the clear choice winner for a heavier vehicle, and a longer wheelbase vehicle. I ran both with a MMM and a zippy 5kmah 40c lipo. No heat issues on the esc or lipo with either but you could feel the torque difference with the 1717 and it ran cooler... Nothing against the 1520 but it is a good 1/8 mt motor. Get much bigger and you need a larger motor. I would like to see a 1725 motor, around 1400kv for 8s use with the MMmxl. But this is just my opinion too, sure I may have days of runtime with hundreds of brushless setups but what do I know... |
|
|
|
|
|
|
|
|
(#12)
|
|
RC-Monster Carbon Fiber
Offline
Posts: 209
Join Date: Sep 2008
|
06.21.2011, 11:39 PM
I am picking up a 1717 tommorrow! I think I am just going to make my own clamp mounts. I have some 5/16"' aluminum plate leftover from another project that should work.
I can see the point in a larger motor wearing out a truck faster but the other points? A bigger motor with the same or equivalent kv rating is going to work a lot easier than a similar smaller motor. I got the 5sc wheels on tonight and set the body on because i couldn't help myself. Internet is out at home so posting from my phone. Will have pics posted in the morning after I get to work. |
|
|
|
|
|
|
|
(#13)
|
|
RC-Monster Carbon Fiber
Offline
Posts: 209
Join Date: Sep 2008
|
06.22.2011, 09:08 AM
Ok photo time. 5SC wheels and tires are mounted up on stock savage axles with the hpi 24mm adapters. Front track width is 16.25" and the rear is 16.75". It's not THAT far off really.
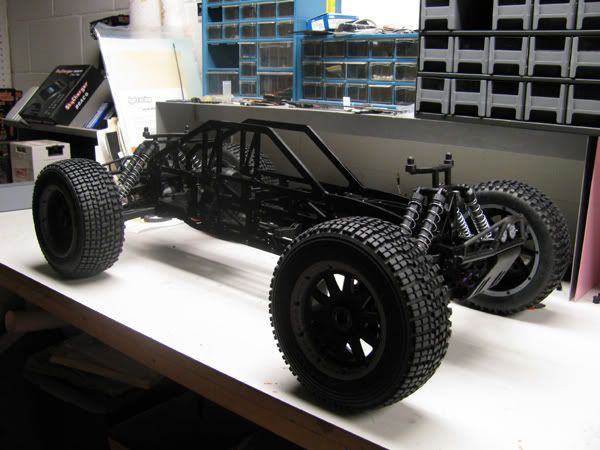 Flux tranny mounted with the motor plate in. Going to start drawing the 1717 clamps today. Pretty much just going to copy the Alza mounts. 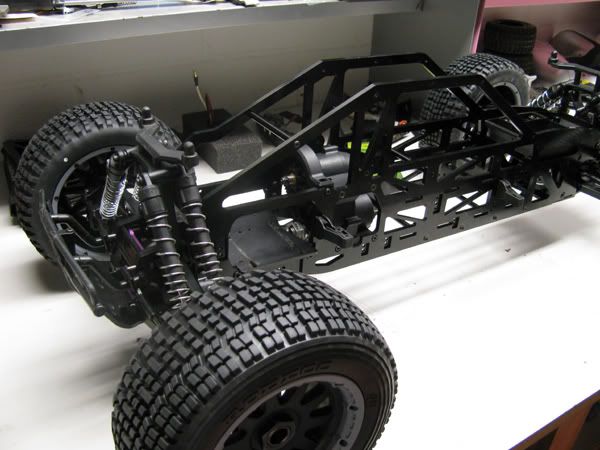 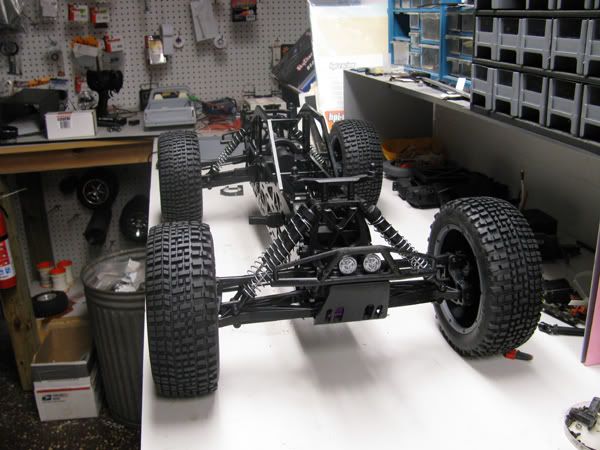 I couldn't help but throw the 5SC body on it...... 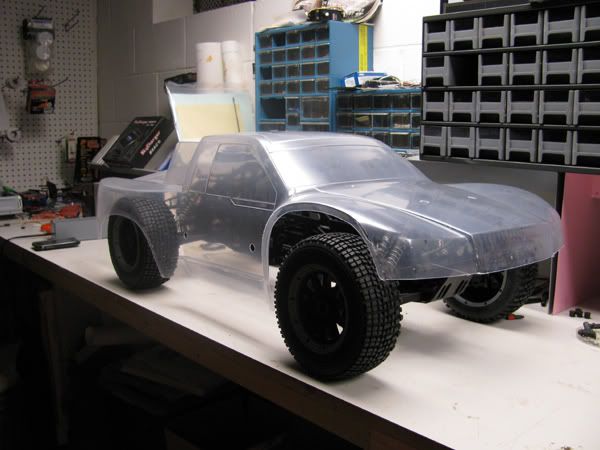 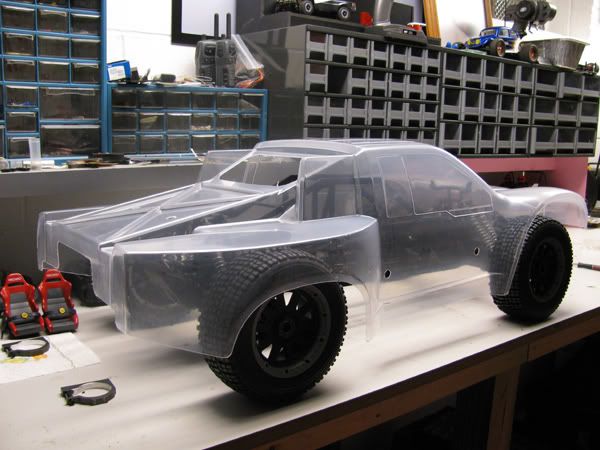 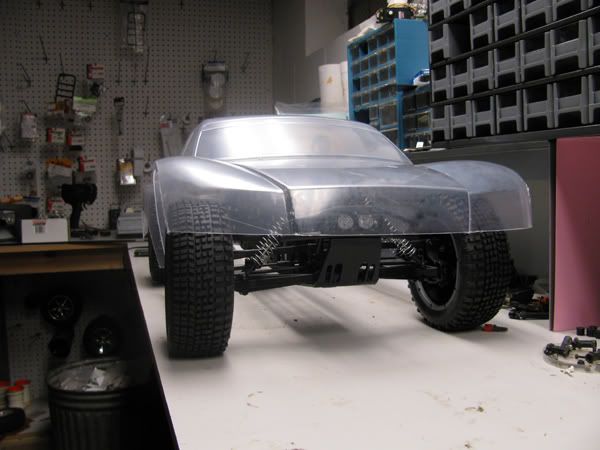 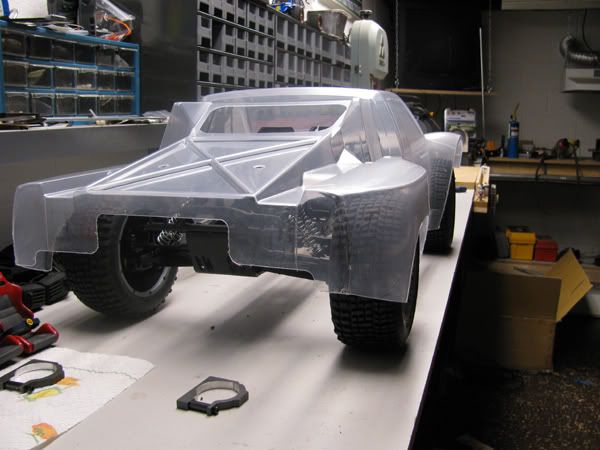 I'm picking up the 1717 today at lunch and I'm hoping I'll have time to assemble the side rails from the 5SC kit so I can see how they'll attach to the TCS plates. |
|
|
|

 |
«
Previous Thread
|
Next Thread
»
| Currently Active Users Viewing This Thread: 1 (0 members and 1 guests) | |
 Linear Mode

|
|

Powered by vBulletin® Version 3.8.11
Copyright ©2000 - 2026, vBulletin Solutions Inc.
vBulletin Skin developed by: vBStyles.com
Copyright ©2000 - 2026, vBulletin Solutions Inc.
vBulletin Skin developed by: vBStyles.com