 |
|
|||||||


 |
|
|
Thread Tools |
Rating: 
|
Display Modes |
Body work and wing |
|

|
(#16)
|
|
RC-Monster Carbon Fiber
Offline
Posts: 116
Join Date: Apr 2011
|
Body work and wing -
02.03.2012, 04:20 PM
Just an update, still have to work and sort out the mechanical brakes, in the mean time did some work on the body and installed a rear wing. Got a bug beetle proline body, its not quite XL length but i really liked it! i feel the wing offsets the general look, if you look closely you can see a bigger horizontal gap between the rear wheel and the arch.
Anyway here are some pics:   Need some opinions, i want a simple 2 color scheme, nothing fancy, will be using spray cans, here are some options, what do you guys think? which one? 
|
|
|

|
|
|
|
|
(#17)
|
|
RC-Monster Carbon Fiber
Offline
Posts: 233
Join Date: Sep 2009
Location: Australia
|
02.04.2012, 01:19 AM
I like paint options 02.
What wheels\tires are those? They look like a 1/2 offset? Weight? |
|
|
|
|
|
|
|
(#18)
|
|
|
RC-Monster Carbon Fiber
Offline
Posts: 116
Join Date: Apr 2011
|
02.04.2012, 02:08 AM
Quote:
This is a previous photo when i bought them new.  edit: They are offset, but dunno if half or full gotta measure them. half offset is half inch? or what is the nomenclature? |
|
|
|
|

|
|
|
|
(#19)
|
|
RC-Monster Carbon Fiber
Offline
Posts: 233
Join Date: Sep 2009
Location: Australia
|
02.04.2012, 03:04 AM
Half offset is half inch.
Great weight, they look like a good monster truck tire. They are a fairly low profile and decent width so should be quite nice to drive on. What height are they? After a quick google they seem to be the tire from a GS Racing SUT but hard to find info on or a place to buy. |
|
|
|
|
|
|
|
(#20)
|
|
|
RC-Monster Carbon Fiber
Offline
Posts: 116
Join Date: Apr 2011
|
02.04.2012, 03:19 AM
Quote:
|
|
|
|
|
|
|
|
|
(#21)
|
|
RC-Monster Titanium
Offline
Posts: 1,152
Join Date: Sep 2008
|
02.04.2012, 11:16 AM
Nice project
 I agree with the blue and white colour scheme, since your wing and wheels are white. I agree with the blue and white colour scheme, since your wing and wheels are white.Doing all you can to keep the esc cool is probably a good idea if the truck is now heavy over the front, it'll be needing more power at full throttle acceleration if it doesn't wheelie. Probably why you have cooler temps WOT. |
|
|
|
|
|
|
|
(#22)
|
|
|
RC-Monster Carbon Fiber
Offline
Posts: 116
Join Date: Apr 2011
|
02.06.2012, 01:46 AM
Quote:
 
|
|
|
|
|
|
|
|
|
(#23)
|
|
RC-Monster Carbon Fiber
Offline
Posts: 233
Join Date: Sep 2009
Location: Australia
|
02.06.2012, 03:47 AM
Cheers, thanks for that. Not quite as large diameter wise as I had hoped though.
|
|
|
|
|
|
|
|
(#24)
|
|
RC-Monster Carbon Fiber
Offline
Posts: 116
Join Date: Apr 2011
|
04.13.2012, 03:49 PM
hi everyone, haven't painted the body yet...
thought just to update, project is still ongoing, but put it on hold for a while because of my cnc build. got some bits and pieces and building myself a cnc to better finalize this project. its close to be finished now, some pieces needs remaking, when done will get back to my savage and put the MAMBA XL in it! here's a pic of my mini cnc in the making:  hope to get it finalized soon! |
|
|
|
|
|
|
|
(#25)
|
|
RC-Monster Carbon Fiber
Offline
Posts: 116
Join Date: Apr 2011
|
09.02.2012, 04:42 PM
Hello everyone, have been quite busy lately, finally had some time to tinker back on my project.
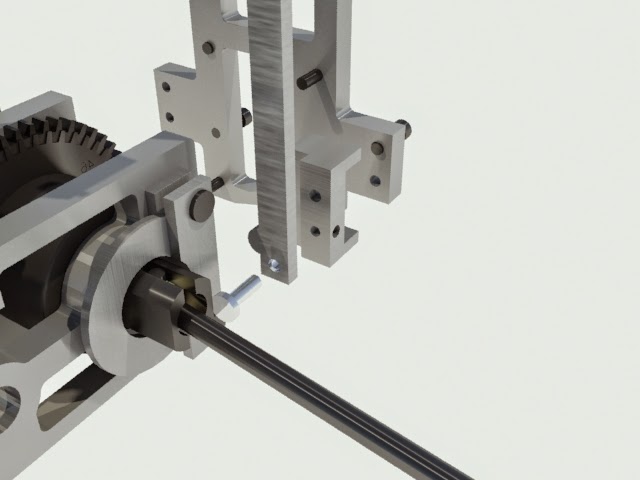
Well the previous design did work well but had some quirks of its own, and i never did manage the mechanical brakes. here is my second attempt to get things going. Here is the design idea:  preferred to rotate the brake pads to a vertical position and use aluminum arms to apply the pressure. |
|
|
|
|
|
|
|
(#26)
|
|
RC-Monster Carbon Fiber
Offline
Posts: 116
Join Date: Apr 2011
|
09.02.2012, 05:00 PM
Here is a sequence of pics showing the CNC milling process, did not post all the pics, left them on the picassa album for any interested.
The right plate being milled: 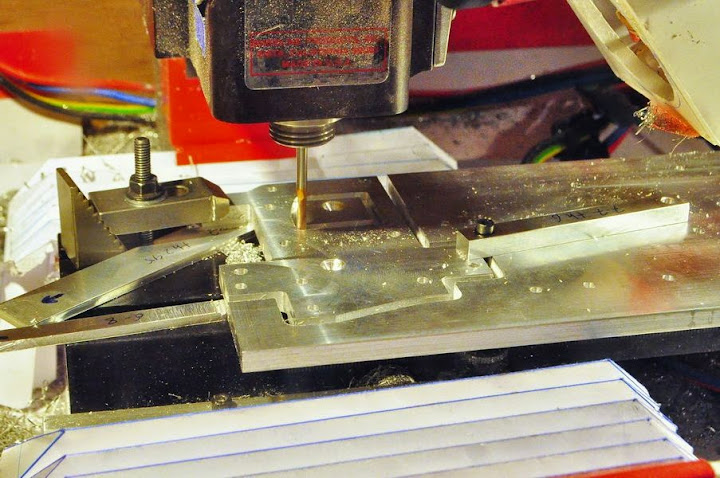 Left and rear plates milled, milled the internal cutouts and drilled the holes, then reclamped to mill the outer profile, this saves time realigning the mill or having to keep tabs or bridges and cut them later. 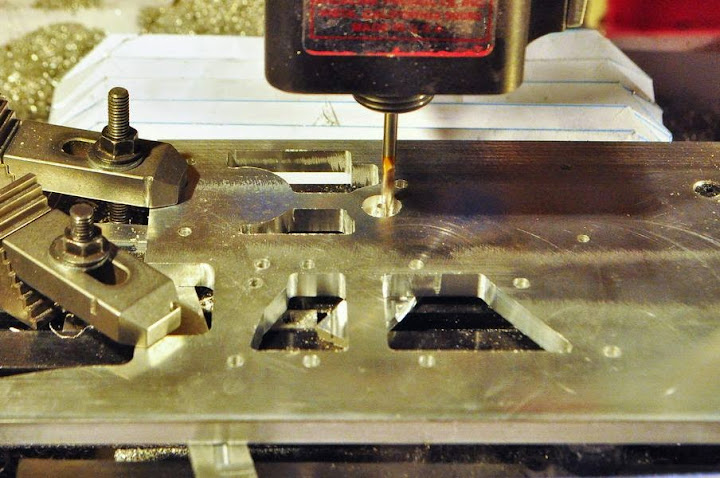 Re clamped and outer profile milling 
|
|
|
|
|
|
|
|
(#27)
|
|
RC-Monster Carbon Fiber
Offline
Posts: 116
Join Date: Apr 2011
|
09.02.2012, 05:05 PM
While milling i left the bearing seat holes smaller, now internally boring the bearing seats:
 Test fit before removing from the mill face plate. all fine so far. 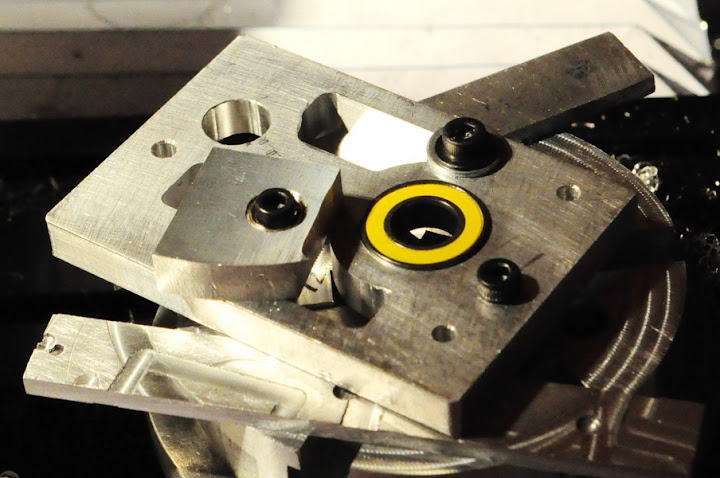 The components of the Center diff support, the center piece is the motor mount plate; the motor gets screwed on it and it is supported to the front plate which is the one above it in the pic. Had to do this t clear the brake disk. 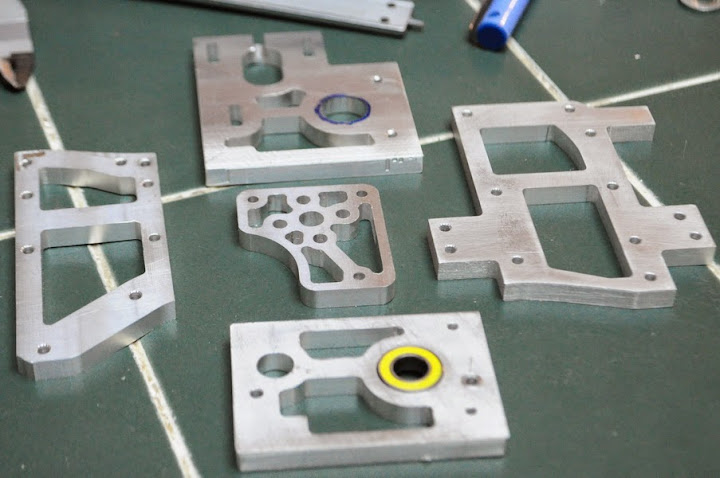
|
|
|
|
|
|
|
|
(#28)
|
|
RC-Monster Carbon Fiber
Offline
Posts: 116
Join Date: Apr 2011
|
09.02.2012, 05:19 PM
Drilling the holes in the front and rear plates, kept a bearing in place and clamped both plates on the vice to have a good alingment.
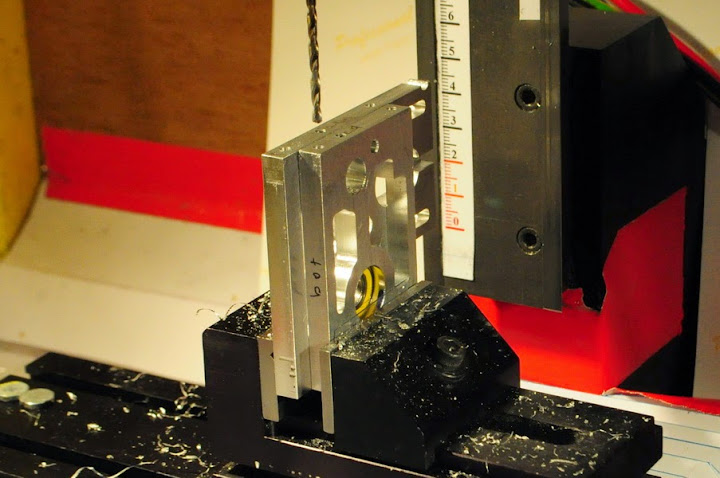 Well now comes the problem part.... forgot to offset the tool bit while drilling the holes, if you look closely on the following pic in the bottom left corner, notice the right plate is extended lower than the left :(:(:(:( 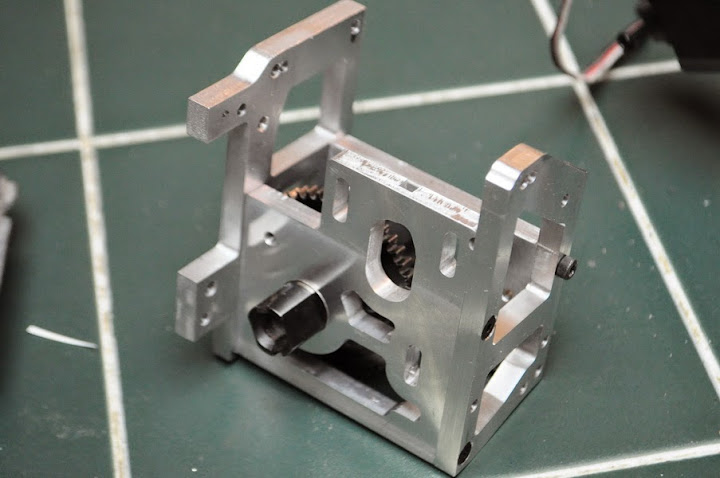 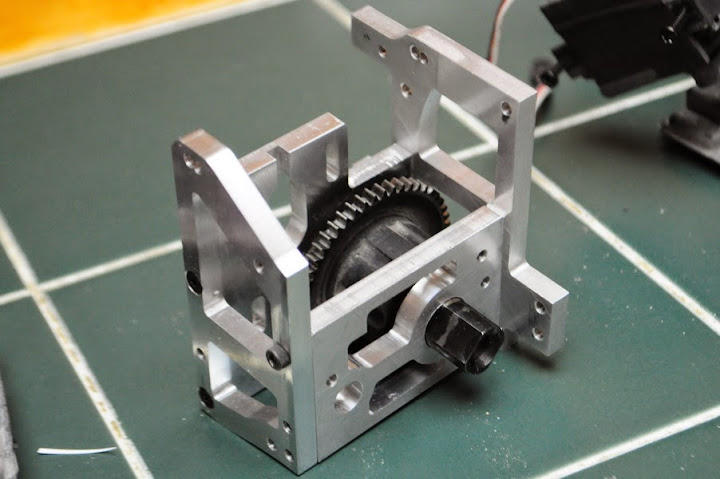  More problems, while test fitting of the plates to the TVP's the measurements i did were messed up, the whole assembly had to be offset 2 mm , thats the reason for the additional holes laterally. the vertical holes are due to the later reason of forgetting to offset the tool bit. 
|
|
|
|
|
|
|
|
(#29)
|
|
RC-Monster Carbon Fiber
Offline
Posts: 116
Join Date: Apr 2011
|
09.02.2012, 05:25 PM
Whats more worse than the above, the motor support plate also had the dimensions for mounting on the 1717 wrong. I just opened the files i had from the last conversion like 5 months old and started designing without rechecking and measuring again....
Thats the price you pay for being hasty. Note to self : MEASURE 3 TIMES AND CUT ONCE! here is the second version of the motor plate, had some fun on CAD to get this design...  I will go on with the Plates, to get a test run then cut new ones. |
|
|
|
|
|
|
|
(#30)
|
|
RC-Monster Carbon Fiber
Offline
Posts: 116
Join Date: Apr 2011
|
09.02.2012, 05:50 PM
This is the general view of how i am going on with the mechanical braking, the brake arm will have to be supported to a block support, then on to the right plate. a pin is needed to have the arm sway correctly and inline.
  Turning the brass pins for the arms, they will be supported in place by a set screw. 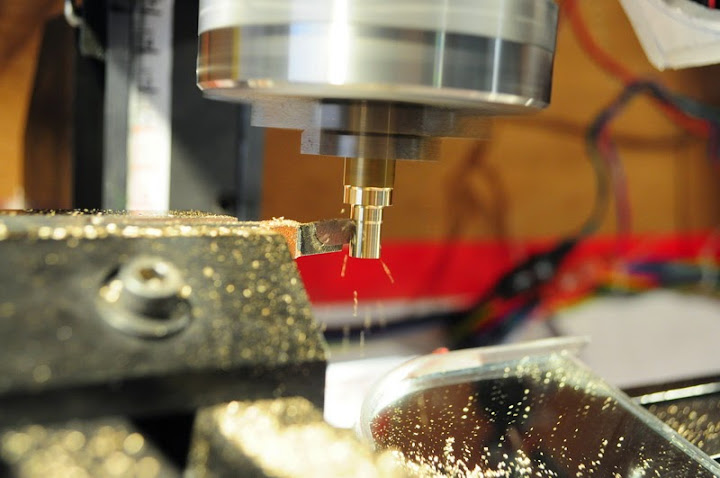 The finished pin  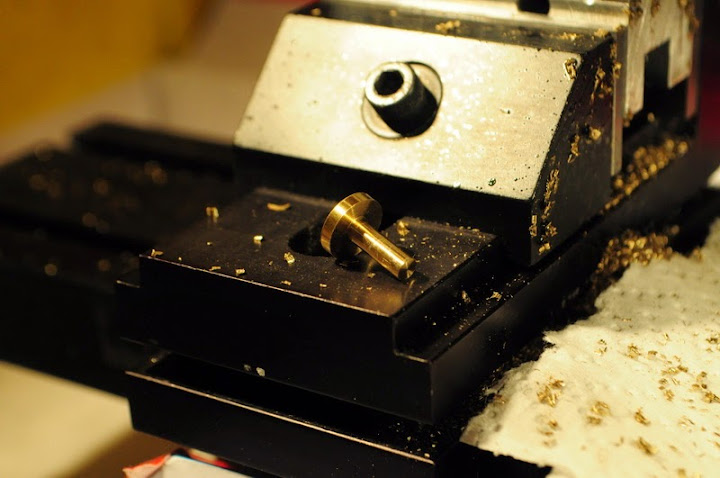
|
|
|
|
|
«
Previous Thread
|
Next Thread
»
| Currently Active Users Viewing This Thread: 1 (0 members and 1 guests) | |
 Linear Mode

|
|

Powered by vBulletin® Version 3.8.11
Copyright ©2000 - 2026, vBulletin Solutions Inc.
vBulletin Skin developed by: vBStyles.com
Copyright ©2000 - 2026, vBulletin Solutions Inc.
vBulletin Skin developed by: vBStyles.com