

Upgraded my Brushless Buggy |

|

|
(#1)
|
|
RC-Monster Carbon Fiber
Offline
Posts: 468
Join Date: Nov 2006
Location: Los Angeles, CA
|
Upgraded my Brushless Buggy -
01.05.2008, 05:15 AM
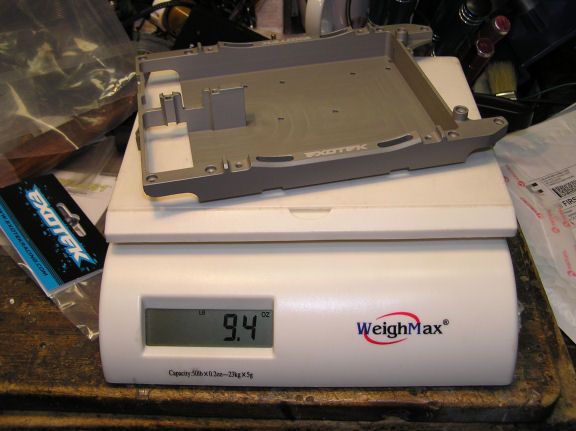
I have been running this buggy for about 5 months now and I have made some upgrades. I was using gorilla straps to hold the main lipo battery (4s2p) but after a few races they started to come apart. So I added super heavy duty velcro strap. The original battery tray was plastic, but again after a few races it started to crack, so I made a heavy duty aluminum tray and mounted it very close to the centerline of the chassis. The battery tray has multiple mounting holes so it can be mounted forward, centered or toward the rear. The Mamba Max ESC has a built in temp cut off but there is nothing for the motor so I added a venom temp failsafe unit that is hooked up to monitor the motor temp. Also while I was at it I added a new larger heat sink to the Mamba that is much larger than the stocker. It stays much cooler than the stock setup. Because the heat sink is much larger I had to angle the ESC mount down to add the necessary body clearence. The Feigao motor is powerful but will fall apart because it has glued on endbells. I built a custom motor mount that braces the motor front and back.
|
|
|

|
|
|
|
|
(#2)
|
|
RC-Monster Aluminum
Offline
Posts: 641
Join Date: Aug 2007
Location: lake conroe area, tx
|
01.05.2008, 10:44 AM
that heatsink is nice, i really like it. where did you find it? computer parts?
CEN GST Mgm 22418 castle 1717 6s lipo Losi Aftershock Infinite 160a esc Motor Not sure yet |
|
|
|
|
|
|
|
(#4)
|
|
RC-Monster Carbon Fiber
Offline
Posts: 468
Join Date: Nov 2006
Location: Los Angeles, CA
|
01.05.2008, 03:27 PM
The heatsink is from an old motherboard, specfically the one that cools the Southbridge chip. I had several to choose from but I picked this one because it fit perfectly. It is actually wider than stock but thats what I wanted. I milled a small groove on the bottom of the heatsink so that the overlapping portion would clear the Mamba Max case (you can see this in the picture). The larger heatsink adds a lot more surface area and the fan blows across the heatsink and caps.
|
|
|
|
|
|
|
|
(#5)
|
|
RC-Monster Dual Brushless
Offline
Posts: 4,236
Join Date: Dec 2007
Location: Cape Cod, Mass.
|
01.05.2008, 08:07 PM
Sweet looking ride!! I bought a 9xl and am also concerned about the motor coming apart.
Any chance a pic of just the motor brace... Thanks Brian |
|
|
|
|
|
|
|
(#6)
|
|
That's All Folks!
Offline
Posts: 2,359
Join Date: Dec 2006
Location: in a VAN down by the RIVER
|
01.05.2008, 09:01 PM
I like the temp failsafe. How low of a temp can you set it at?
|
|
|
|
|
|
|
|
(#7)
|
|
RC-Monster Carbon Fiber
Offline
Posts: 468
Join Date: Nov 2006
Location: Los Angeles, CA
|
01.05.2008, 09:30 PM
bdebde, the venom overheat fail safe can be set between 122 and 392 degrees (fahrenheit) in 9 degree increments. I have it set to kick in at 194 degrees. It also has a voltage and radio fail safe as well.
|
|
|
|
|
|
|
|
(#8)
|
|
RC-Monster Carbon Fiber
Offline
Posts: 468
Join Date: Nov 2006
Location: Los Angeles, CA
|
01.05.2008, 09:46 PM
magman, I went with the Feigao because they are powerful but economical motors. Unfortunetly you get what you pay for and the Feigao has a glued on endbell that will definetly come loose if it is only secured by the endbell. My solution was to add a top and rear bracket to Mike's motor mount that bascially surrounds the entire motor. Two large cap head screws in the rear brace can then be tightened to apply pressure to the motor. One other problem I ran into was because the motor uses such soft aluminum I could not tighten the endbell mounting screws enough to really prevent the motor from moving and causing gear mesh issues. So I added a small piece on the side that also applies sideways pressure to prevent the motor from moving away from the spur gear, even if the motor screws come loose.
 here is a picture of the mount out of the buggy. Notice the cap screw on the rear bracket that applies pressure to keep the motor together and the screw near the front that prevents the pinion from moving away from the spur. |
|
|
|
|
|
|
|
(#9)
|
|
RC-Monster Dual Brushless
Offline
Posts: 4,236
Join Date: Dec 2007
Location: Cape Cod, Mass.
|
01.05.2008, 10:37 PM
Thanks for the pic ...nice job on the fabrication
|
|
|
|
|
|
|
|
(#10)
|
|
RC-Monster Carbon Fiber
Offline
Posts: 468
Join Date: Nov 2006
Location: Los Angeles, CA
|
01.06.2008, 02:49 AM
Magman, actually a pretty easy mod. Just a couple of short pieces of aluminum bar, a few cap screws, a drill and tap. About 50 cents worth of material, but it makes the Feigao motor a viable choice for a 1/8 buggy conversion.
|
|
|
|
 |
«
Previous Thread
|
Next Thread
»
| Currently Active Users Viewing This Thread: 1 (0 members and 1 guests) | |
 Linear Mode

|
|

Powered by vBulletin® Version 3.8.11
Copyright ©2000 - 2026, vBulletin Solutions Inc.
vBulletin Skin developed by: vBStyles.com
Copyright ©2000 - 2026, vBulletin Solutions Inc.
vBulletin Skin developed by: vBStyles.com