


|

|
(#16)
|
||
|
RC-Monster Titanium
Offline
Posts: 1,402
Join Date: Aug 2008
Location: Twin Citys Mn
|
06.22.2011, 09:39 PM
very cool project
Quote:
Quote:
|
||
|
|

|

|
|
|
|
(#17)
|
|
|
Flux Fan
Offline
Posts: 70
Join Date: Jan 2011
|
06.23.2011, 10:12 AM
Quote:
|
|
|
|
|
|
|
|
|
(#18)
|
|
RC-Monster Carbon Fiber
Offline
Posts: 209
Join Date: Sep 2008
|
06.29.2011, 01:37 PM
It's nice to see some good progress FINALLY. Finished the plastic mock up channel and mounted up the side rail assembly with the stone guards too. Actually worked out really really well. Putting the flux battery boxes back on is going to take some serious thinking though.
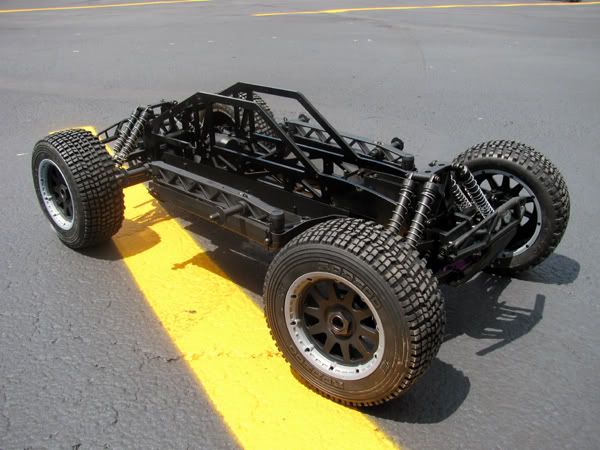  I'm going to make a center skid. The stone guards cover up the sides nicely but the open bottom of the TCS conversion bugs me. 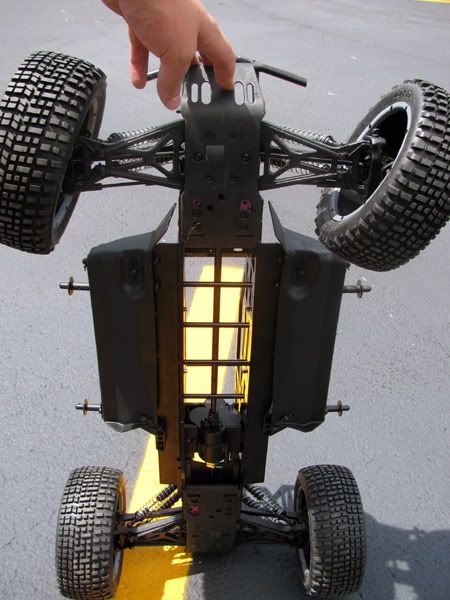 Some body on shots. Springs are really soft and the plastic channel for the body mounts is sagging but it's pretty close to the ride height I'm going for. Can't wait to get in the XL axles to widen out the track width. 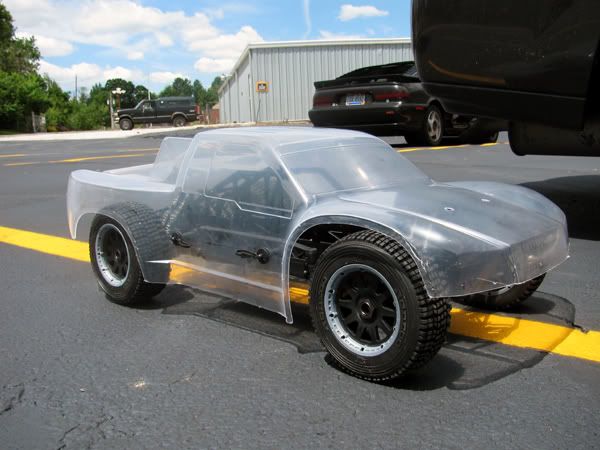 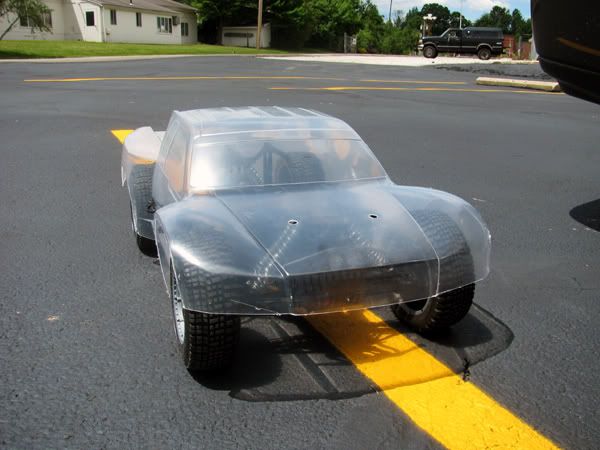 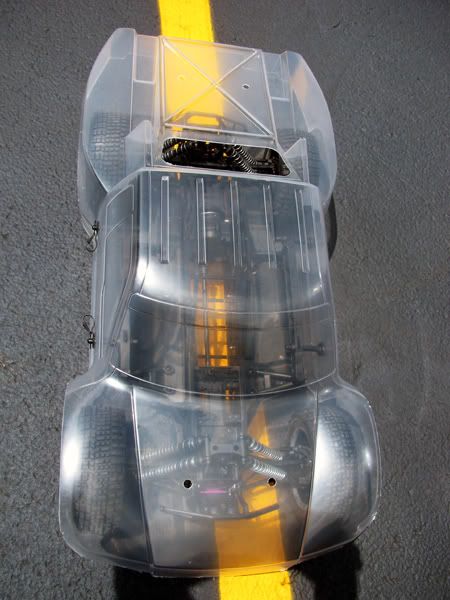 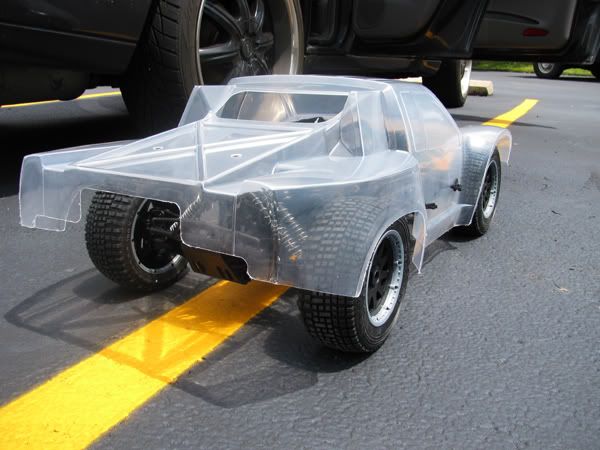 Time to make the aluminum rails since the plastic ones worked out well then start assembling the front and rear bumper assemblies so I can get started on those. |
|
|
|
|
|
|
|
(#19)
|
|
RC-Monster Aluminum
Offline
Posts: 800
Join Date: Oct 2009
|
06.29.2011, 01:46 PM
You could also just put the batteries inside the TVPs. Granted it does raise the CoG a bit as they have to sit over the driveshaft; see my thread for what I did.
Seems that it needs to have a slightly wider track. |
|
|
|
|
|
|
|
(#20)
|
|
RC-Monster Carbon Fiber
Offline
Posts: 209
Join Date: Sep 2008
|
06.29.2011, 01:47 PM
I've debated about the battery going in the middle. I don't think it's a bad option. The battery boxes will have to be raised slightly to clear the new side mounts anyway.
I posted in the pics that I have XL axles on the way. That'll give me 1/2" more width per side. |
|
|
|
|
|
|
|
(#21)
|
|
|
RC-Monster Aluminum
Offline
Posts: 800
Join Date: Oct 2009
|
06.29.2011, 03:34 PM
Yeah that will help then. Think you will still want to do something akin to my axle mod especially if using the XL axles.
Quote:
|
|
|
|
|
|
|
|
|
(#22)
|
|
RC-Monster Carbon Fiber
Offline
Posts: 209
Join Date: Sep 2008
|
06.29.2011, 03:55 PM
I have a sleeve I'm going to try first. You know how on the adapters I made for you there is a shoulder in between the 24mm hex and the bearing in the knuckle? I think that's why the XL axles have a problem. They have nothing to support them when they flex and the weakest point is at the thread where they are tightened down. I'm going to make some of these beefy sleeves and try them out and see how it holds up.
|
|
|
|
|
|
|
|
(#23)
|
|
working on a brushless for my wheelchair.....
Offline
Posts: 4,890
Join Date: Mar 2007
Location: minnesnowta
|
06.29.2011, 05:34 PM
I don't know what the side pieces from the 5sc kit are called, but I'd just throw the batteries there, one on each side. Mount some straps and call her a day.

It's "Dr. _paralyzed_" actually. Not like with a PhD, but Doctor like in Dr. Pepper. |
|
|
|
|
|
|
|
(#24)
|
|
|
RC-Monster Carbon Fiber
Offline
Posts: 209
Join Date: Sep 2008
|
06.30.2011, 09:26 AM
Quote:
|
|
|
|
|
|
|
|
|
(#25)
|
|
|
RC-Monster Aluminum
Offline
Posts: 800
Join Date: Oct 2009
|
06.30.2011, 12:00 PM
Yes, I'm pretty sure you hit on the head. Be interesting to see if beefy sleeves solves the problem; if it does, certainly a less of a hassle solution.
Quote:
|
|
|
|
|
|
|
|
|
(#26)
|
|
RC-Monster Stock
Offline
Posts: 1
Join Date: Sep 2005
|
07.05.2011, 04:42 AM
Some FLM extended arms would fill in that body perfectly.
|
|
|
|
|
|
|
|
(#27)
|
|
RC-Monster Carbon Fiber
Offline
Posts: 209
Join Date: Sep 2008
|
07.05.2011, 09:08 AM
It was sloooooooow weekend in the RC shop. Way too much to do around the house and for the holiday. I got nothing done. Almost!
I did get one of the spacers done for the 24mm hexes. I'm hoping these will help beef up the axle flex. XL stub with stock purple spacer and new larger spacer 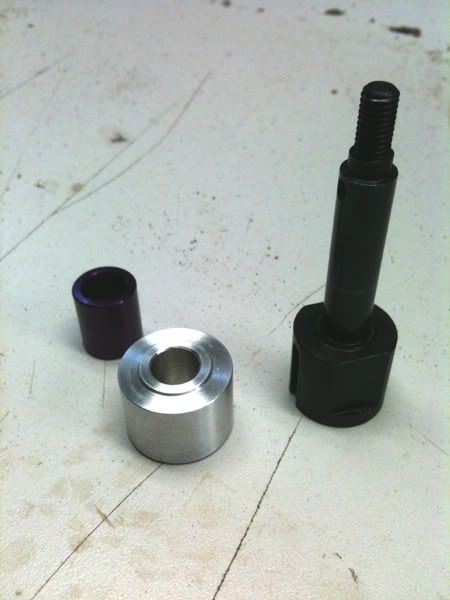 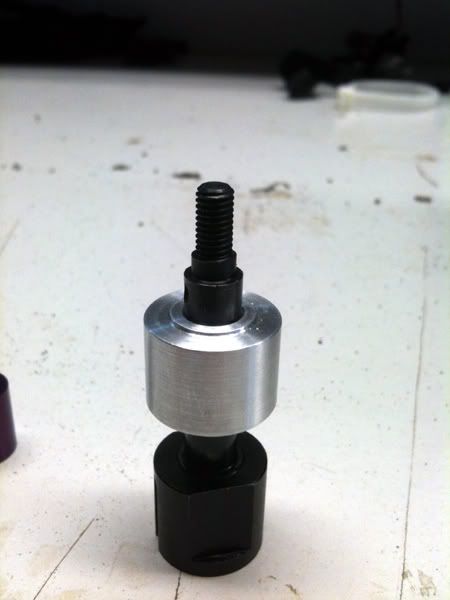 Here it is in place. My thought is that since it's sandwiched in between the hex hub and the steering knuckle this will help cut down on the amount the axle can flex on hard landings, hopefully keeping the threads from snapping off like they're known for? 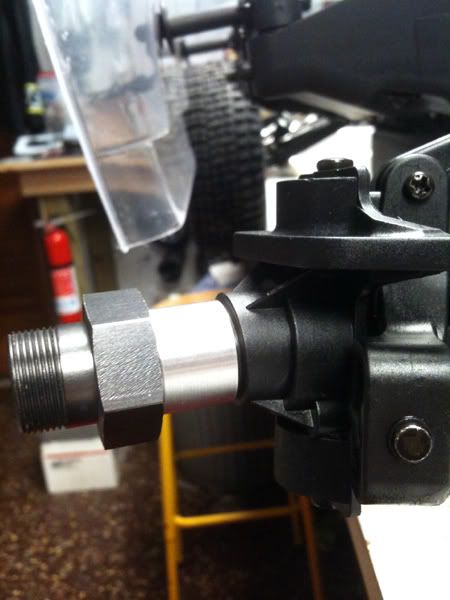
|
|
|
|
|
|
|
|
(#28)
|
|
Destroyer of Tires
Offline
Posts: 626
Join Date: Feb 2009
|
07.07.2011, 07:58 PM
What you've created looks alot like an extended hex, except that it is in 2 pieces. What about taking an extended hex with an 8mm bore, and drill a hole for the drive pin in the correct location. It'll be all one piece, and might support the axle better. Only issue then is you might want to use a sleeve or something on the threaded portion of the axle. Just an observation, and throwing out an idea. Cool truck man, I love those bodies.
|
|
|
|
|
|
|
|
(#29)
|
|
|
RC-Monster Carbon Fiber
Offline
Posts: 209
Join Date: Sep 2008
|
07.14.2011, 01:52 PM
Quote:
Alza motor mounts came in for the 1717. 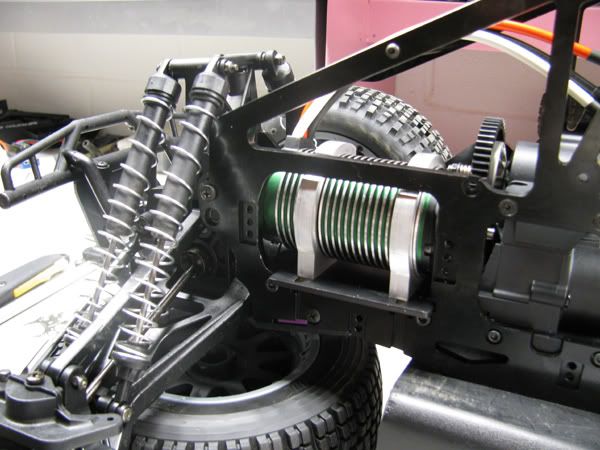 Some clearance issues 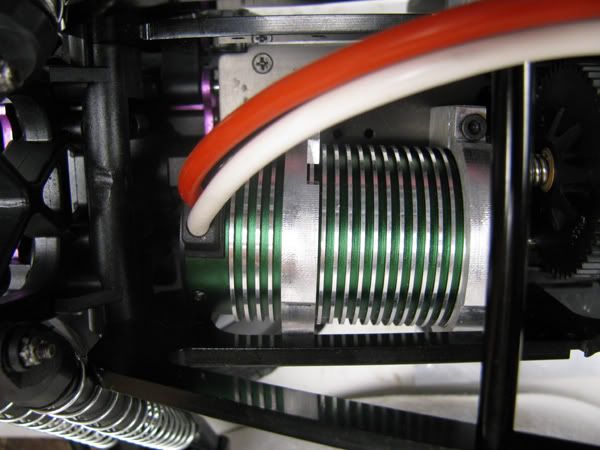 "Trimmed" the TCS plates  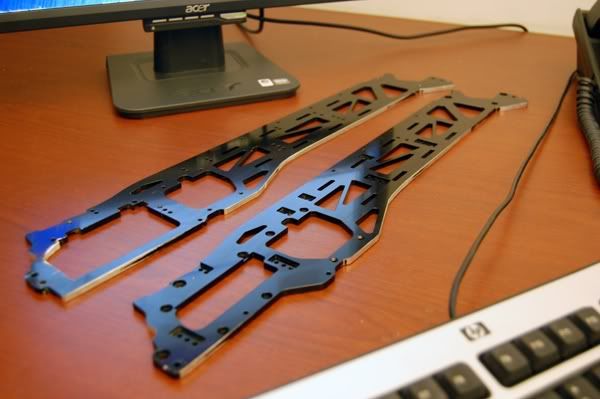
|
|
|
|
|
|
|
|
|
(#30)
|
|
Destroyer of Tires
Offline
Posts: 626
Join Date: Feb 2009
|
07.14.2011, 05:07 PM
I forgot about the 24mm hex size of the wheels and the savage 5t hexes you already bought. Yea I'd try my best to make them work instead of modifying something else and then wrapping them with aluminum tape for the wheels. Like I said, just an idea I was throwing out there. Back to the regularly scheduled build. Looking good btw!
|
|
|
|
 |
«
Previous Thread
|
Next Thread
»
| Currently Active Users Viewing This Thread: 1 (0 members and 1 guests) | |
 Linear Mode

|
|

Powered by vBulletin® Version 3.8.11
Copyright ©2000 - 2025, vBulletin Solutions Inc.
vBulletin Skin developed by: vBStyles.com
Copyright ©2000 - 2025, vBulletin Solutions Inc.
vBulletin Skin developed by: vBStyles.com