

Finished My RC8 Conversion |

|

|
(#1)
|
|
Guest
Posts: n/a
|
Finished My RC8 Conversion -
02.10.2008, 05:42 PM
I just wanted to share a few pics of the RC8. 15151y, Quark 125b, and misc parts rc-monster (servo holder & pinions) and rcproductdesigns (mount & integrated battery box/mud guard).
She seems to run great. The quark is really smooth, absolutely no cogging whatsoever. The brakes seem a little harsh though. I did a few runs up and down the street on 3s while I wait on my new 4s flightpower & new energy packs to get here. I bought two TrueRC packs but sent them back as they are too wide for the battery box by 2mm. The 3s 8000 probably had her doing about 30 mph. I can't wait to try her out on the track next week which is what I built it for. 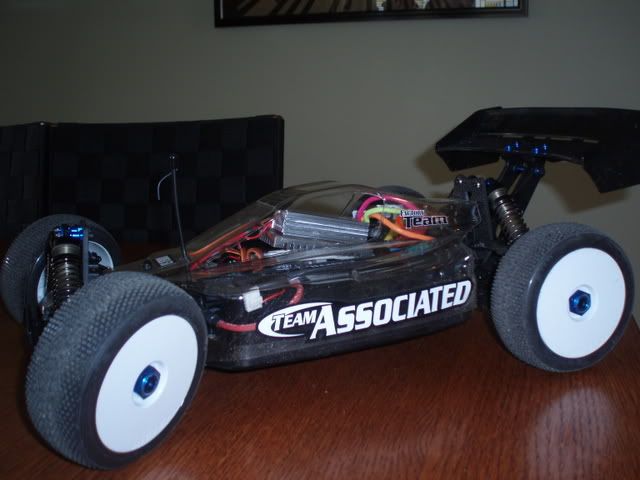 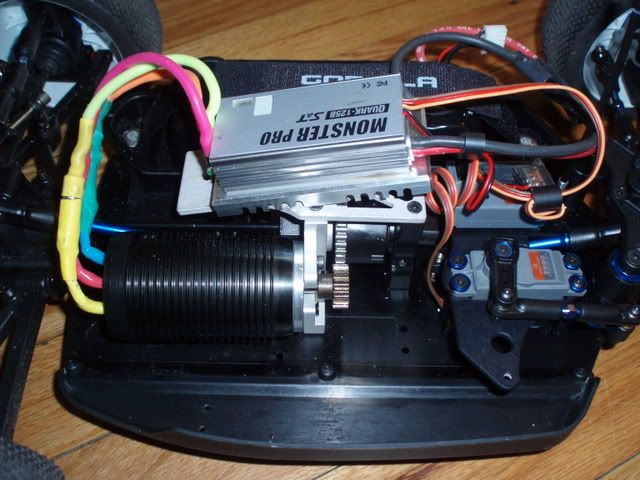 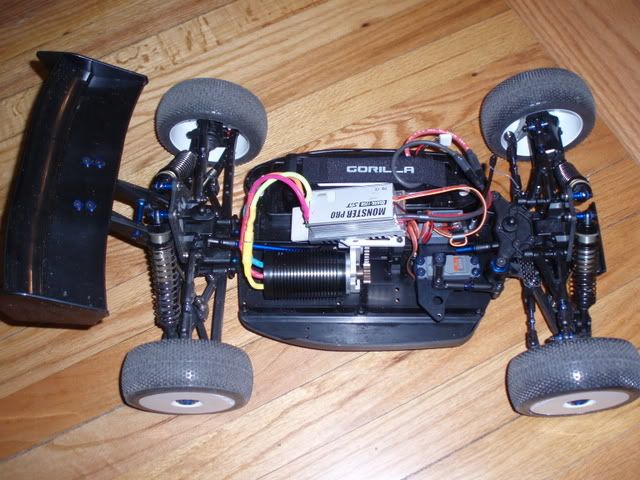
|
|
|

|
|
|
|
|
(#2)
|
|
RC-Monster Brushless
Offline
Posts: 2,864
Join Date: Jan 2007
Location: SoCal
|
02.10.2008, 09:20 PM
Great conversion!! That motor must be quite the challenge to control in a 1/8 buggy.
 Must have torque like nothing else... Must have torque like nothing else...

|
|
|
|
|
|
|
|
(#3)
|
|
Check out my huge box!
Offline
Posts: 11,935
Join Date: Aug 2007
Location: Slidell, LA
|
02.10.2008, 10:21 PM
Very nice, how about a pic from the battery side, so I can see the sidepod/battery box.
|
|
|
|
|
|
|
|
(#4)
|
|
Guest
Posts: n/a
|
02.10.2008, 10:40 PM
It definitely has some torque and I can't wait to see how she moves with the 4 & 5s. The 3s isnt strong enough for the motor. Hopefully, it can keep all the power to all fours and not wheelie all over the place like my Rusty. This my first buggy and 4wd drive car and I can't believe the handing difference.
|
|
|
|
|
|
|
|
(#5)
|
|
|
Guest
Posts: n/a
|
02.10.2008, 11:22 PM
Quote:

|
|
|
|
|

|
|
|
|
(#6)
|
|
RC-Monster Brushless
Offline
Posts: 2,864
Join Date: Jan 2007
Location: SoCal
|
02.11.2008, 01:35 AM
Its a shame the TrueRC pack didn't fit. If it did, it would make my future conversion of the RC8 much easier...
|
|
|
|
|
|
|
|
(#7)
|
|
|
RC-Monster Mod
Offline
Posts: 5,297
Join Date: Mar 2005
Location: SoCal
|
02.11.2008, 01:50 AM
Quote:
|
|
|
|
|
|
|
|
|
(#8)
|
|
RC-Monster Brushless
Offline
Posts: 2,184
Join Date: Nov 2006
|
02.11.2008, 01:51 AM
so why are you using 5mm plugs instead of deans?
they have the least resistence of any connector? |
|
|
|
|
|
|
|
(#9)
|
|
|
Guest
Posts: n/a
|
02.11.2008, 10:23 AM
Quote:
|
|
|
|
|
|
|
|
|
(#10)
|
|
|
Guest
Posts: n/a
|
02.11.2008, 10:25 AM
Quote:
|
|
|
|
|
|
|
|
|
(#11)
|
|
|
Guest
Posts: n/a
|
02.11.2008, 10:28 AM
Quote:
|
|
|
|
|
|
|
|
|
(#12)
|
|
RC-Monster Brushless
Offline
Posts: 2,184
Join Date: Nov 2006
|
02.11.2008, 11:48 AM
TBH i couldnt figure out how to solder the 5mm plugs.....
|
|
|
|
|
|
|
|
(#13)
|
|
|
RC-Monster Mod
Offline
Posts: 5,297
Join Date: Mar 2005
Location: SoCal
|
02.11.2008, 02:11 PM
Quote:
|
|
|
|
|
|
|
|
|
(#14)
|
|
|
Old Skool
Offline
Posts: 7,494
Join Date: Feb 2007
Location: Devon, England
|
02.11.2008, 06:05 PM
Quote:

|
|
|
|
|
|
|
|
|
(#15)
|
|
5th Scale Guy
Offline
Posts: 183
Join Date: Jan 2008
Location: Surrey, BC
|
02.11.2008, 06:55 PM
I got this from one of the guys that has been racing his converted RC8 and though I'd share.... I didn't know RCPD made a battery tray for the RC8!!
im gonna save you some hassle while its sittn there lookin preety.. go over everything.. front and rear diffs... all the nuts with a lil dab of ca glue.. mainly the ones under the wing unter the top plate.. and the ones that hold the shock tower on.. this makes changing anything a breeze and you dont have to worry about the locknuts falling out.. .. secondly go into the center diff.. put an additional shim behind the four lil gears. and if your using a kyosho spur take the two shims that suppsoed to be under there and put the spare one. (since you can only use one on that side ) under the other sun gear.. refill with 7000 weight diff fluid.. if you dont do this to the center gear your gonna eat innards like crazy.. the stock center diff setup is shimmed loosely |
 |
|
 |
«
Previous Thread
|
Next Thread
»
| Currently Active Users Viewing This Thread: 1 (0 members and 1 guests) | |
 Linear Mode

|
|

Powered by vBulletin® Version 3.8.11
Copyright ©2000 - 2026, vBulletin Solutions Inc.
vBulletin Skin developed by: vBStyles.com
Copyright ©2000 - 2026, vBulletin Solutions Inc.
vBulletin Skin developed by: vBStyles.com